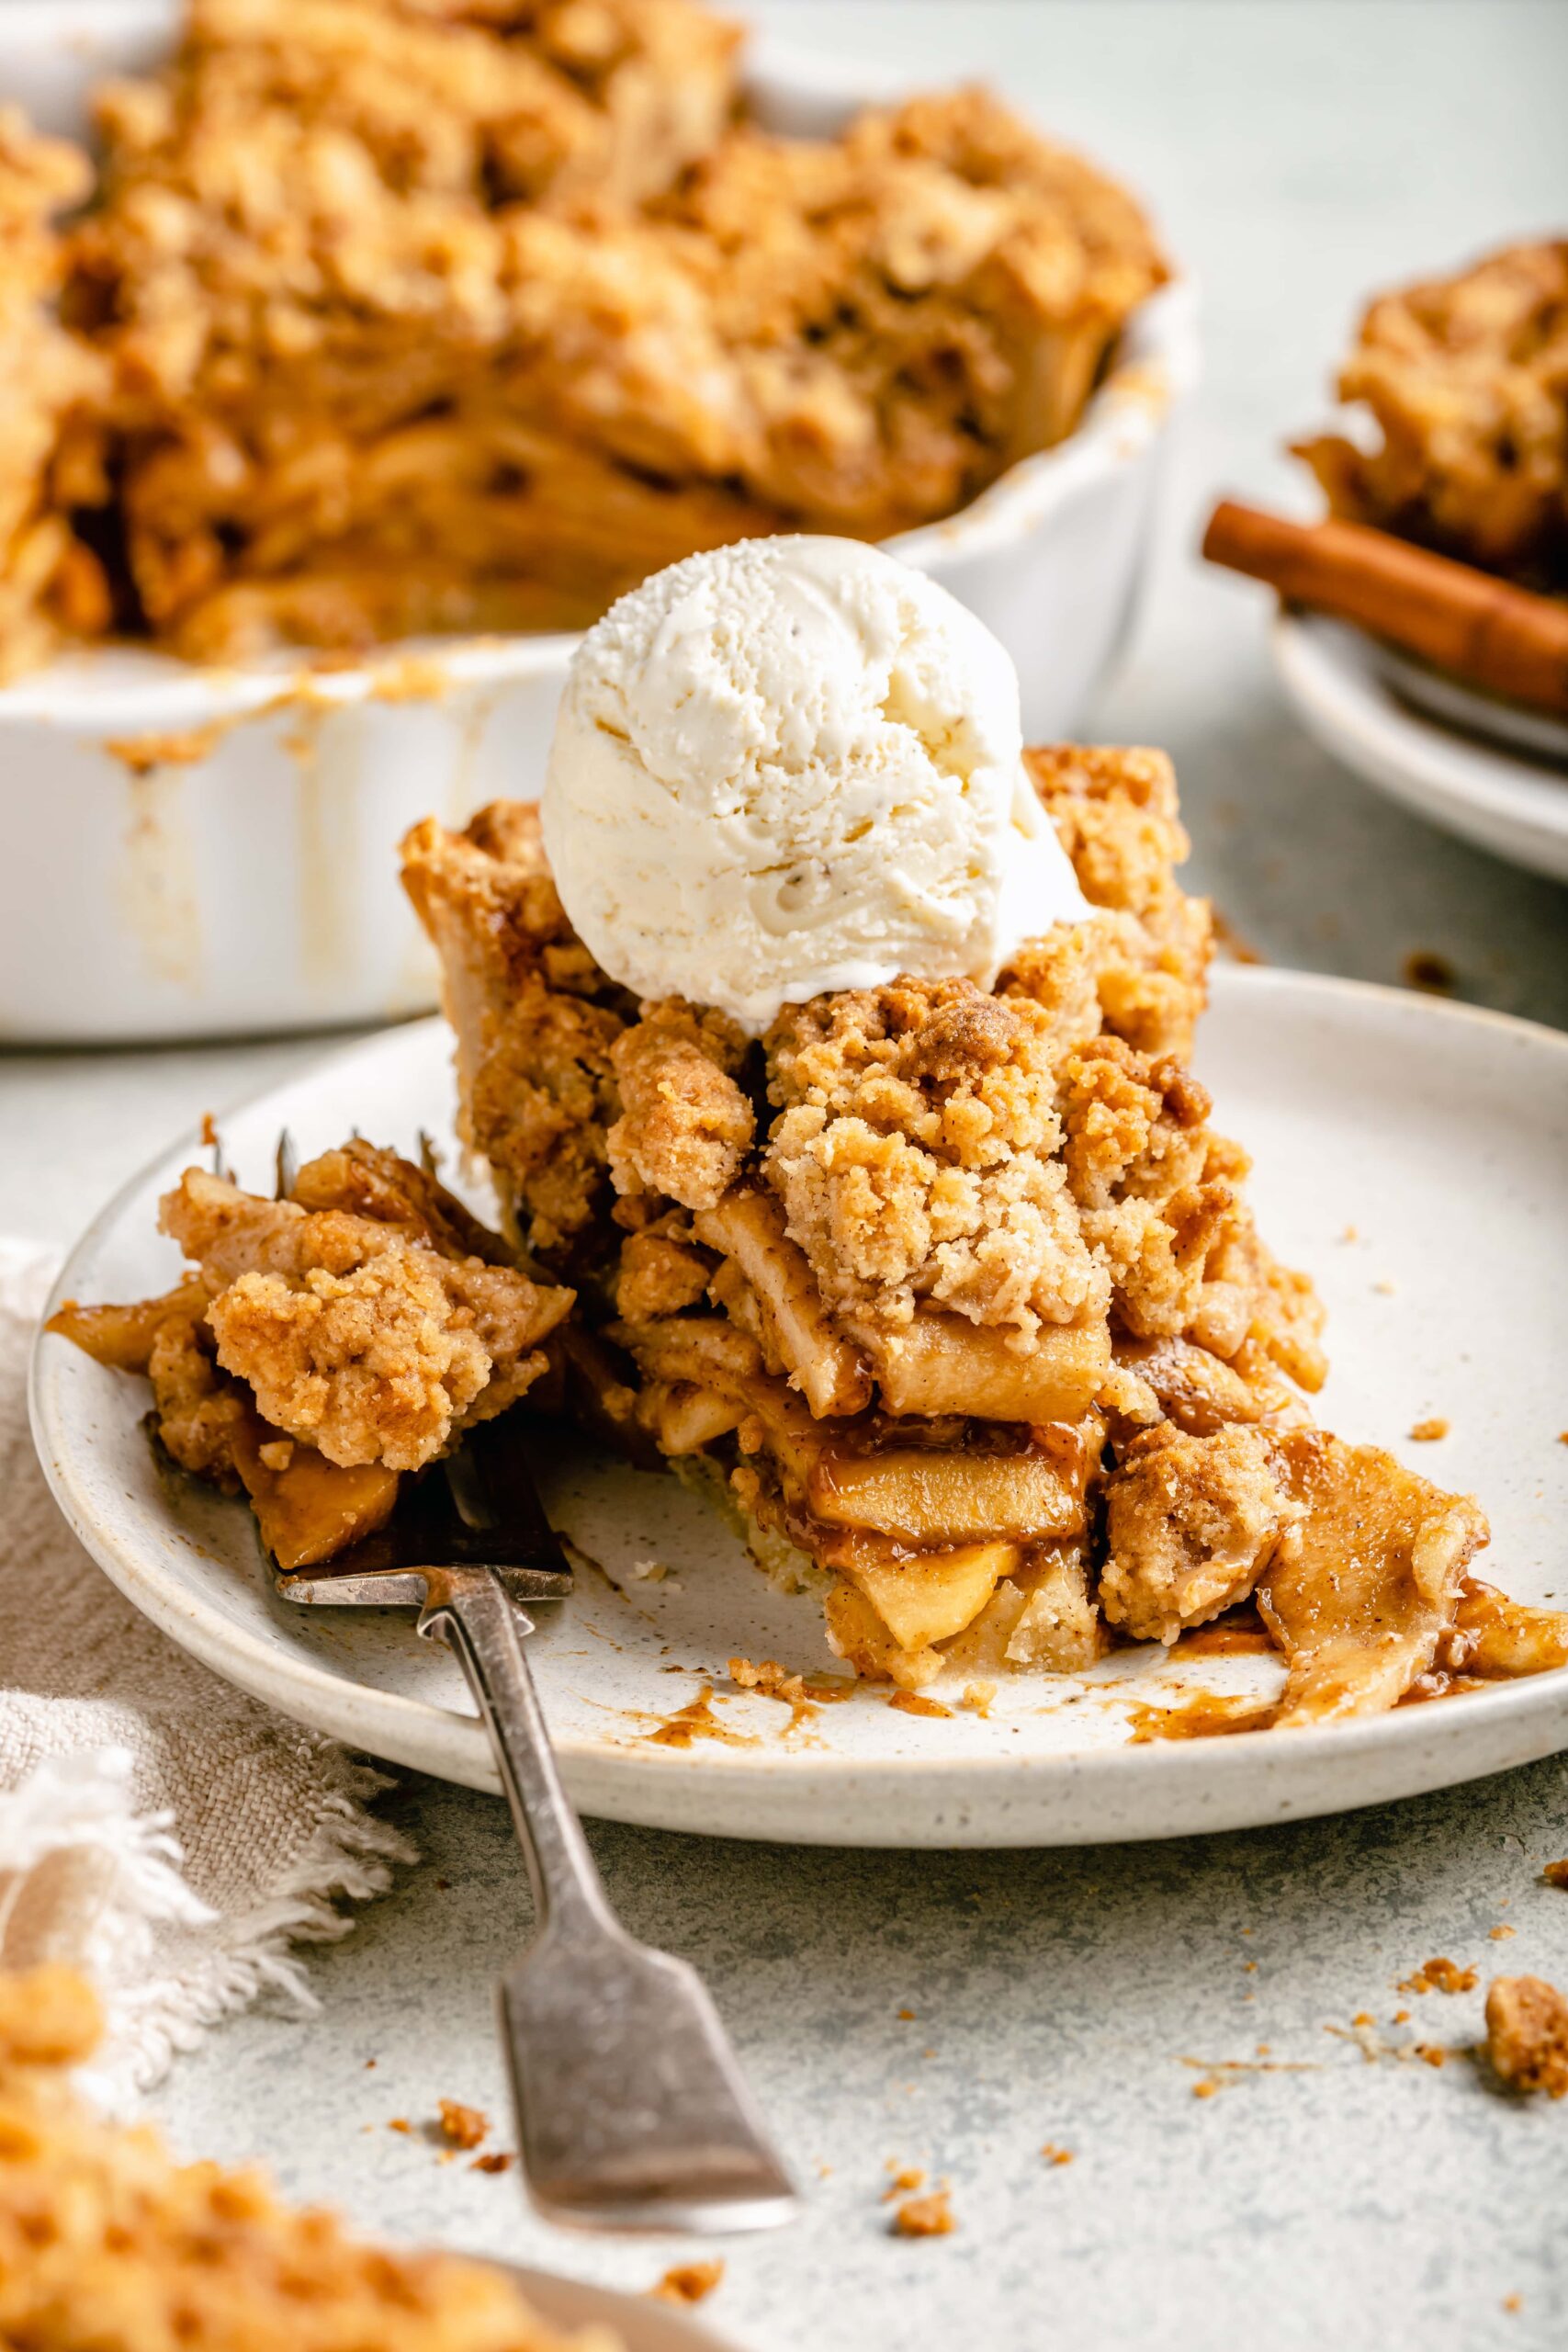
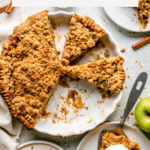
A delicious Dutch Apple Pie with a caramel apple filling, streusel topping, and flaky pie crust. The perfect pie to use seasonal apples.

Why You’ll Love This Dutch Apple Pie
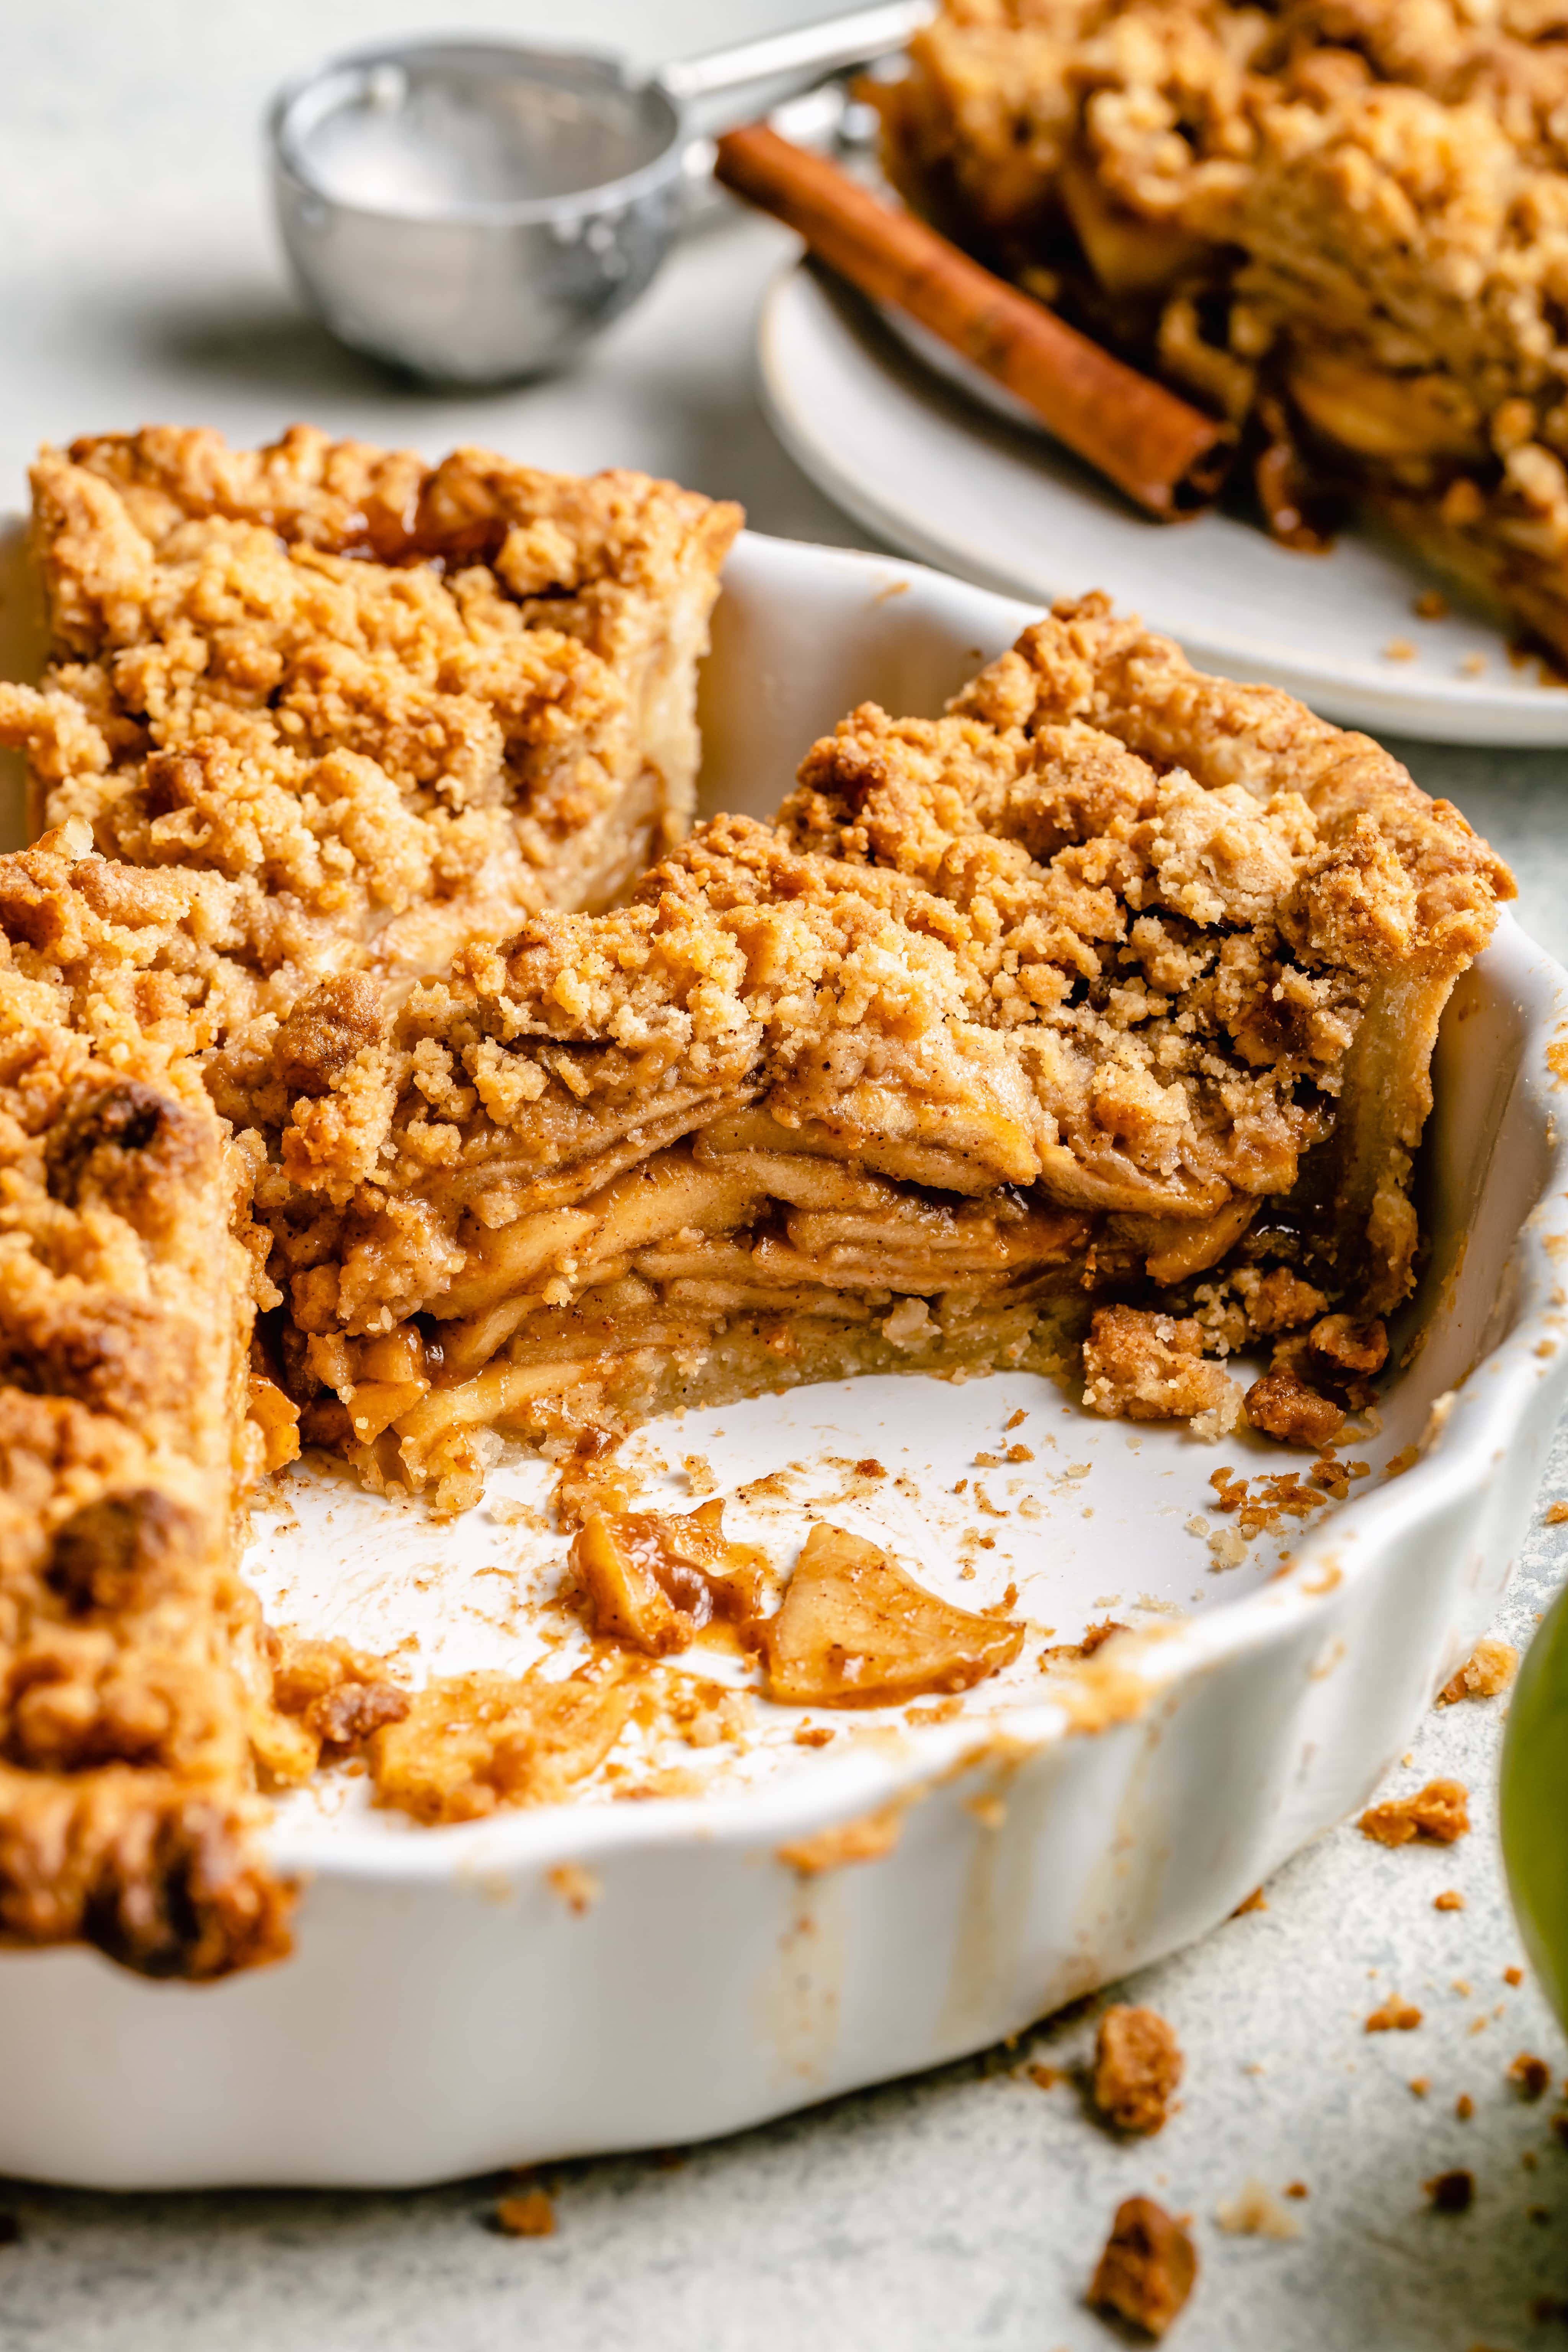
- It’s absolutely delicious! The jammy, caramel-like apple filling, the perfect flaky pie crust, and the divine streusel topping all work together to give you the most delicious apple pie.
- It’s relatively easy! I know that making pie dough and rolling out the crust can seem bit intimidating but trust me, it’s easier than you may think. What’s great about this pie is that you only have to roll out one pie crust instead of two!
- It’s a showstopper! There’s something beautiful about a delicious rustic apple pie, am I right? Trust me, this pie comes out beautifully every single time and is sure to be a hit and your next gathering!
Dutch Apple Pie Video
What’s the Difference Between Dutch Apple Pie and Apple Pie?
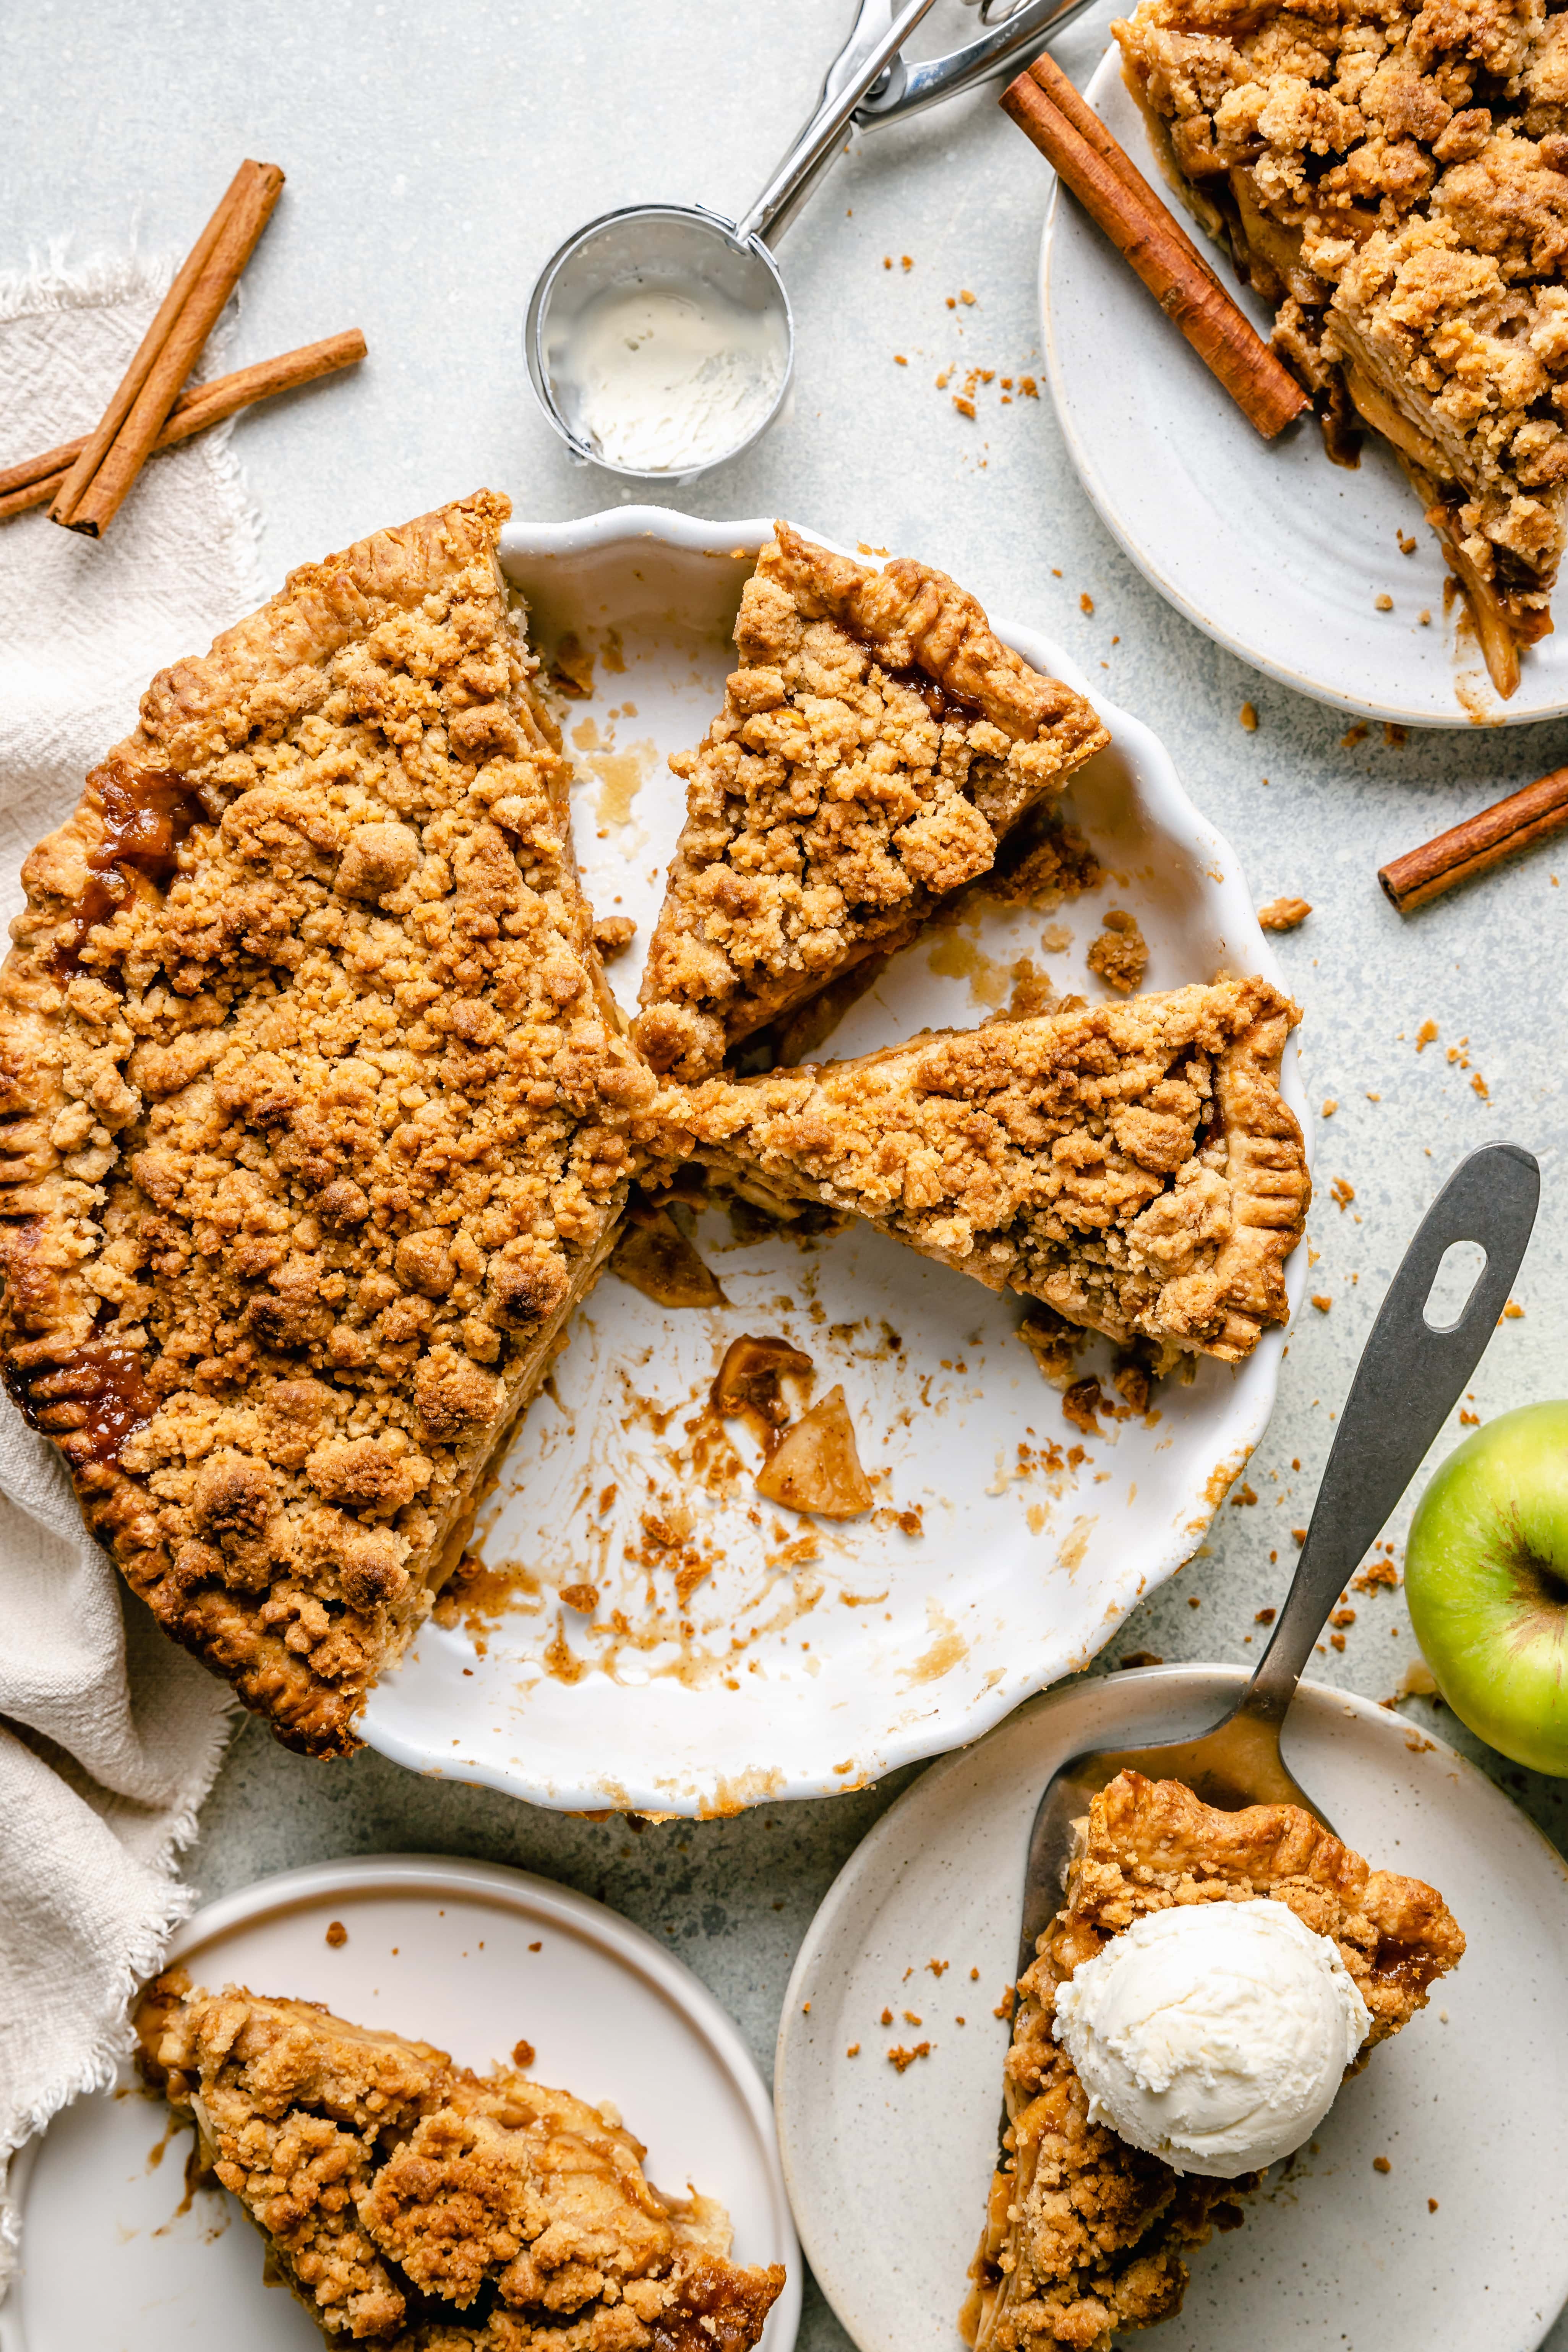
Unlike traditional apple pie with a double crust or lattice topping, Dutch apple pie has a crumbly streusel topping, made from sugar, flour, and butter, that covers the delicious apple pie filling.
What are the Best Apples to Use?
My personal apple preference for any baked apple dessert is always a combination of a tart apple, like Granny Smith, and a slightly sweeter apple like Honey Crisp or Pink Lady. For this pie, we’re using both Granny Smith apples and Honey Crisp for the perfect balance of sweet and tart.
More Reader Favorite Apple Recipes
- Spiced Apple Cake with Cream Cheese Frosting
- Apple Cinnamon Rolls with Brown Butter Cream Cheese Icing
- Gluten Free Apple Crisp
- Apple Cinnamon Waffles
- Apple Pie Crumble Bars
- Healthy Apple Pie Smoothie
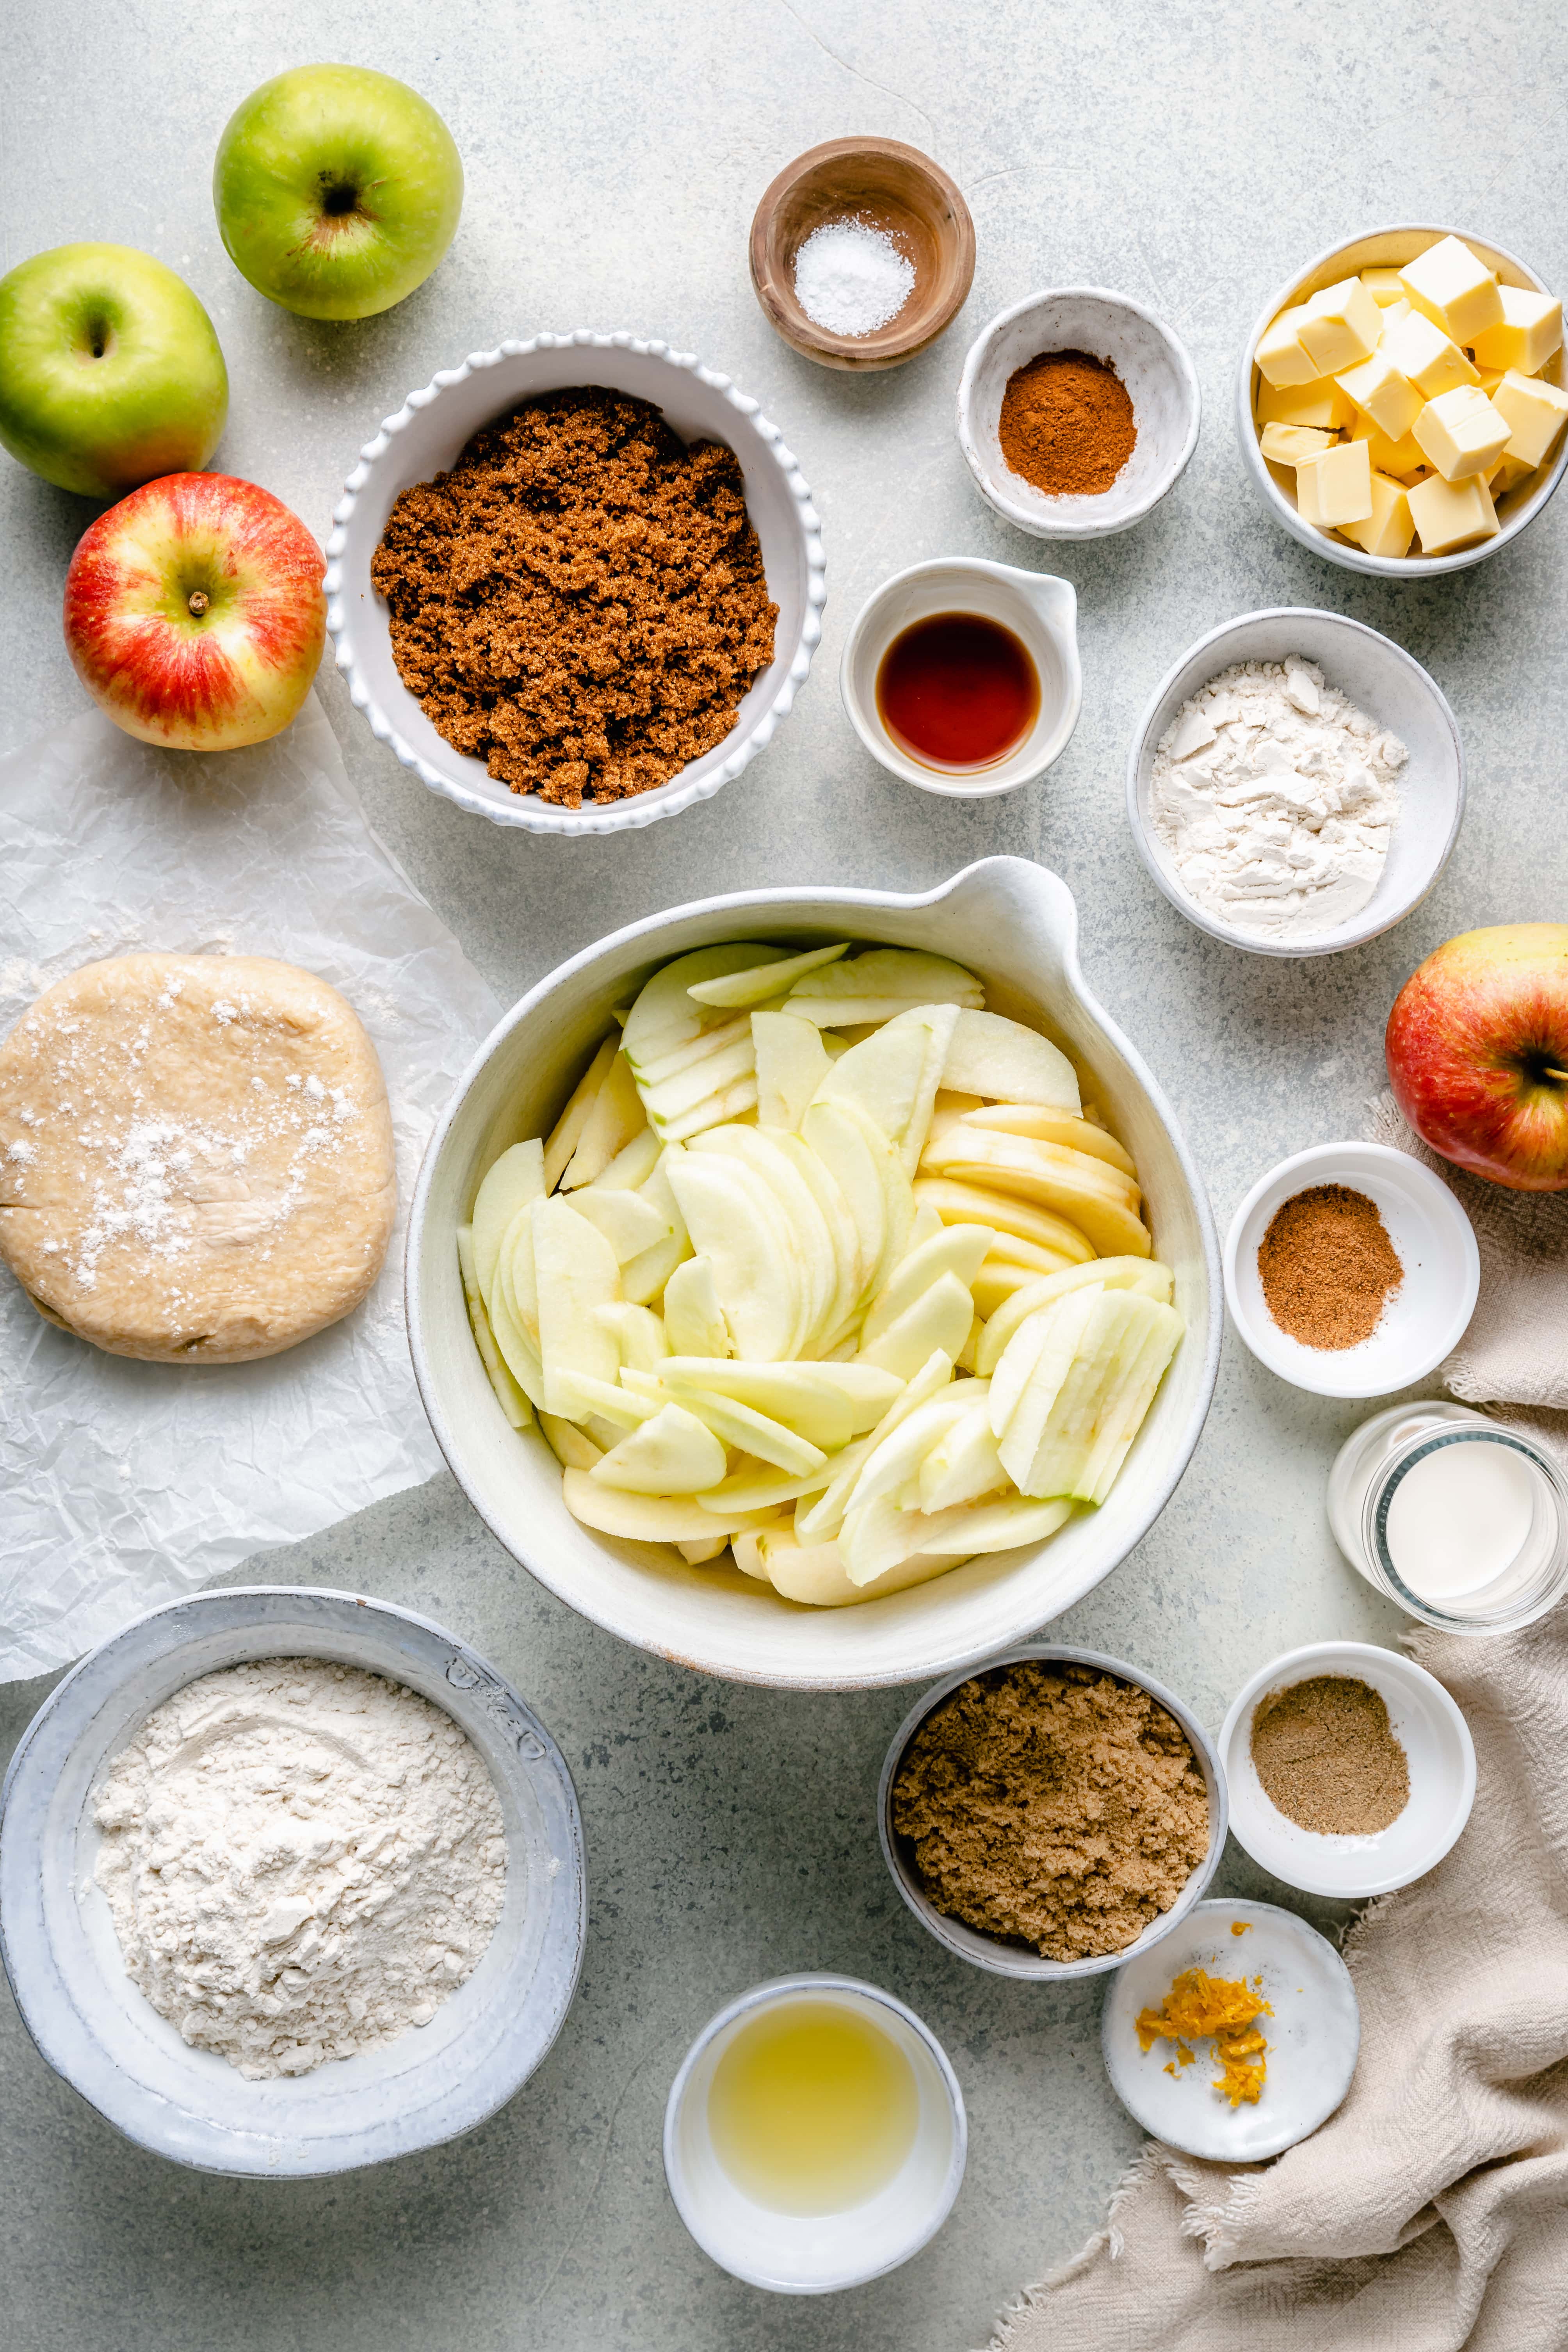
Ingredients
Apples: you’ll need 8 cups of apples that have been cut 1/8 inch thick.
All Purpose Flour: a bit of flour in the filling helps to keep everything together and you’ll also need some for the crumb topping.
Brown Sugar: we’re using delicious brown sugar for both the filling and the topping.
Lemon Juice and Zest: a bit of fresh lemon juice and zest helps to balance out the sweetness in the pie.
Half and Half: to give the apple pie filling a delicious caramel like flavor and texture, we’re using a bit of half and half.
Vanilla Extract: can you even make an apple pie without vanilla extract?
Spices: we’re using a combination of both traditional ground cinnamon as well as ground cardamom for the most delicious warm flavor.
Butter: I prefer to use unsalted butter when baking but feel free to use what you have. If you do use salted butter, then omit the salt from the crumb topping.
Pie Crust: I use my homemade all butter pie crust recipe for this pie and it comes out wonderfully every single time.
Ingredient Substitutions
- All Purpose Flour – if you would like to make a gluten free version of this pie then you can use gluten free flour instead of all purpose. My favorite gluten free flour is Cup4Cup Gluten Free Multi-Purpose Flour.
- Butter – feel free to use a vegan butter if you need to keep this pie dairy free.
- Brown Sugar – I love the flavor of dark brown sugar in this pie, but you are welcome to swap it for coconut sugar if you like.
- Half and Half – swap the half and half for heavy cream if that’s all you have. If you need to keep things dairy free, you can use full fat coconut milk instead.
- Pie Crust – you can make a gluten free version of my all butter pie crust recipe or use your favorite pre-made gluten free crust.
Helpful Kitchen Tools
Pie Dish: for this pie you’ll need a nine inch pie plate – preferably one on the deeper side to accommodate for all of those spiced apples.
Mixing Bowl: you’ll need one large mixing bowl to make the apple filling and the crumb topping.
Mandolin: trust me, using a mandolin to slice your apples is the way to go when making this apple pie. It ensures that each slice is the exact same size which means that all of the apples cook evenly in your pie.
Measuring Cups and Spoons: a must have when baking.
Pastry Cutter: this is such a helpful tool to have on hand for making both the pie crust and streusel topping.
Pie Shield: I don’t always find this to be necessary but if the edges of your pie start to become too brown during baking then you can pop this on to prevent them from burning. You can also use strips of aluminum foil if you don’t have a shield.
Sheet Pan: placing your pie on a parchment lined sheet pan helps to avoid any mess in your oven and makes cleaning up after your pie bakes so easy.
How to Make This Dutch Apple Pie Recipe
Step One: Preheat oven to 400 degrees Fahrenheit
Step Two: On a lightly floured surface, roll out the pie dough and gently place it a 9-inch pie dish. Lightly press the dough into the bottom and sides of the pie dish and then flute the edges. Place the pie crust in the fridge while you prepare the rest of the pie.
Step Three: Next, add the flour, brown sugar, cinnamon, salt, and diced butter to a mixing bowl (you can use the same bowl you used to make the filling). Use your hands or a pastry cutter to work the butter into the flour and sugar until a crumb forms.
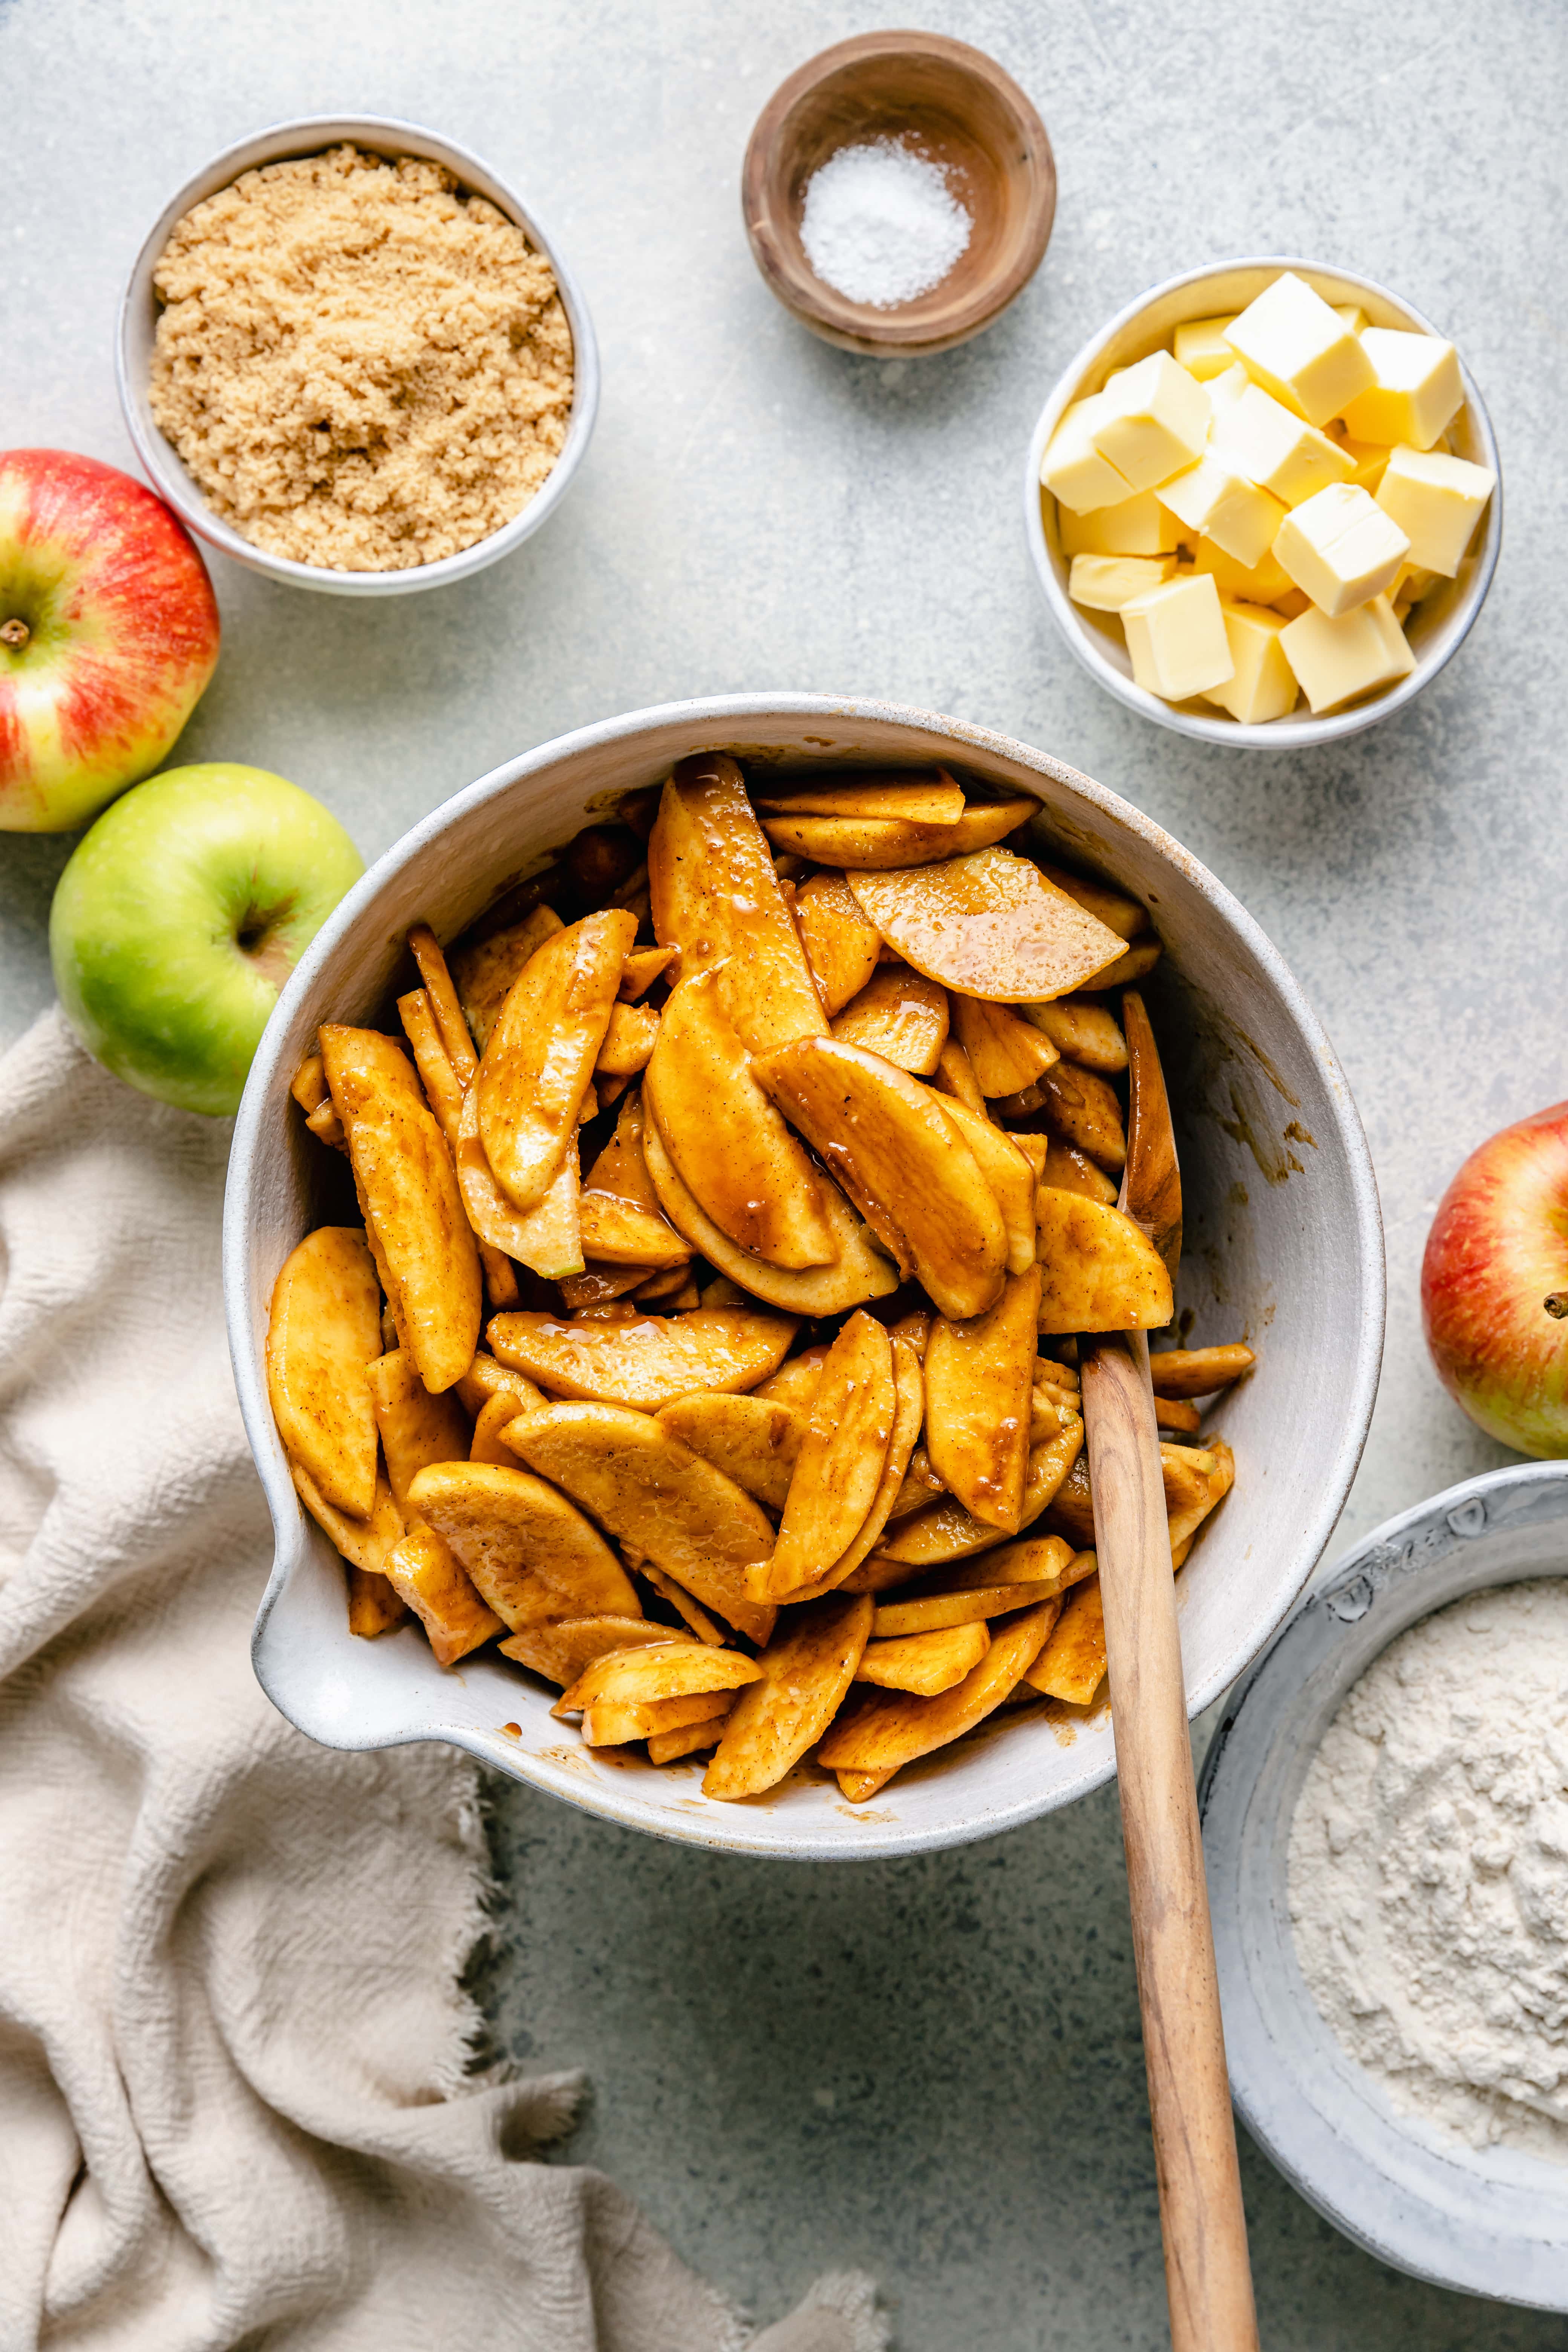
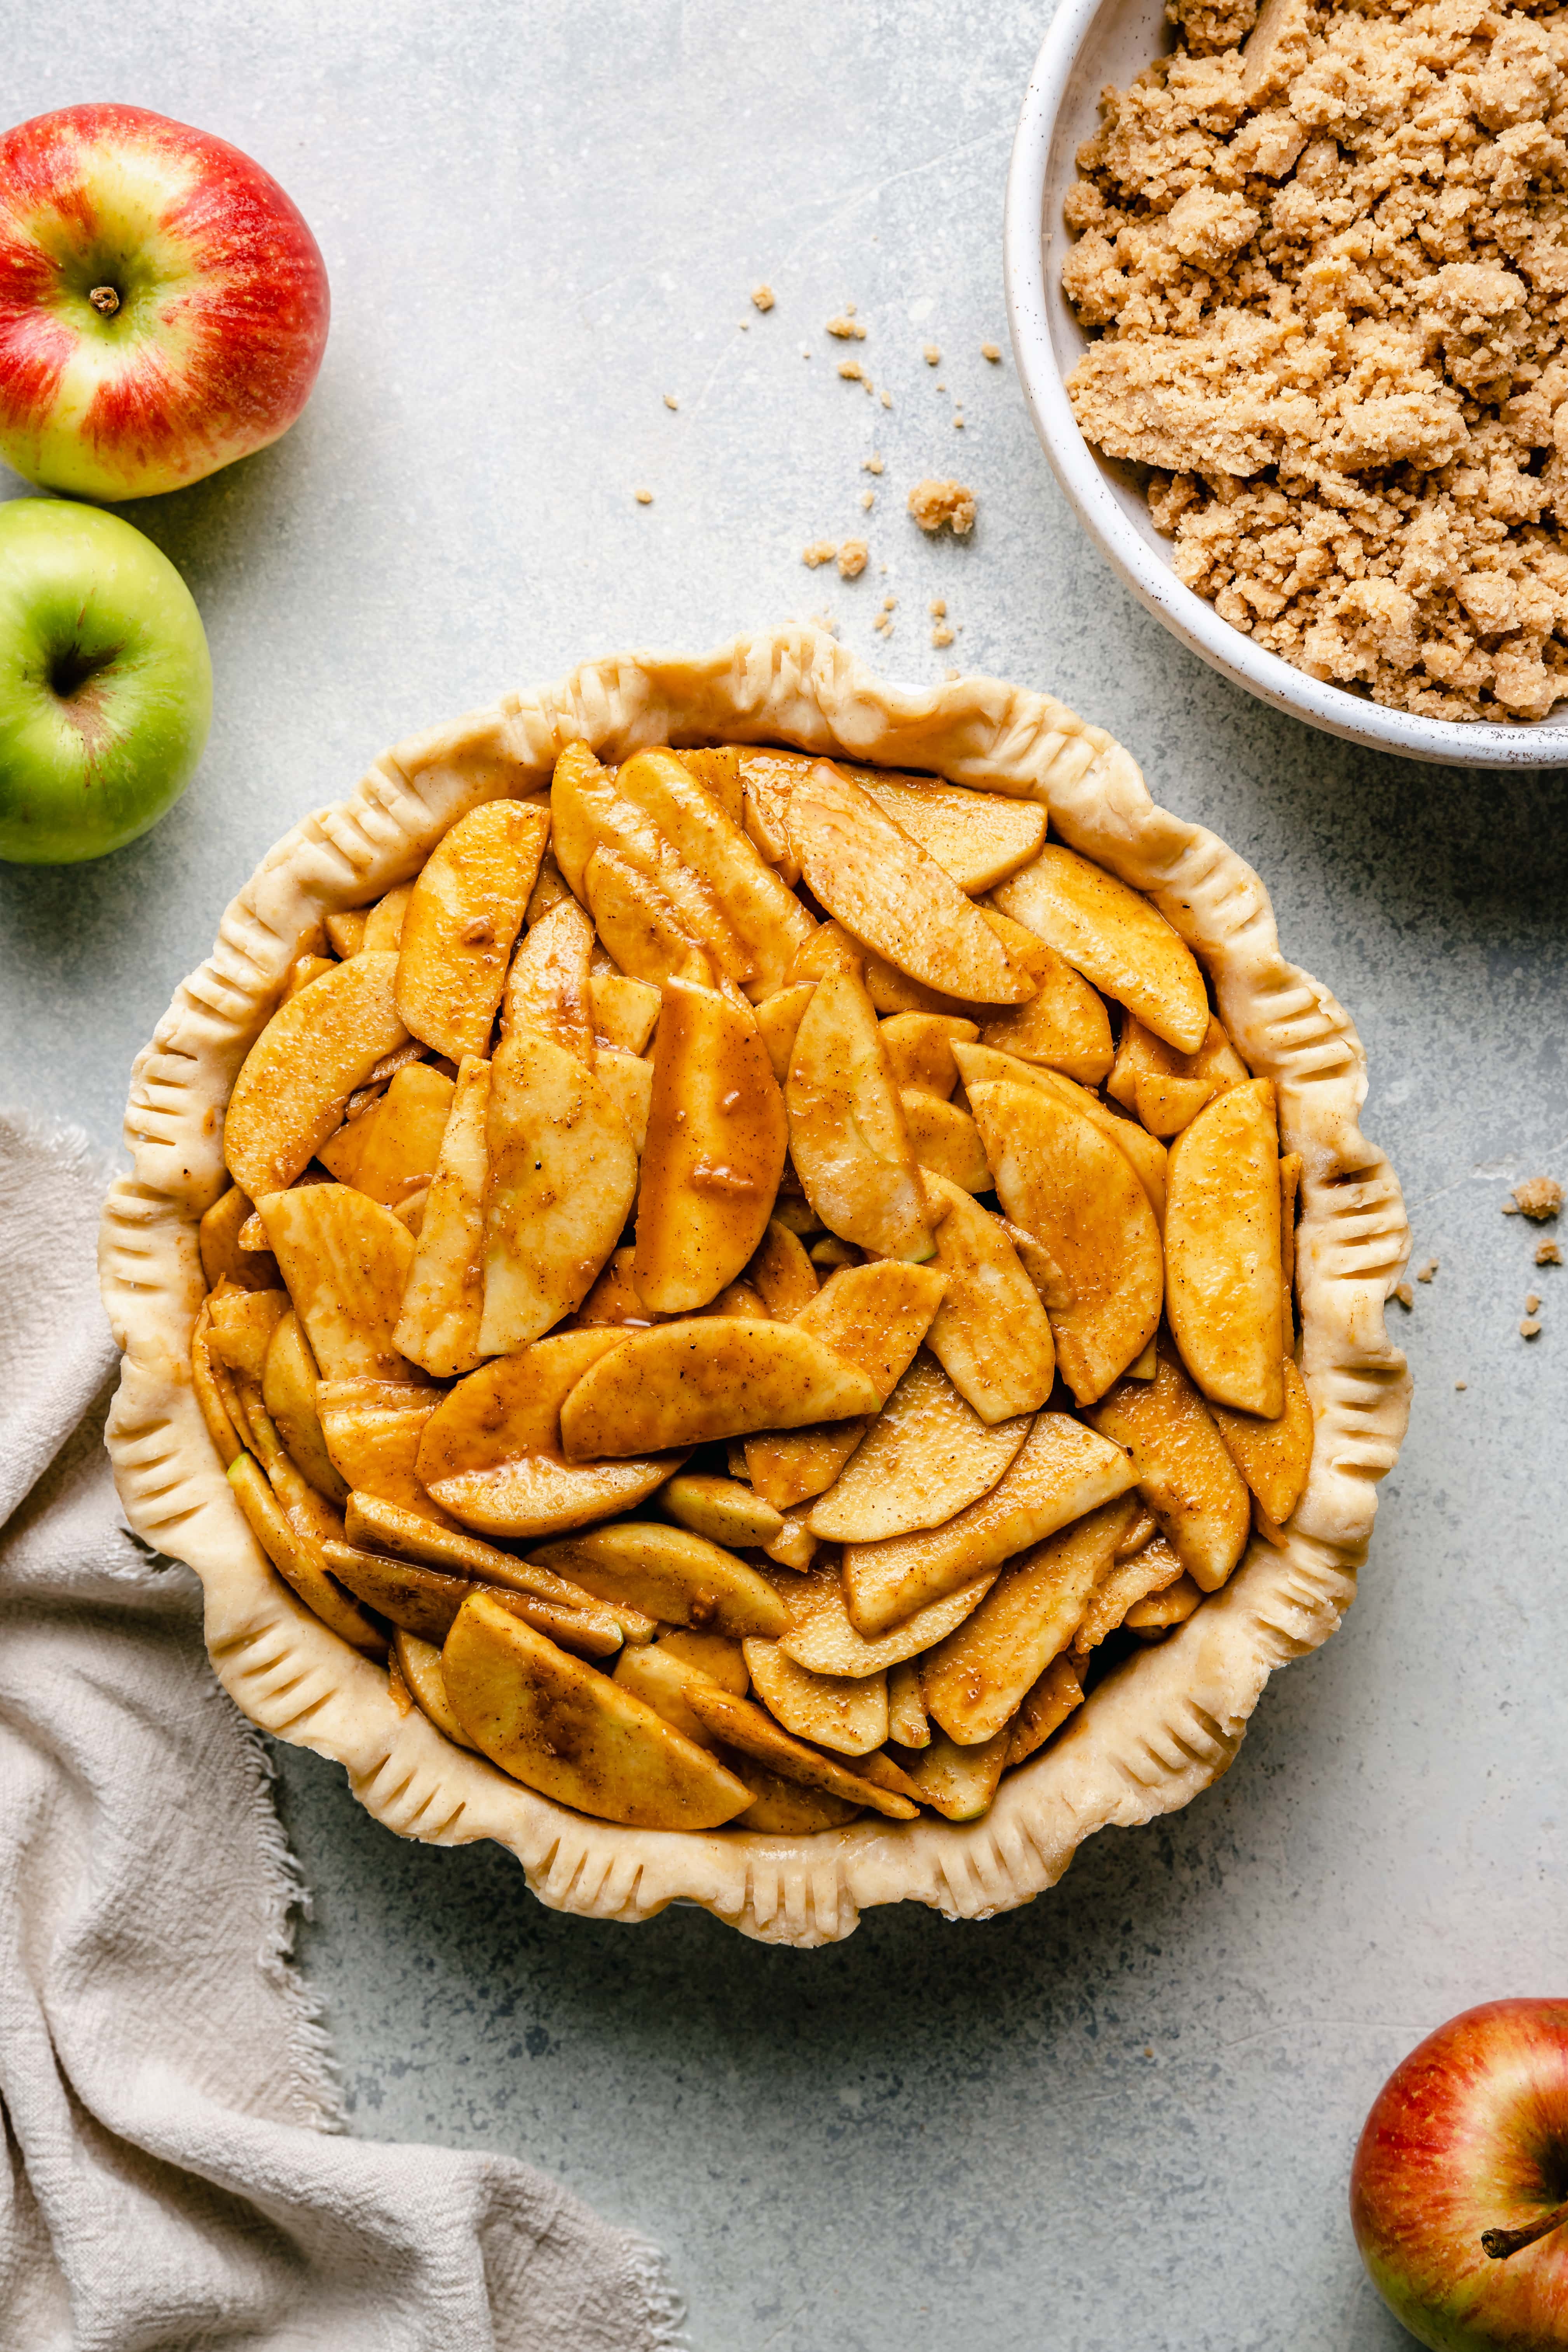
Step Four: Add the sliced apples, all purpose flour, brown sugar, lemon juice, half and half, lemon zest, vanilla extract, ground cinnamon, ground cardamom, and nutmeg to a large mixing bowl. Toss until everything is well combined and the apples are evenly coated. Remove the pie crust from the fridge and pour the apple filling into crust (be sure to scrape down the bowl), arranging them into an even layer.
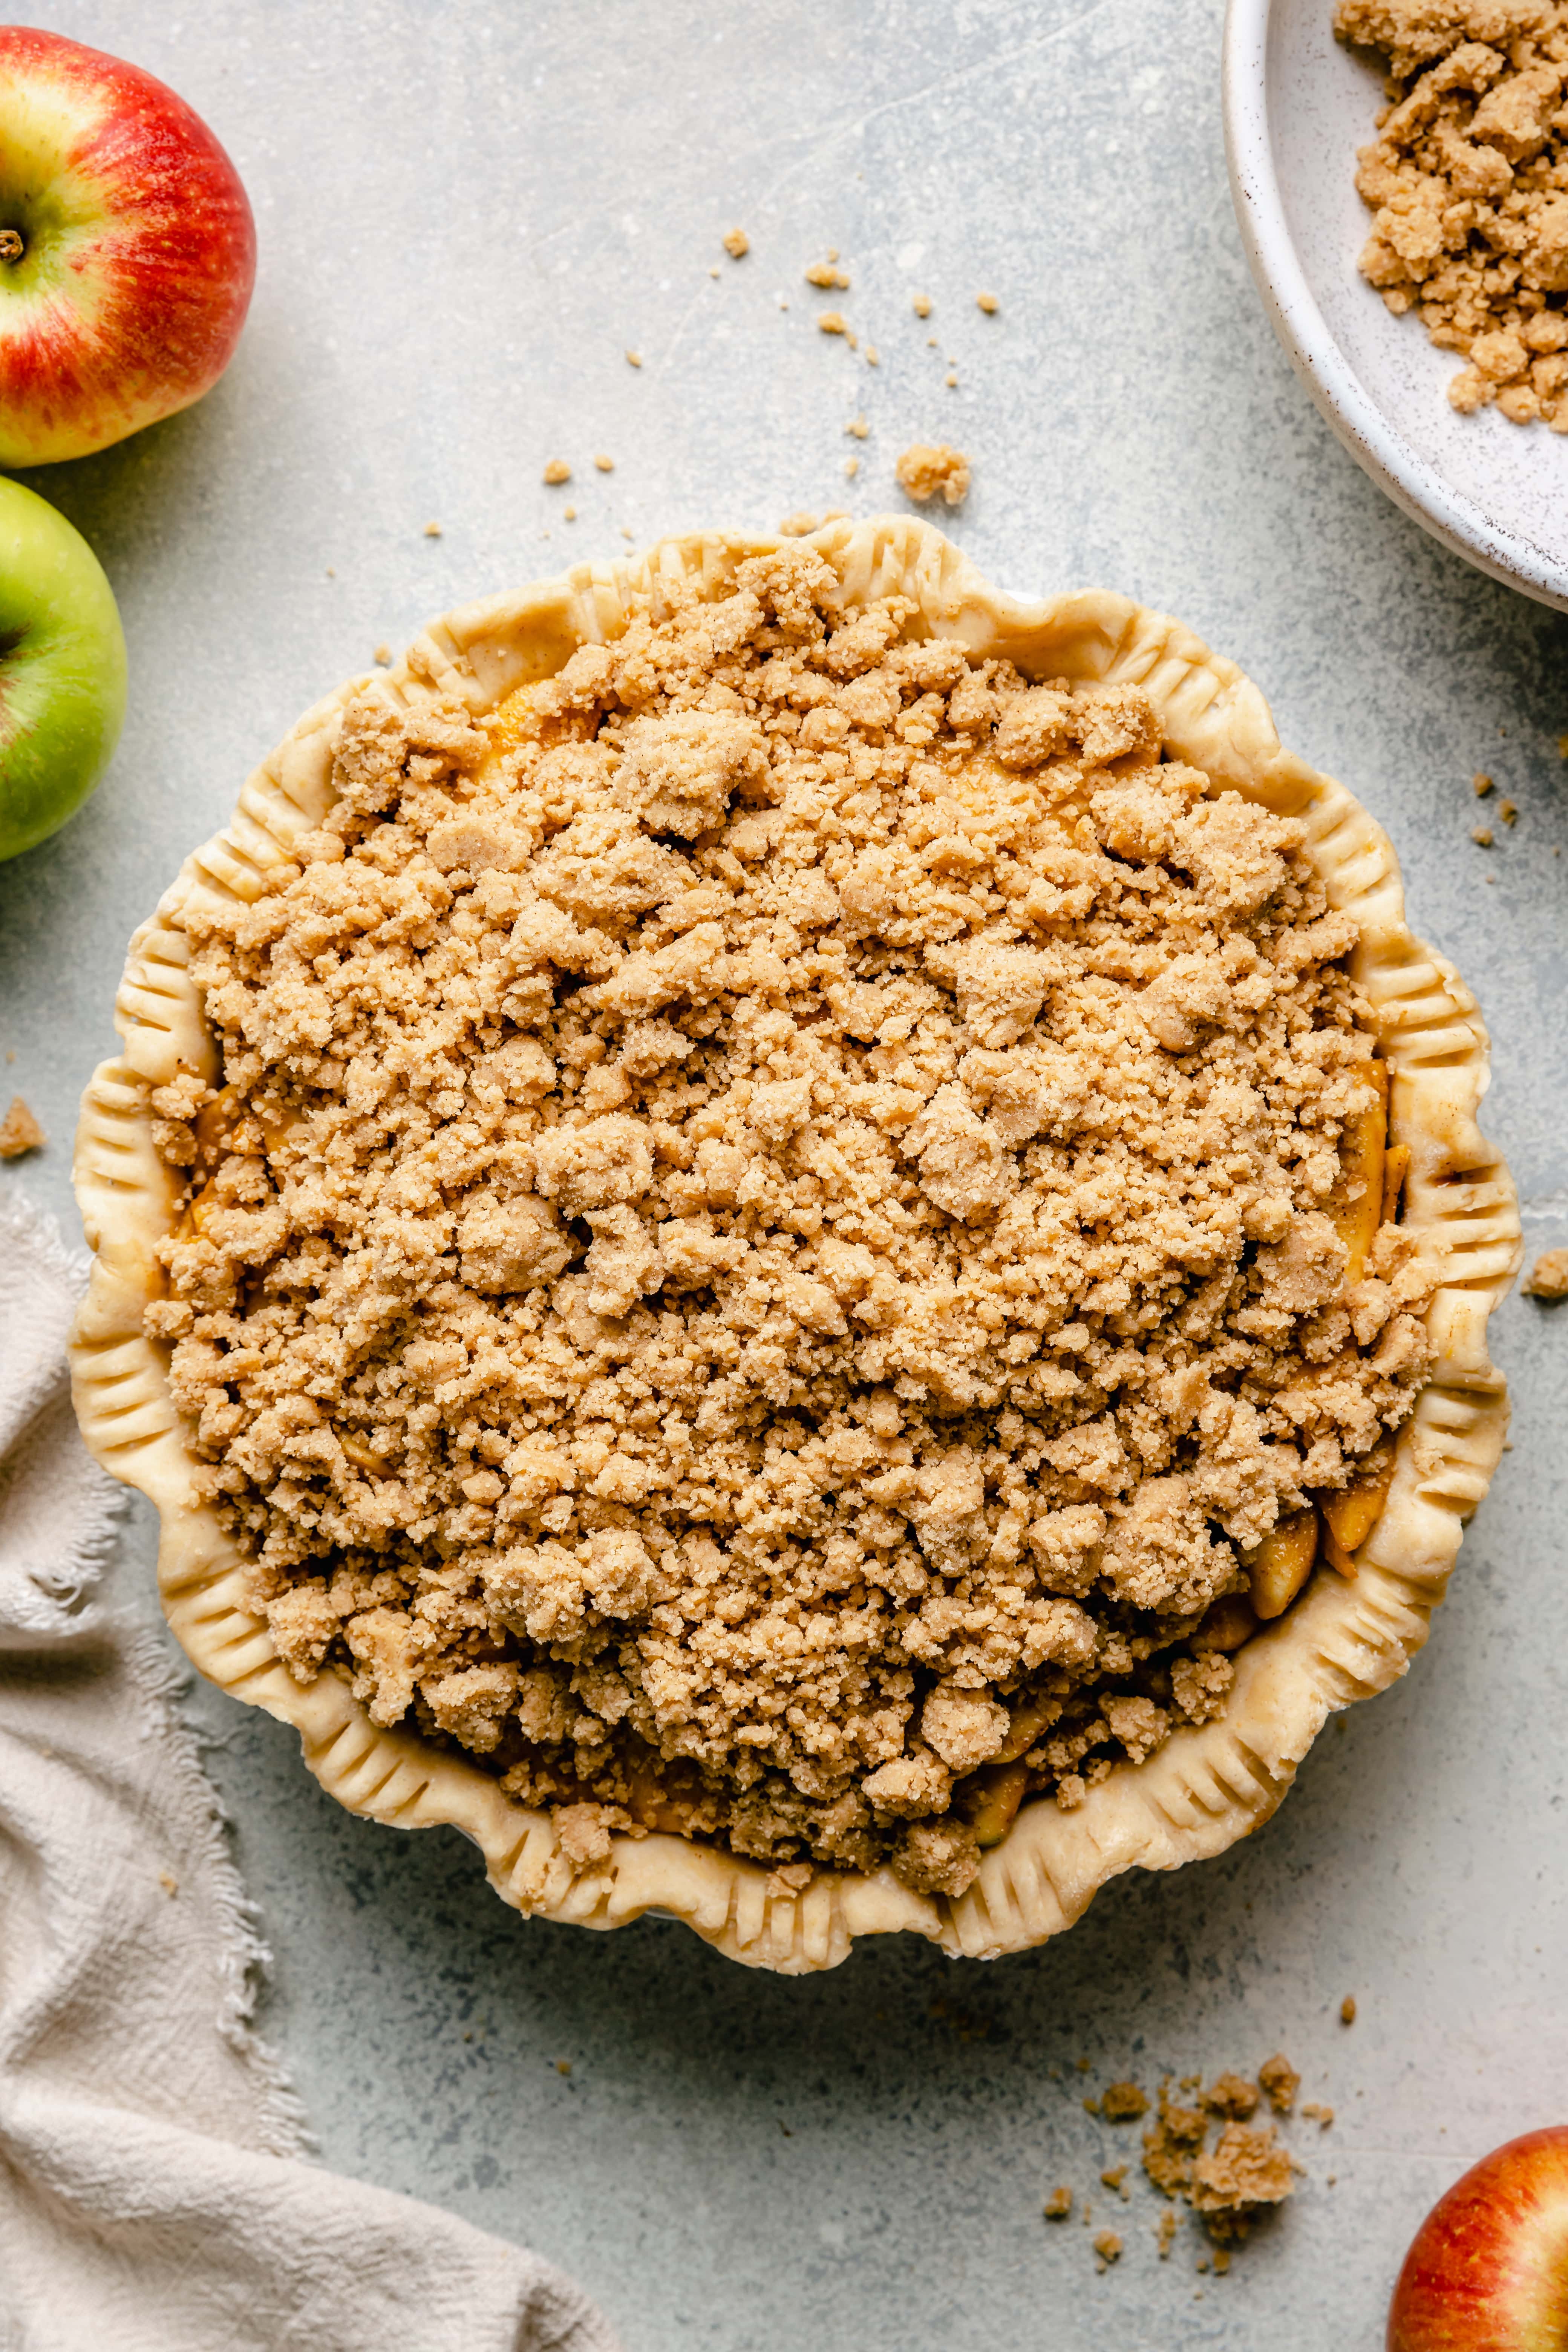
Step Five: Sprinkle the crumb topping evenly all over the apples.
Step Six: Place the pie on a parchment lined baking sheet and bake at 400 degrees for 15 minutes. After 15 minutes lower the oven temperature to 375 degrees (without removing the pie from the oven) and continue to bake for 50-55 minutes until the pie is golden brown and bubbly. If the edges of the pie crust start to become too brown you can cover them with a pie crust shield or strips of aluminum foil.
Step Seven: Remove the pie from the oven and let cool for 3 hours before slicing and serving. Enjoy!
Tips and Tricks for the Best Pie
- Use a mandolin for even apple slices – you’ll get perfectly even slices that cook at the same time which means you won’t have huge uncooked apple chunks in any bites of your pie.
- Place the pie on a sheet pan before baking – as the pie cooks the filling will bubble and may drip over the side of the pie dish. Use a sheet pan to catch any drips and avoid a mess.
- Keep your pie dough cold – for a perfectly flaky pie crust be sure to keep your pie dough cold. Once you place the pie dough into the dish, pop it into the fridge while you prep the rest of the pie.
- Let the apple pie cool – it’s going to be so tempting to eat a slice of pie right out of the oven but trust me on this – let the pie cool! It will help the filling to “set up” so that you actually slice the pie without it running all over the place. I recommend letting the pie rest for a minimum of one hour before slicing.
- Top with ice cream while warm – even after resting the pie should still be warm so serve it with a generous scoop of ice cream and enjoy!
How to Store Your Pie
I recommend storing this dutch apple pie in the fridge, tightly covered with food wrap, or in an air-tight storage container, for 3-5 days.
Ways to Prep in Advance
- Make the pie crust in advance – I like to make my homemade pie crust weeks in advance and freeze or up to three days in advance and place it in the fridge. Be sure to thaw the pie dough in the fridge overnight if using from frozen.
- Make the crumb topping in advance – you can make the crumble topping up to a day in advance and store in the fridge until you are ready to use.
More Delicious Fall Deserts
- The Best Healthy Pumpkin Pie
- Brown Butter Sweet Potato Pie
- Pumpkin Coffee Cake
- Gooey Chocolate Pecan Pie
- Easy Pumpkin Pecan Pie
- Brown Butter Pumpkin Bars with Cream Cheese Icing
- Healthy Oatmeal Crisp
I hope you give this Dutch Apple Pie a try! They are so easy to make and delicious! If you do give this recipe a try, let me know!
Leave a comment with a star rating below. You can also snap a photo & tag @allthehealthythings on INSTAGRAM. Your reviews and ratings help support All the Healthy Things and make it possible for me to continue to create the recipes you trust and love.
Print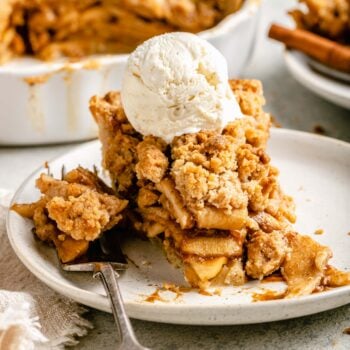
Dutch Apple Pie
- Prep Time: 30 minutes
- Cook Time: 75 minutes
- Total Time: 1 hour 45 minutes
- Yield: 8 1x
- Category: Dessert
- Method: Baking
- Cuisine: Dutch Inspired
Description
A delicious Dutch Apple Pie with a caramel apple filling, streusel topping, and flaky pie crust. The perfect pie to use seasonal apples.
Ingredients
- 1 disk pie crust from my homemade all-butter pie crust recipe
For the filling
- 8 cups sliced apples, sliced 1/8 inch thick (Granny Smith and Honey Crisp)
- 1/4 cup all purpose flour
- 2/3 cup dark brown brown sugar
- 2 tablespoons fresh lemon juice
- 2 tablespoons half and half
- 1 teaspoon lemon zest
- 1 tablespoon vanilla extract
- 1 teaspoon ground cinnamon
- 1/2 teaspoon ground cardamom
- 1/2 teaspoon nutmeg
For the Crumb Topping
- 1 cup all purpose flour
- 1/2 cup brown sugar
- 1/2 teaspoon cinnamon
- 1/4 teaspoon salt
- 6 tablespoons butter, diced and softened
Instructions
- Preheat oven to 400 degrees Fahrenheit
- Prep the pie crust: On a lightly floured surface, roll out the pie dough and gently place it a 9-inch pie dish. Lightly press the dough into the bottom and sides of the pie dish and then flute the edges. Place the pie crust in the fridge while you prepare the rest of the pie.
- Make crumb topping: Next, add the flour, brown sugar, cinnamon, salt, and diced butter to a mixing bowl (you can use the same bowl you used to make the filling). Use your hands or a pastry cutter to work the butter into the flour and sugar until a crumb forms.
- Make the filling: Add the sliced apples, all purpose flour, brown sugar, lemon juice, half and half, lemon zest, vanilla extract, ground cinnamon, ground cardamom, and nutmeg to a large mixing bowl. Toss until everything is well combined and the apples are evenly coated. Remove the pie crust from the fridge and pour the apple filling into crust (be sure to scrape down the bowl), arranging them into an even layer.
- Sprinkle the crumb topping evenly all over the apples.
- Bake the Pie: Place the pie on a parchment lined baking sheet and bake at 400 degrees for 15 minutes. After 15 minutes lower the oven temperature to 375 degrees (without removing the pie from the oven) and continue to bake for 50-55 minutes until the pie is golden brown and bubbly. If the edges of the pie crust start to become too brown you can cover them with a pie crust shield or strips of aluminum foil.
- Remove the pie from the oven and let cool for 3 hours before slicing and serving. Enjoy!
Recipe by: Ashlea Carver / All the Healthy Things | Photography by: Eat Love Eat


Loved this recipe. Very easy to follow and the pie turned out great. Received many compliments for Thanksgiving!
This came out so tasty. I wasn’t able to find cardamom anywhere for some reason, so I had to substitute ground cloves. And had a small maker error and didn’t leave big enough chunks in the crumble to make the nice big golden pieces, BUT it still tasted delicious and was a hit apple pie at our dinner. Thanks so much for all your amazing recipes!
Look no further, this is the only apple pie recipe you will ever need!
This pie was a second favorite after the Gooey Chocolate Pecan Pie! We loved the combination of serving it with Tillamook Vanilla Ice Cream and it just paired perfectly! Loved that it was not overly sweet–the only thing I changed was I did not slice thin the apple slices to save time, and left them as small cubes, taste was on point!
Absolutely delicious. Made it for Thanksgiving dessert, and my family loved it!
made the Dutch apple pie and I was delicious
OmG your food is so GOOD I LOVE your recipes that you could DIE FOR. I made this recipe last night and OMG tried it out this afternoon and done went thru half pan. Oops got to make some more ASAP. Hehe
Best apple pie I’ve ever had!!! So delicious! Recipe was easy to follow and the tips included were so helpful! Can’t wait to wow my guests tomorrow! Made 2 pies so I could have one to myself it’s so good!
I’m brand new to pie making so this may be a silly question. But in the pie crust recipe pictures you poked holes in the unbaked crust – do we not have to do that here because it’s not being blind baked? Thank you!
Hi, Bobbie! Great question! There’s no need to poke holes in the pie crust before adding the apple filling. You’re correct, we’re not blind baking this pie crust, so no holes needed. Hope you enjoy the apple pie!