This flaky homemade all butter pie crust comes out perfectly every single time! With just a few simple ingredients you’ll have a delicious pie crust to use for your favorite pie and quiche recipes!

I am so excited to bring you another post in our All the Healthy Things “Just the Basics” series. These posts are focused on helping you master basics in the kitchen and, hopefully, inspiring you with a few new ideas along the way.
If you are new to cooking, or just need a refresher on the basics, these posts are designed to help you feel more confident in the kitchen. Once you have a handle on a few basic concepts and techniques, you can easily build upon them to create new and exciting recipes dishes without a second thought.
If you have ever wondered how some people just seem to know how to cook without a recipe or can quickly throw together a meal in a moment’s notice, it’s likely because they have a good grasp of the basics. I want that for you! It’s my hope that every just the basics post helps you feel more comfortable so that you can enjoy your time spent in the kitchen even more!
If you haven’t already be sure to check out the other how-to guides in the series.
Here are a few of our most popular posts:
Easy, Flaky Homemade All Butter Pie Crust
One of the best parts of a pie, to me, is always the flaky buttery pie crust. The combination of a flaky crust with a delicious pie filling…PERFECTION!
Watch How to Make This Recipe
If you have never made pie crust from scratch this tutorial is for you! With just a little know-how, you’ll get a perfectly flaky, buttery pie crust every single time. I also include a few notes on how to make a gluten-free version of this pie crust, including my favorite flour to use, in this post as well.
Ingredients You’ll Need
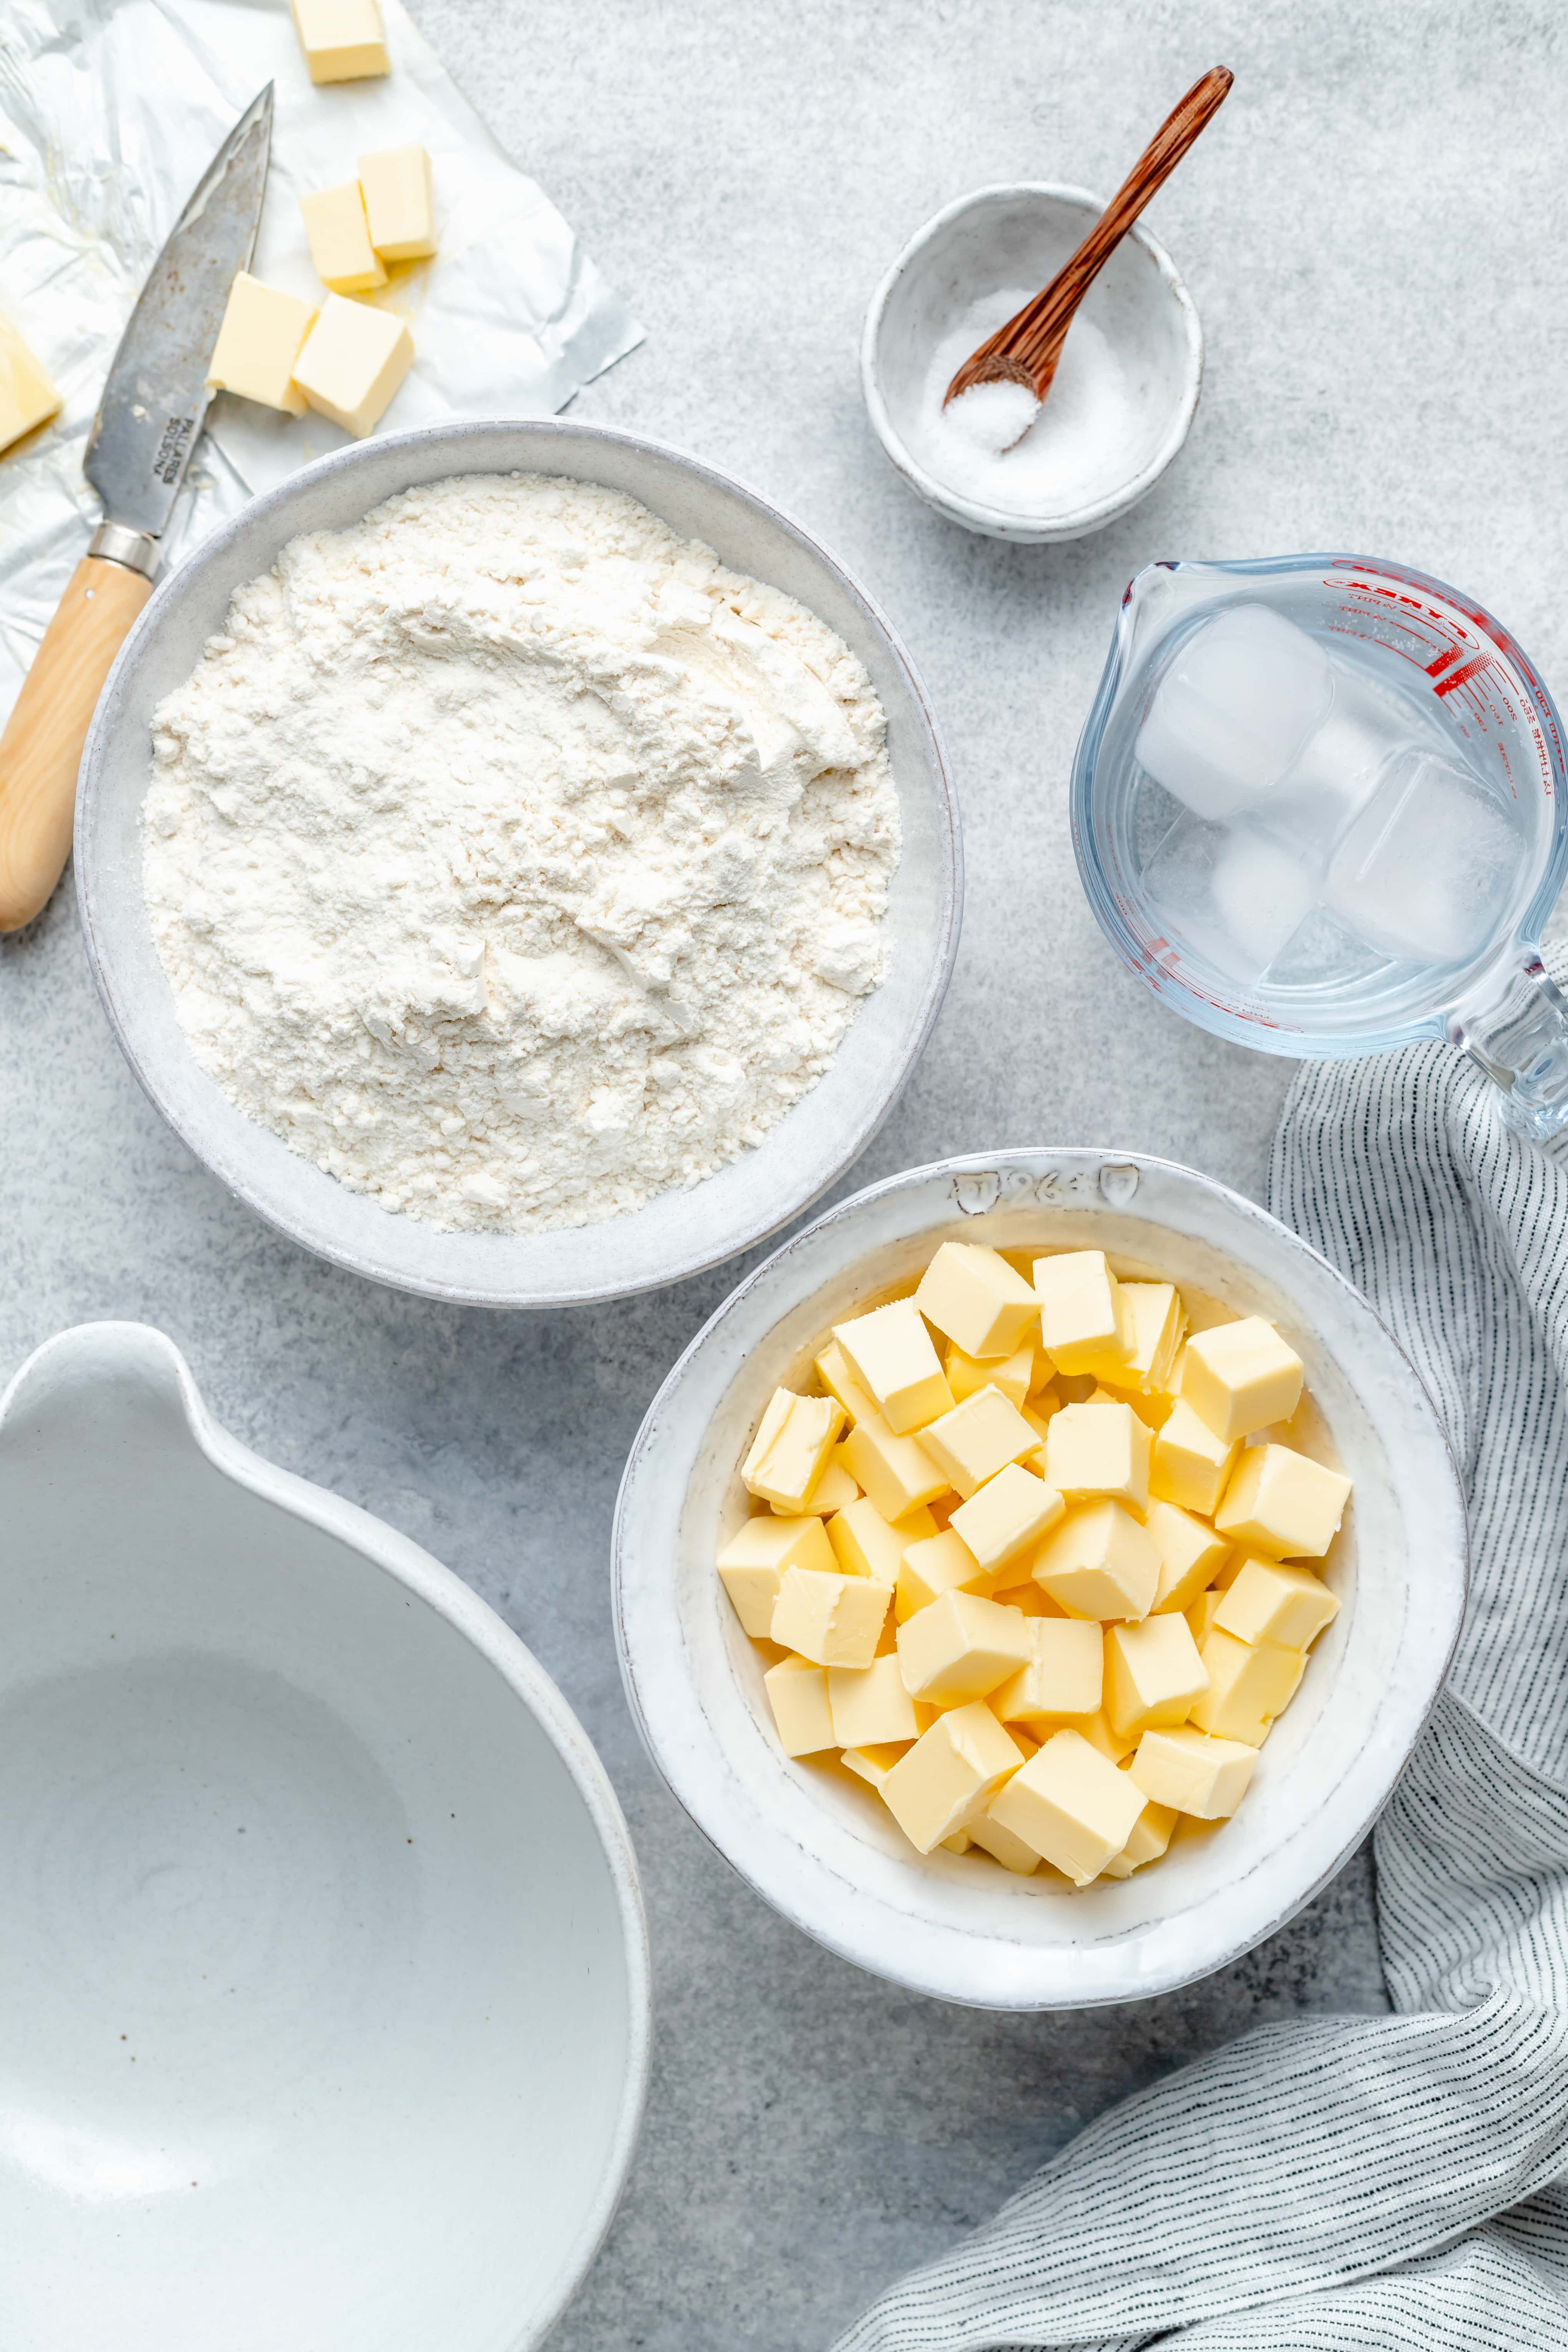
All Purpose Flour: standard all-purpose white flour is what you’ll need for this recipe. If you need a gluten free option, I include my favorite gluten free flour, below.
Butter: butter is the star of the show in this pie crust so be sure to use a high quality one. For pie crust I like to splurge and use a a rich, deep colored grass-fed butter for the best flavor.
Salt: salt is so important when baking becomes it adds much needed flavor to the dough.
Ice Water: when making pie crust it’s important to keep everything cold so that the butter stays cold and using ice water helps to do that!
Sugar: this is optional but I like to add a bit of sugar to my pie dough if I am making a sweet pie.
Can I Use Gluten Free Flour?
Yes! I tested this recipe with both regular all purpose flour and a few different brands of gluten free flour. Ultimately, I found that the best gluten free flour to use as a one-to-one replacement in this recipe was Cup 4 Cup multi-purpose gluten free flour.
This flour was easy to work with, roll out, and yielded incredibly similar results to all purpose flour. While gluten free pie crust is a bit more dense than one using all purpose flour, it was still flaky, buttery, and delicious! I honestly don’t think that anyone would really notice a difference.
Can I Use a Grain Free Flour?
I have not tested this recipe with typical grain-free flours like almond flour, coconut flour, or cassava flour but do not think the they would work well as a 1:1 substitute for all purpose flour without some additional modifications to this recipe.
How to Make Pie Crust
Step One: Add the flour and salt to a large mixing bowl and whisk together until well combined.
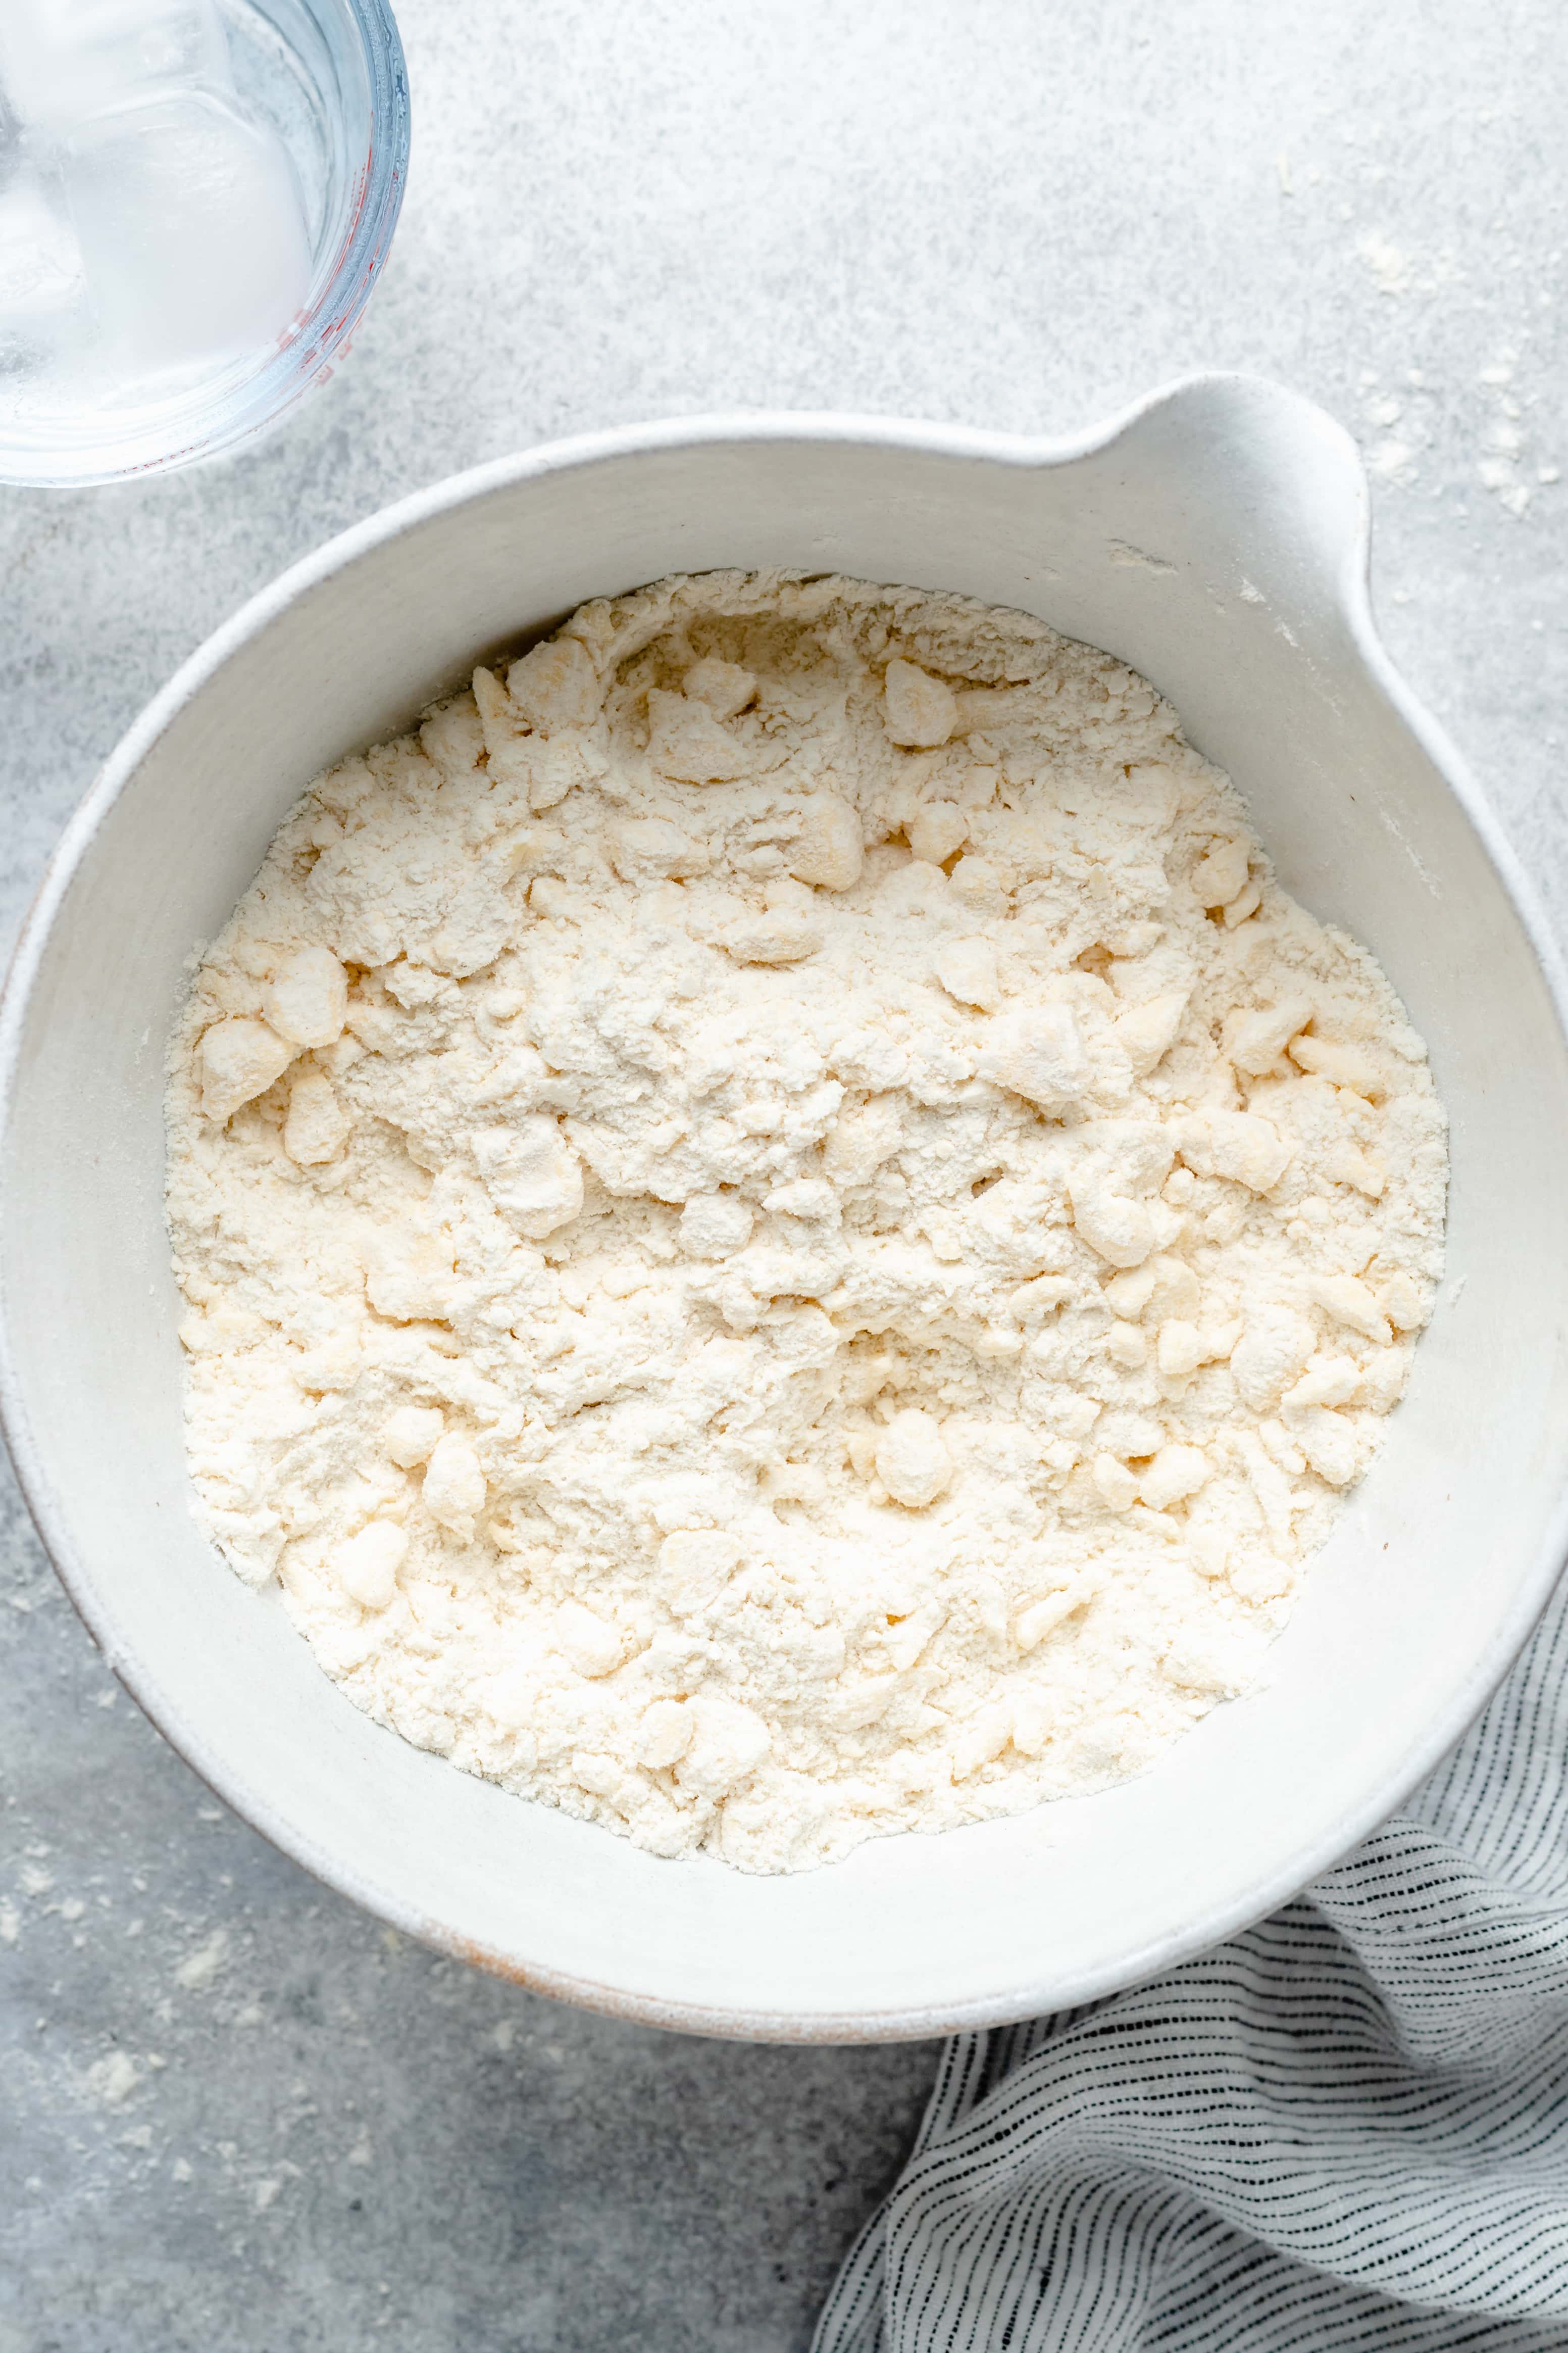
Step Two: Sprinkle the cold, diced butter over the flour. Use a pastry cutter to cut the butter into the flour until you have large pea-sized pieces of butter covered in flour.
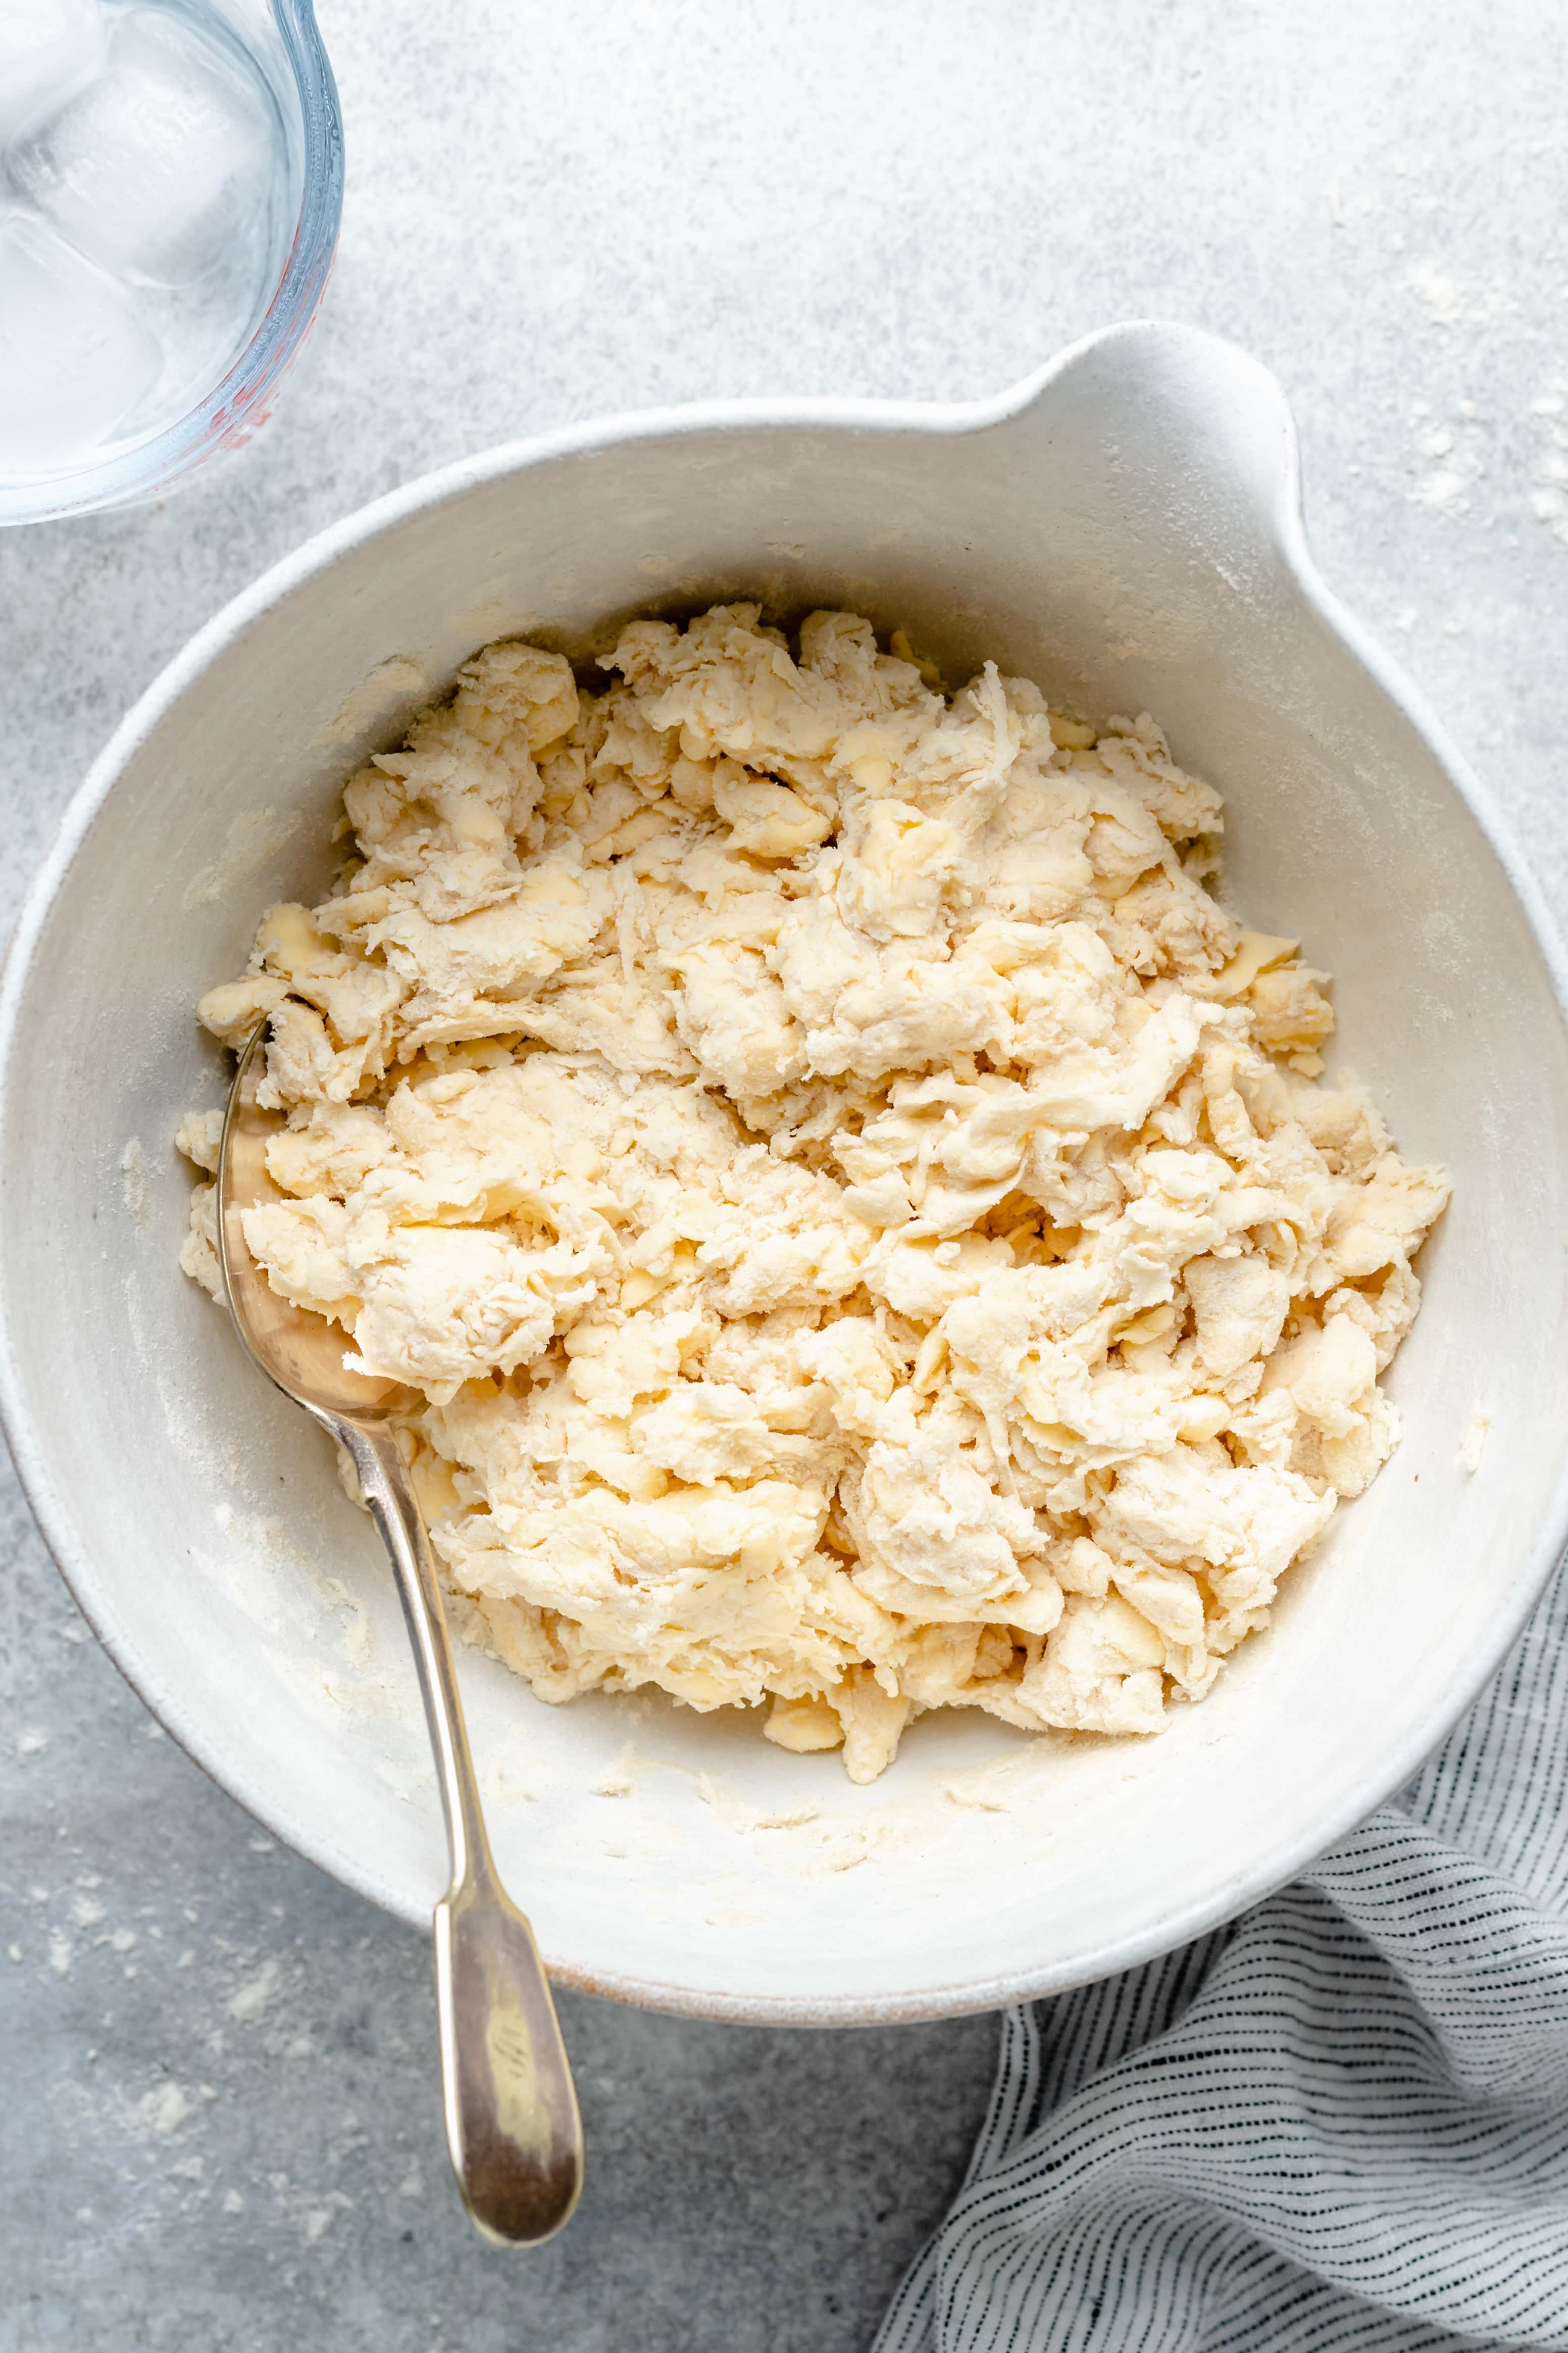
Step Three: Next, add the ice water. Drizzle the ice water over the dough, two tablespoons at a time, and work the water into the dough. Add just enough water until the dough starts to clump together. You’ll know it’s ready when you pinch the dough between your fingers and it sticks together. If the dough is still very crumbly, add a bit more water.
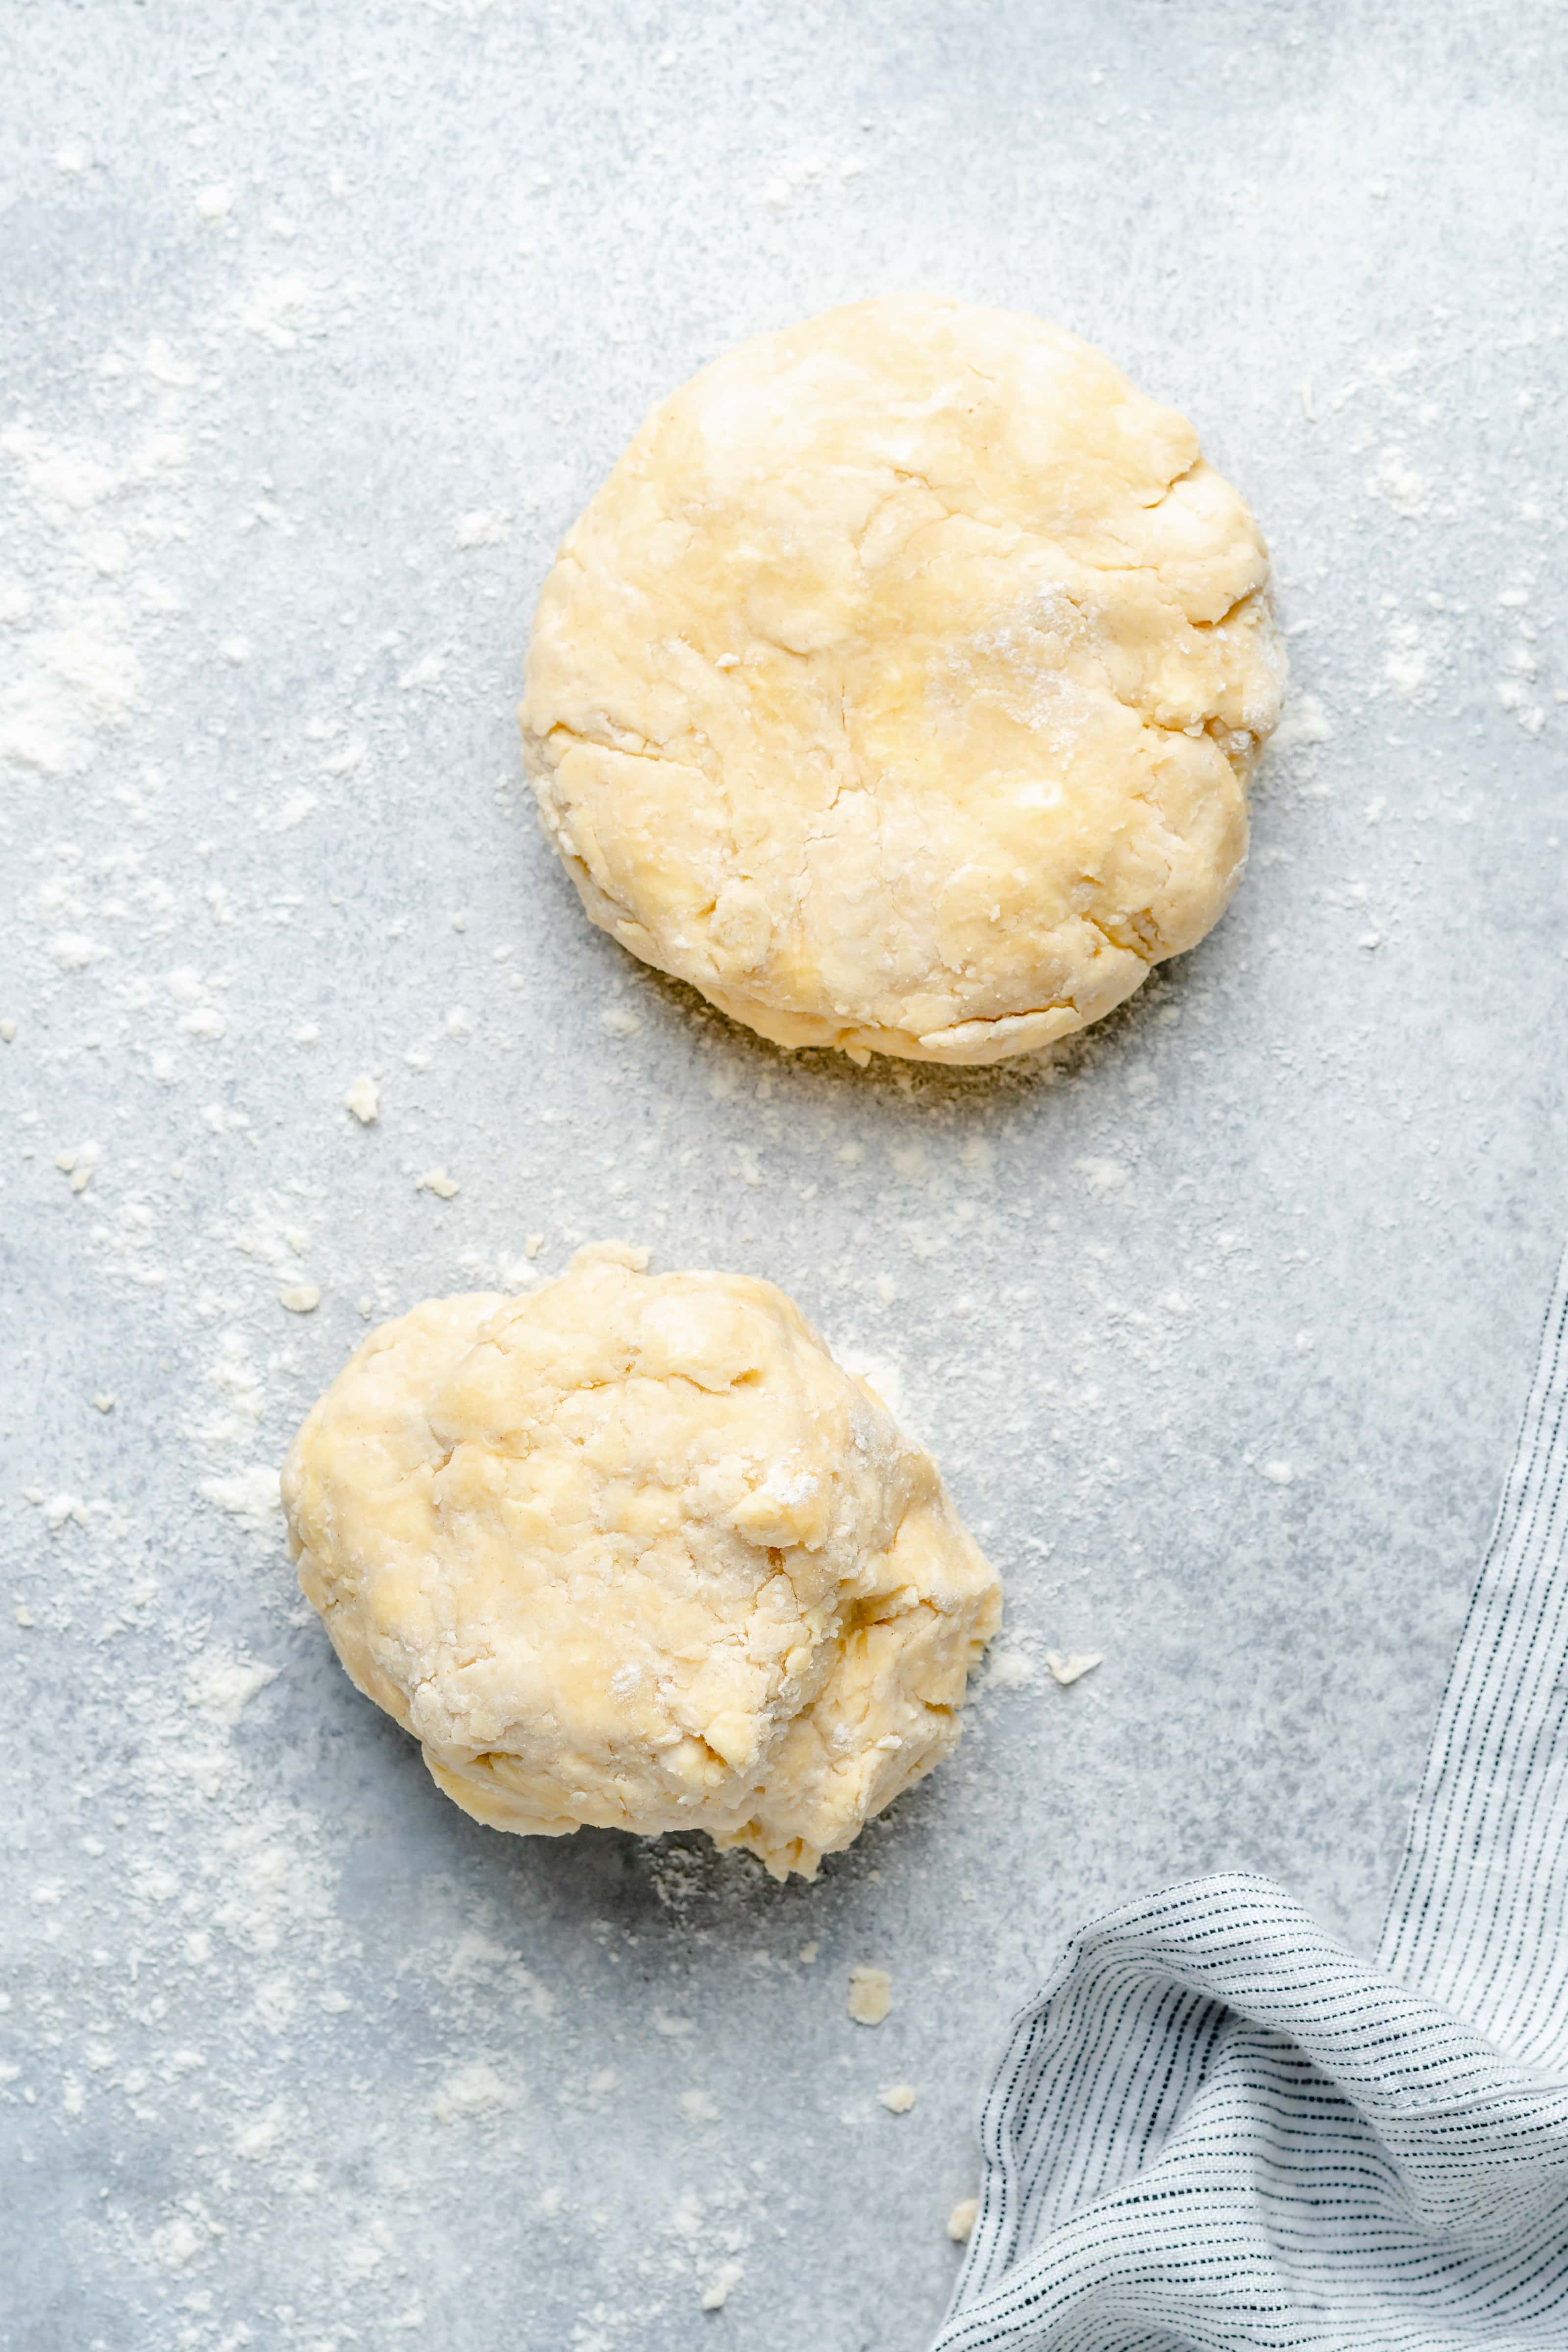
Step Four: Turn the dough out onto a floured work surface. Use your hands to form the dough into a ball and then divide in half. Form each half into a flat disk and then wrap with plastic wrap.
Step Five: Place the dough in the fridge to rest for at least 30 minutes hour before using.
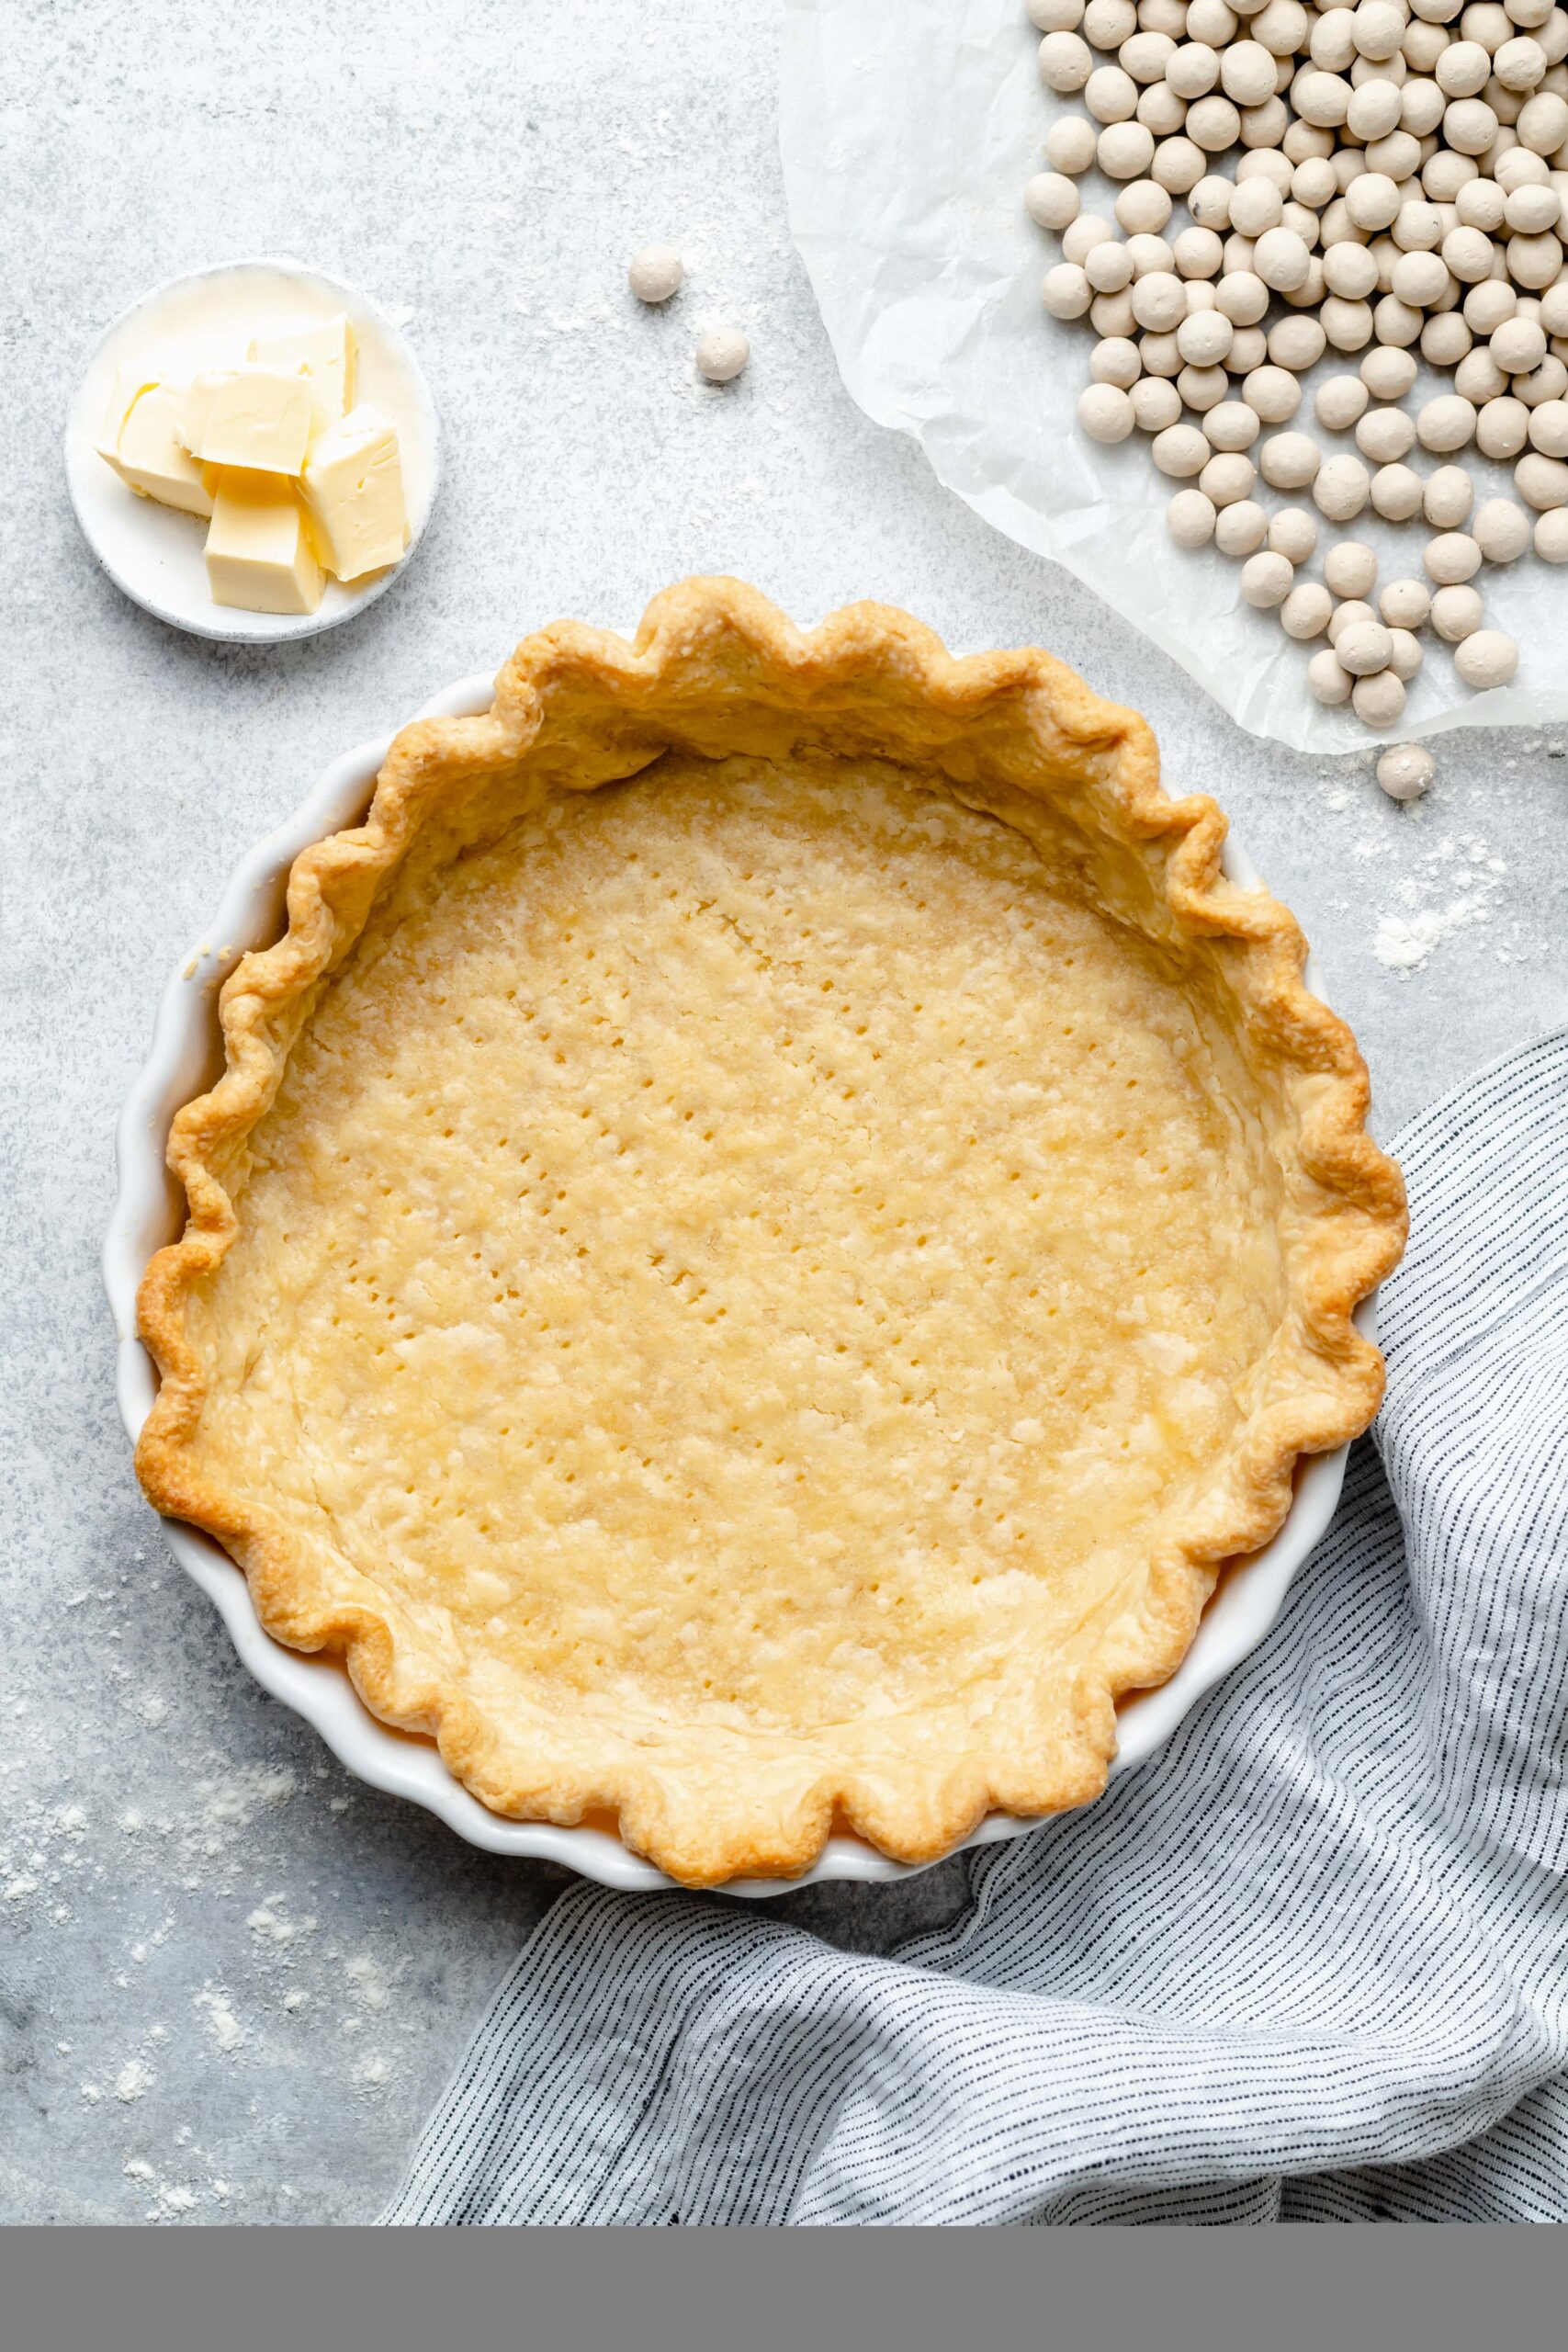
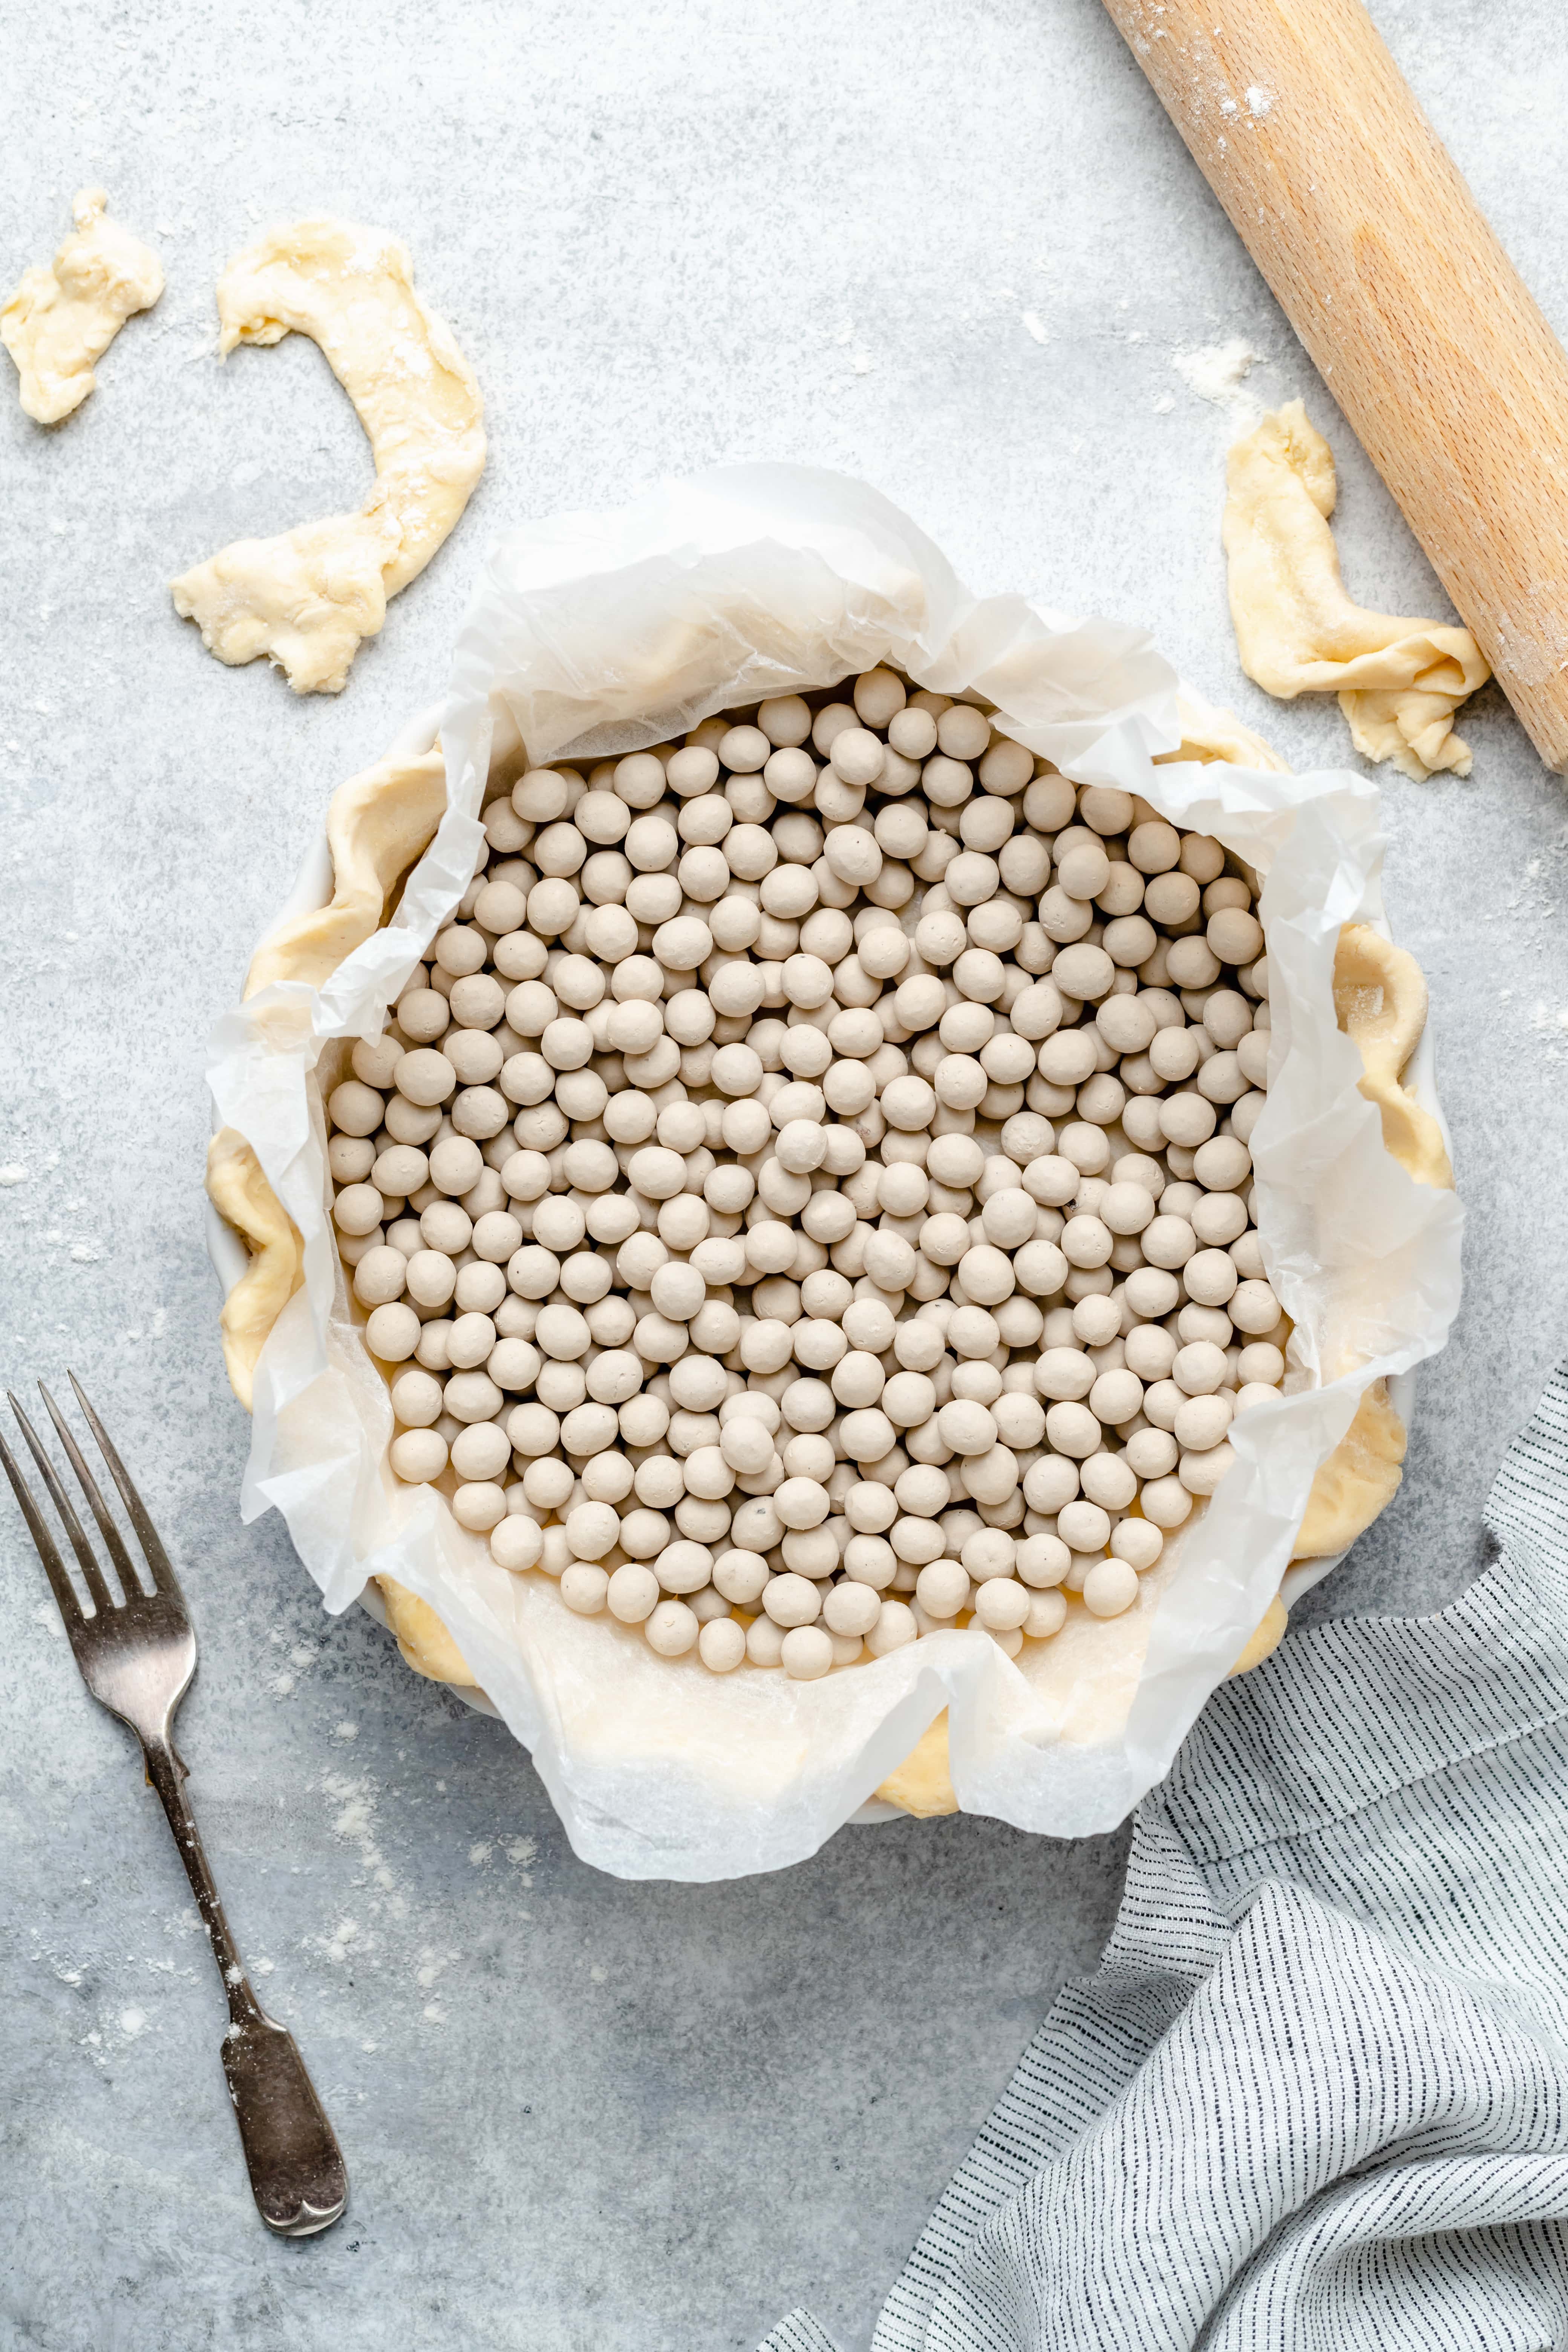
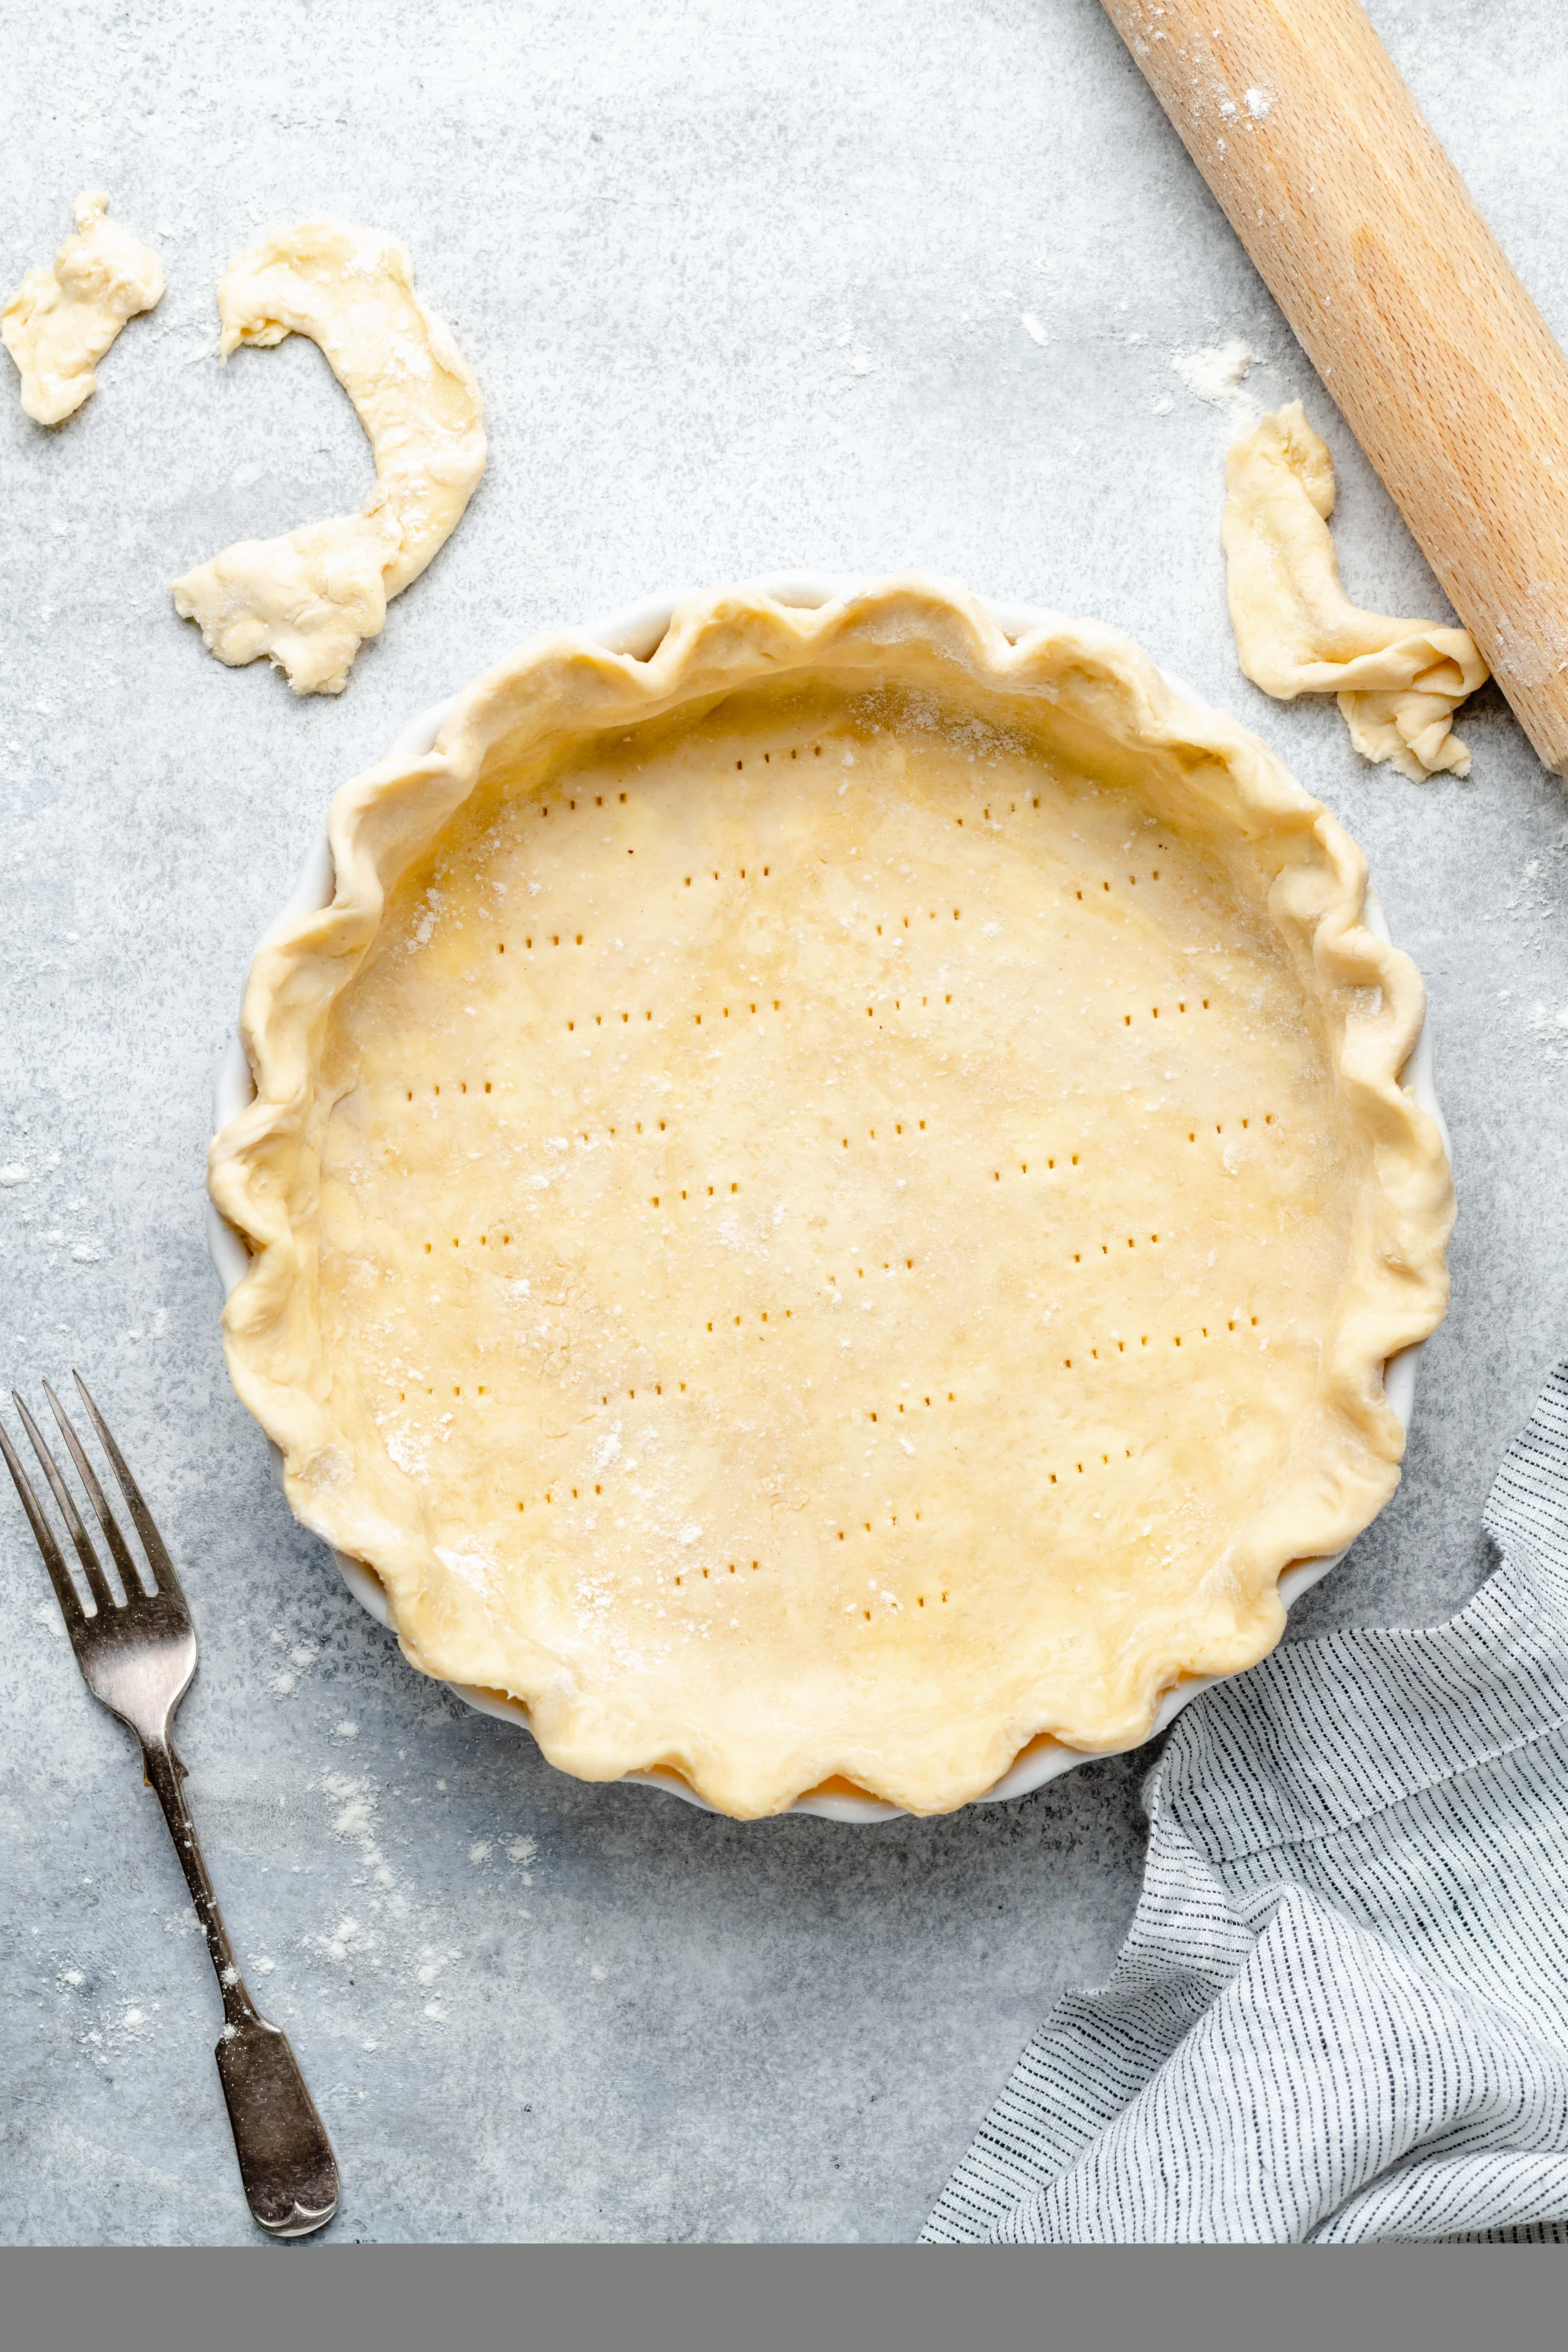
Step Six: When you are ready to use, remove the dough from the fridge. If the dough has been in the fridge for over an hour, let it rest for 5-10 minutes before rolling to avoid cracking in the center. If dough begins to split in the center, that means it’s too cold. Let sit at room temperature for a few more minutes before continuing to roll out.
How to Roll Out Pie Dough
Once your pie dough has chilled, it’s time to roll it out and get ready to make your pie! Here are a few of my favorite tips for rolling out your dough:
- Flour your surface and rolling pin to ensure that the pie dough does not stick to either surface.
- If your dough begins to crack as soon as you start rolling, it’s likely too cold to roll. You can let the pie crust sit on the counter for 5 minutes to warm just a bit to help prevent the crust from cracking.
- Roll the pie crust from the center and apply gentle, even pressure.
- To get an even circle, roll outward from the center and use a dough scraper to turn the dough 90 degrees after each roll.
- Try to work quickly! You want to keep that butter chilled in the dough for the flakiest pastry, so try to work quickly to prevent the butter melting into the dough.
Helpful Kitchen Tools
Tips and Tricks for the Best Pie Crust
- Keep everything cold – keeping everything cold ensures that the butter doesn’t melt into the dough and that solid pieces run throughout the dough. Those solid pieces of butter melt in the oven while baking and gives the crust that delicious flaky texture. Be sure your butter is cold, that you are using ice water, and you can even place your flour in the fridge for a bit before using to chill.
- Use enough ice water – I recommend a range for the measurement of ice water because depending on the climate you may need less or more. If your dough is still a bit too dry, you can add a another tablespoon at a time until you get the right consistency. Remember, it’s better for the dough to be a bit too wet than too dry.
- Prevent burning with a pie shield – to prevent the edges of your pie from becoming too brown, use a pie shield! This helps to protect the edges of the crust from browning while giving the filling the opportunity to continue to bake.
I hope you give this Homemade Pie Crust tutorial is helpful for you!
If you do give this recipe a try, I want to know! Leave a comment with a star rating below. You can also snap a photo & tag @allthehealthythings on INSTAGRAM. Your reviews help support All the Healthy Things and make it possible for me to continue to create the recipes you know and love.
Print
Flaky Homemade All Butter Pie Crust
- Prep Time: 10 minutes
- Cook Time: 15 minutes
- Total Time: 25 minutes
- Yield: 8 1x
- Category: Dessert
- Method: Baking
- Cuisine: American
- Diet: Gluten Free
Description
This flaky homemade all butter pie crust comes out perfectly every single time! With just a few simple ingredients you’ll have a delicious pie crust to use for your favorite pie and quiche recipes!
Ingredients
- 2 1/4 cups flour
- 1 teaspoon salt
- 1 cup cold butter, diced
- 6-8 tablespoons ice water
Instructions
- Add the flour and salt to a large mixing bowl and whisk together until well combined.
- Sprinkle the cold, diced butter over the flour. Use a pastry cutter to cut the butter into the flour until you have large pea-sized pieces of butter covered in flour.
- Next, add the ice water. Drizzle the ice water over the dough, two tablespoons at a time, and work the water into the dough. Add just enough water until the dough starts to clump together. You’ll know it’s ready when you pinch the dough between your fingers and it sticks together. If the dough is still very crumbly, add a bit more water.
- Turn the dough out onto a floured work surface. Use your hands to form the dough into a ball and then divide in half. Form each half into a flat disk and then wrap with plastic wrap.
- Place the dough in the fridge to rest for at least 30 minutes hour before using.
- When you are ready to use, remove the dough from the fridge. If the dough has been in the fridge for over an hour, let it rest for 5-10 minutes before rolling to avoid cracking in the center. If dough begins to split in the center, that means it’s too cold. Let sit at room temperature for a few more minutes before continuing to roll out.
- Continue, per your pie recipe’s instructions.
Recipe by: Ashlea Carver / All the Healthy Things | Photography by: Eat Love Eats


I used this recipe to make a pumpkin pie on Thanksgiving. Was able to make the dough a few days ahead of time so it was ready to go and it turned out so nice!! Great flavor and texture!
This is my go to pie crust! So easy and SO delicious!
Love! So flaky