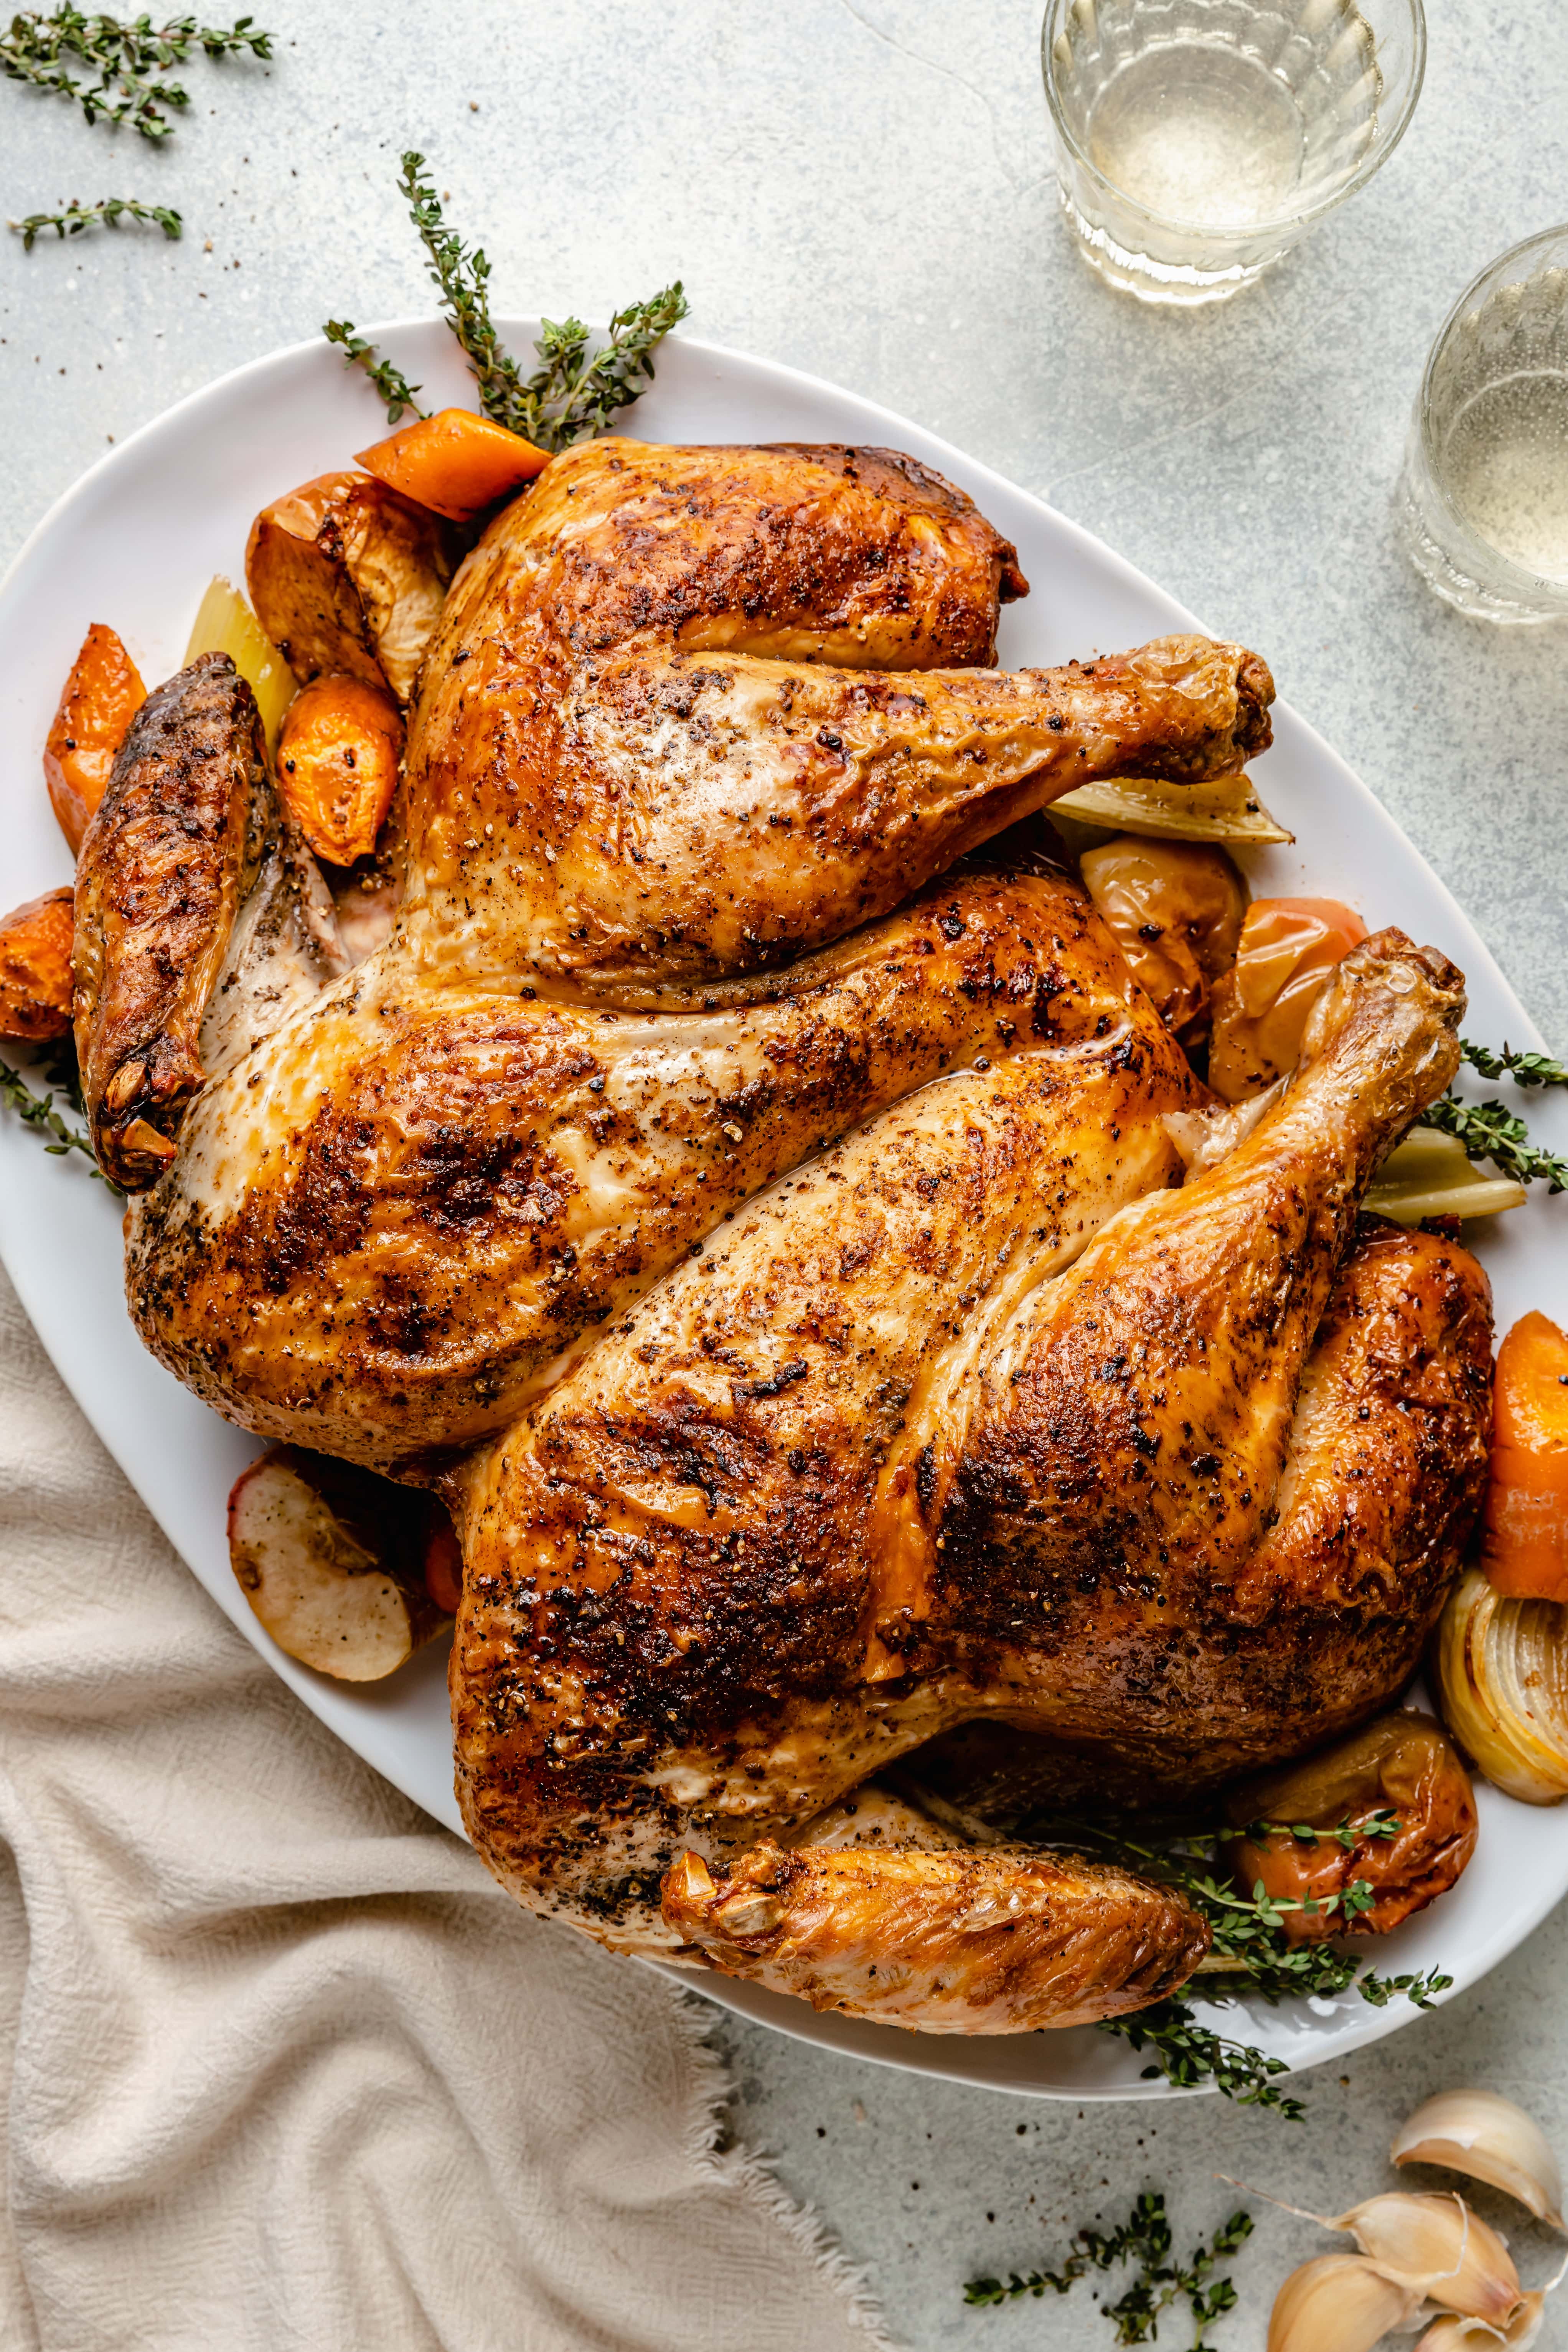
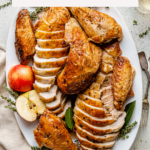
This Roasted Spatchcock Turkey recipe is incredibly simple and a great introduction to roasting a whole turkey. All you need are a few simple ingredients for a delicious and juicy turkey.

I am so excited to bring you another post in our All the Healthy Things “Just the Basics” series. These posts are focused on helping you master basics in the kitchen and, hopefully, inspiring you with a few new ideas along the way.
If you are new to cooking, or just need a refresher on the basics, these posts are designed to help you feel more confident in the kitchen. Once you have a handle on a few basic concepts and techniques, you can easily build upon them to create new and exciting recipes dishes without a second thought.
If you have ever wondered how some people just seem to know how to cook without a recipe or can quickly throw together a meal in a moment’s notice, it’s likely because they have a good grasp of the basics. I want that for you! It’s my hope that every just the basics post helps you feel more comfortable so that you can enjoy your time spent in the kitchen even more!
If you haven’t already be sure to check out the other how-to guides in the series.
Here are a few of our most popular posts:
The Best Whole Roasted Chicken
How to Make Bone Broth
How to Make Homemade Gravy
How to Roast Butternut Squash
How to Make a Flaky Homemade All Butter Pie Crust

What is a Spatchcock Turkey?
A spatchcocked, or butterflied, turkey is a turkey that has had the backbone completely removed. Removing the backbone allows the turkey to be completely opened, pressed down, and flattened to an even level. Removing the backbone also makes it possible for the turkey to be cooked in several different ways including grilling and roasting.
This simple spatchcock roasted turkey is a great introduction to roasting a turkey. There are minimal ingredients, a simple method, and it leaves you with a flavorful bird that is absolutely delicious.
Why Spatchcock Over Regular Roasting?
When it comes to roasting a turkey, the spatchcock method is my favorite. Here are a few reasons why:
- Cooks evenly! a spatchcocked turkey cooks much more evenly because of the even surface level.
- Cooks faster! Because of the even surface level the turkey cooks much faster which is exactly what you need if you’re roasting a turkey for the holidays. A quicker cooking bird means less time in the kitchen and more time to enjoy time with family and friends.
- Cooks crispy! Because the backbone is cut out of the chicken it allows for more of the overall surface of the turkey to be exposed which means you can cover every inch of the bird with oil and seasoning. You’ll get more crispy skin and more flavor, and who does not want that?!
How to Spatchcock a Turkey
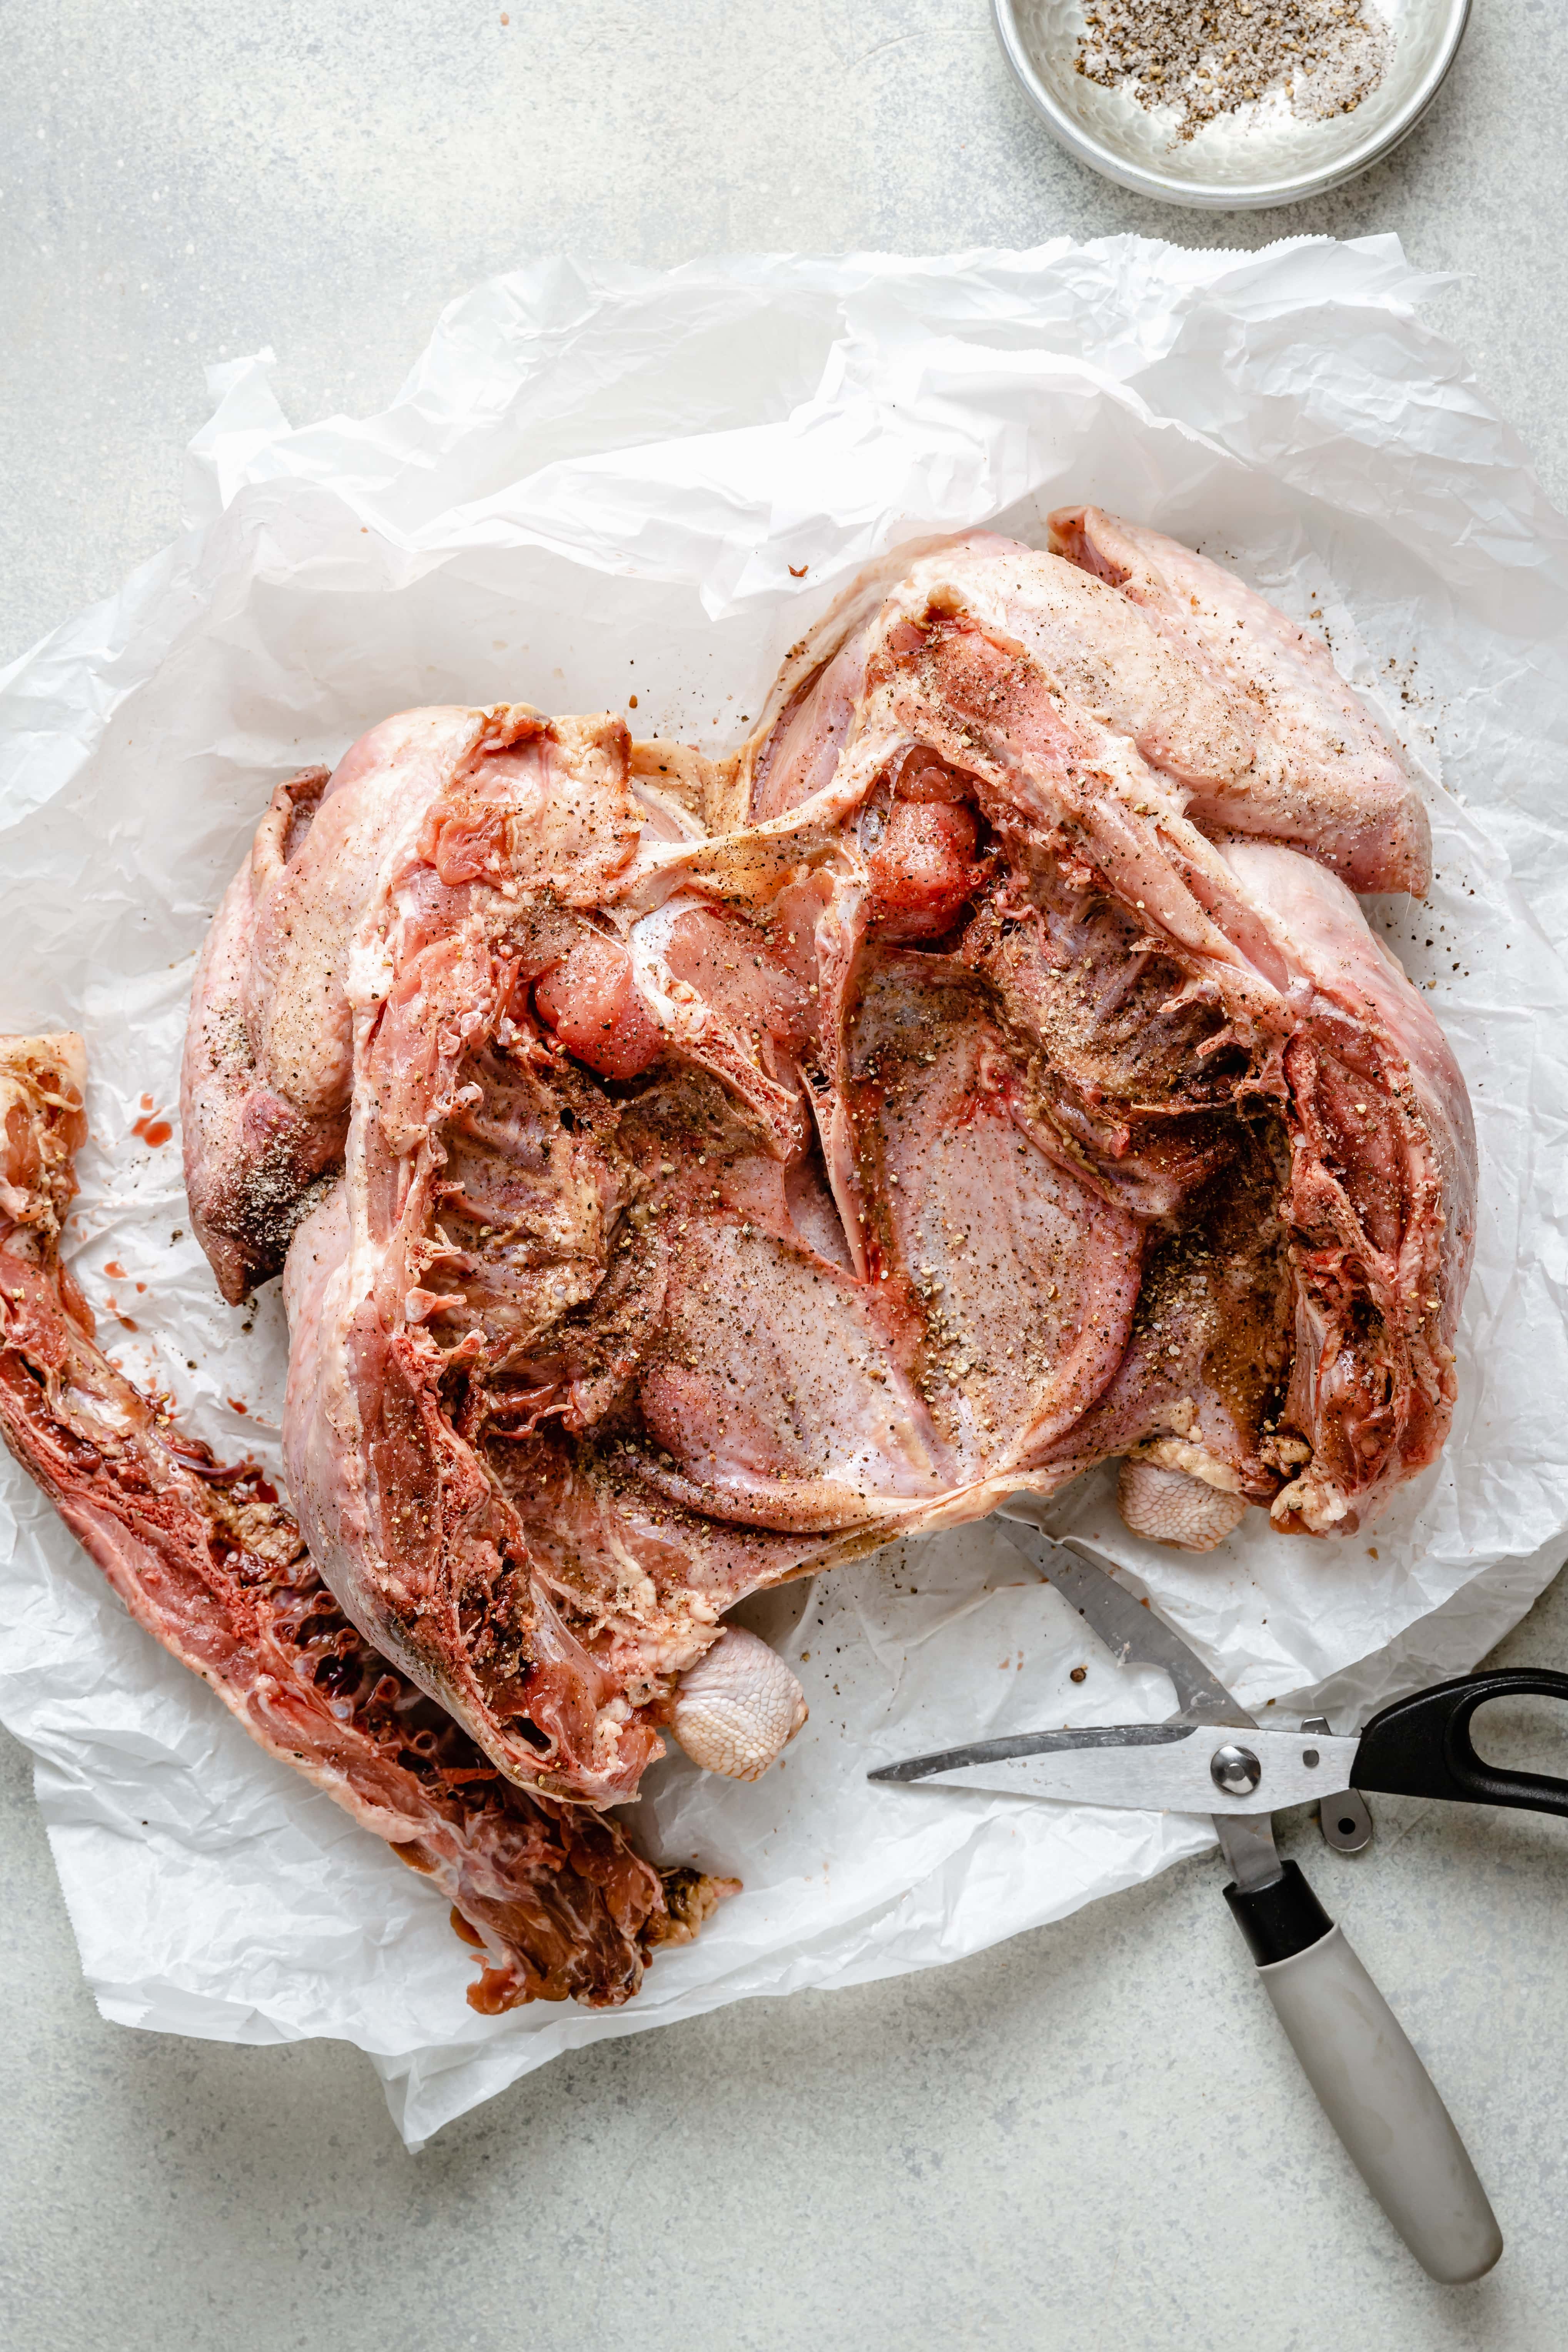
The best way to spatchcock a turkey is to use a very sharp pair of kitchen shears. Then, turn the turkey breast side down and use the shears to cut alongside the right side of the backbone. Next, cut alongside the other side of the backbone until you can remove it completely (be sure to save the backbone for roasting!). Finally, flip the turkey over and press down on the middle of the turkey to break the backbone and completely flatten the bird.
Ingredients You’ll Need
Whole Turkey: you’ll need a 12-14 pound turkey for this recipe. To me, this is the sweet spot when it comes to spatchcock roasted turkey size as anything much bigger will likely be hard to fit in a roasting pan.
Salt and Pepper: we’re keeping this recipe extra simple and going with some tried and true salt and black pepper to season our bird. Trust me, you’ll still get an incredibly flavorful bird with just salt and pepper. Just me sure to be liberal with the seasoning, remember, it’s big bird!
Oil: because butter can burn at high temperatures, we’re using a higher smoke-point oil like avocado oil to roast the turkey. You could also use refined olive oil if you prefer.
Veggies and Aromatics: we’re using a combination of onion, garlic, bay leaves, celery, and apple in the bottom of the roasting pan to give the turkey flavor and to flavor the drippings for a delicious gravy.
Helpful Kitchen Tools
- SHARP KITCHEN SHEARS
- MIXING BOWL
- LARGE SHEET PAN
- MEASURING SPOONS
- MEASURING CUPS
- BASTING BRUSH
- SHARP KNIFE
- roasting pan
How to Make this Simple Spatchcock Turkey Recipe
Step One: Preheat oven to your 425 degrees.
Step Two: On a sturdy surface, place the turkey breast side down. Use a sharp pair of kitchen shears to cut alongside the right side of the backbone. Next, cut alongside the left side of the backbone and remove it from the bird. Set the backbone aside to roast later. Flip the turkey over, breast side up, and point the legs inward toward the breast. Use your hands to press down on the middle of the turkey to break the backbone and flatten the bird. Trim off any excess fat or skin from around the neck of the turkey. Pat the turkey dry all over with paper towels and now the turkey is ready to cook!
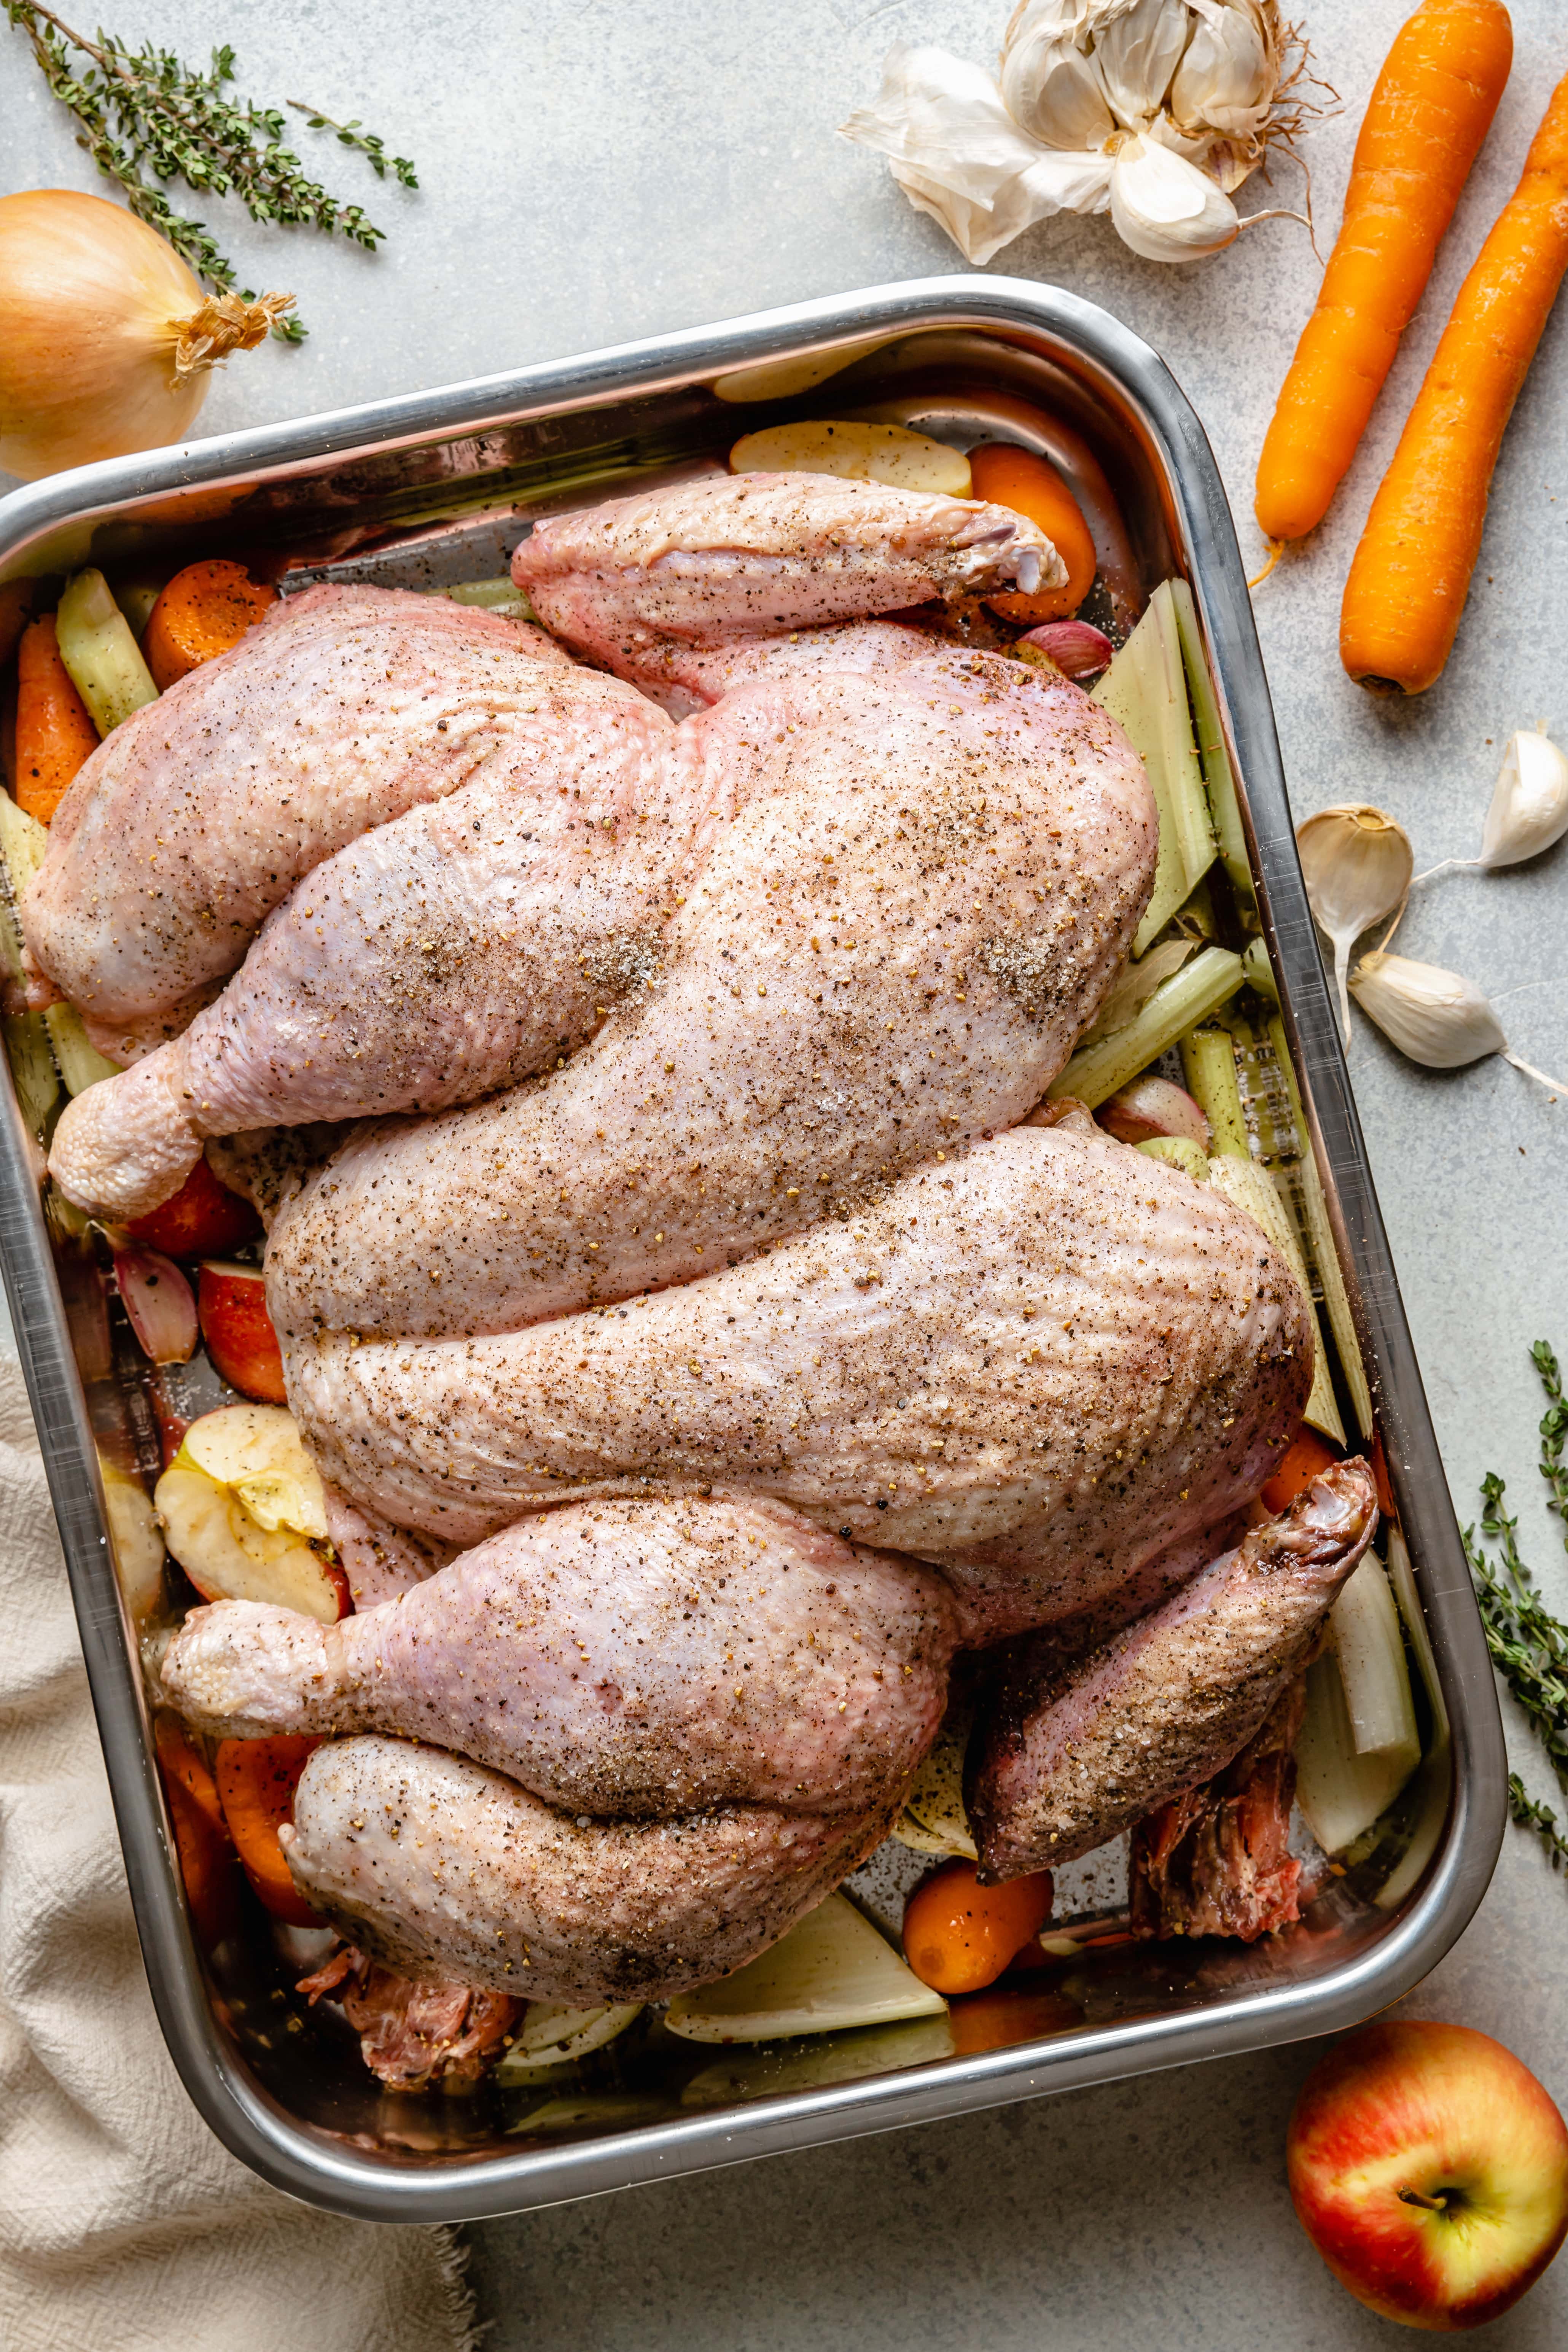
Step Three: Place the carrots, onion, celery, apple, garlic cloves, and dried bay leaves in the bottom of your roasting pan.
Step Four: Next, season the underside of the turkey liberally with salt and pepper. Flip the turkey over, breast side up, and then place the bird on top of the veggies. Tuck the turkey wings behind the breast to ensure they don’t burn. You can place the removed backbone in the roasting pan to roast alongside your turkey. The roasted back will give the drippings flavor which means an even more flavorful gravy.
Step Five: Use a basting brush to brush the turkey skin liberally with oil being sure to get every nook and cranny of the skin. Then season liberally with salt and pepper.
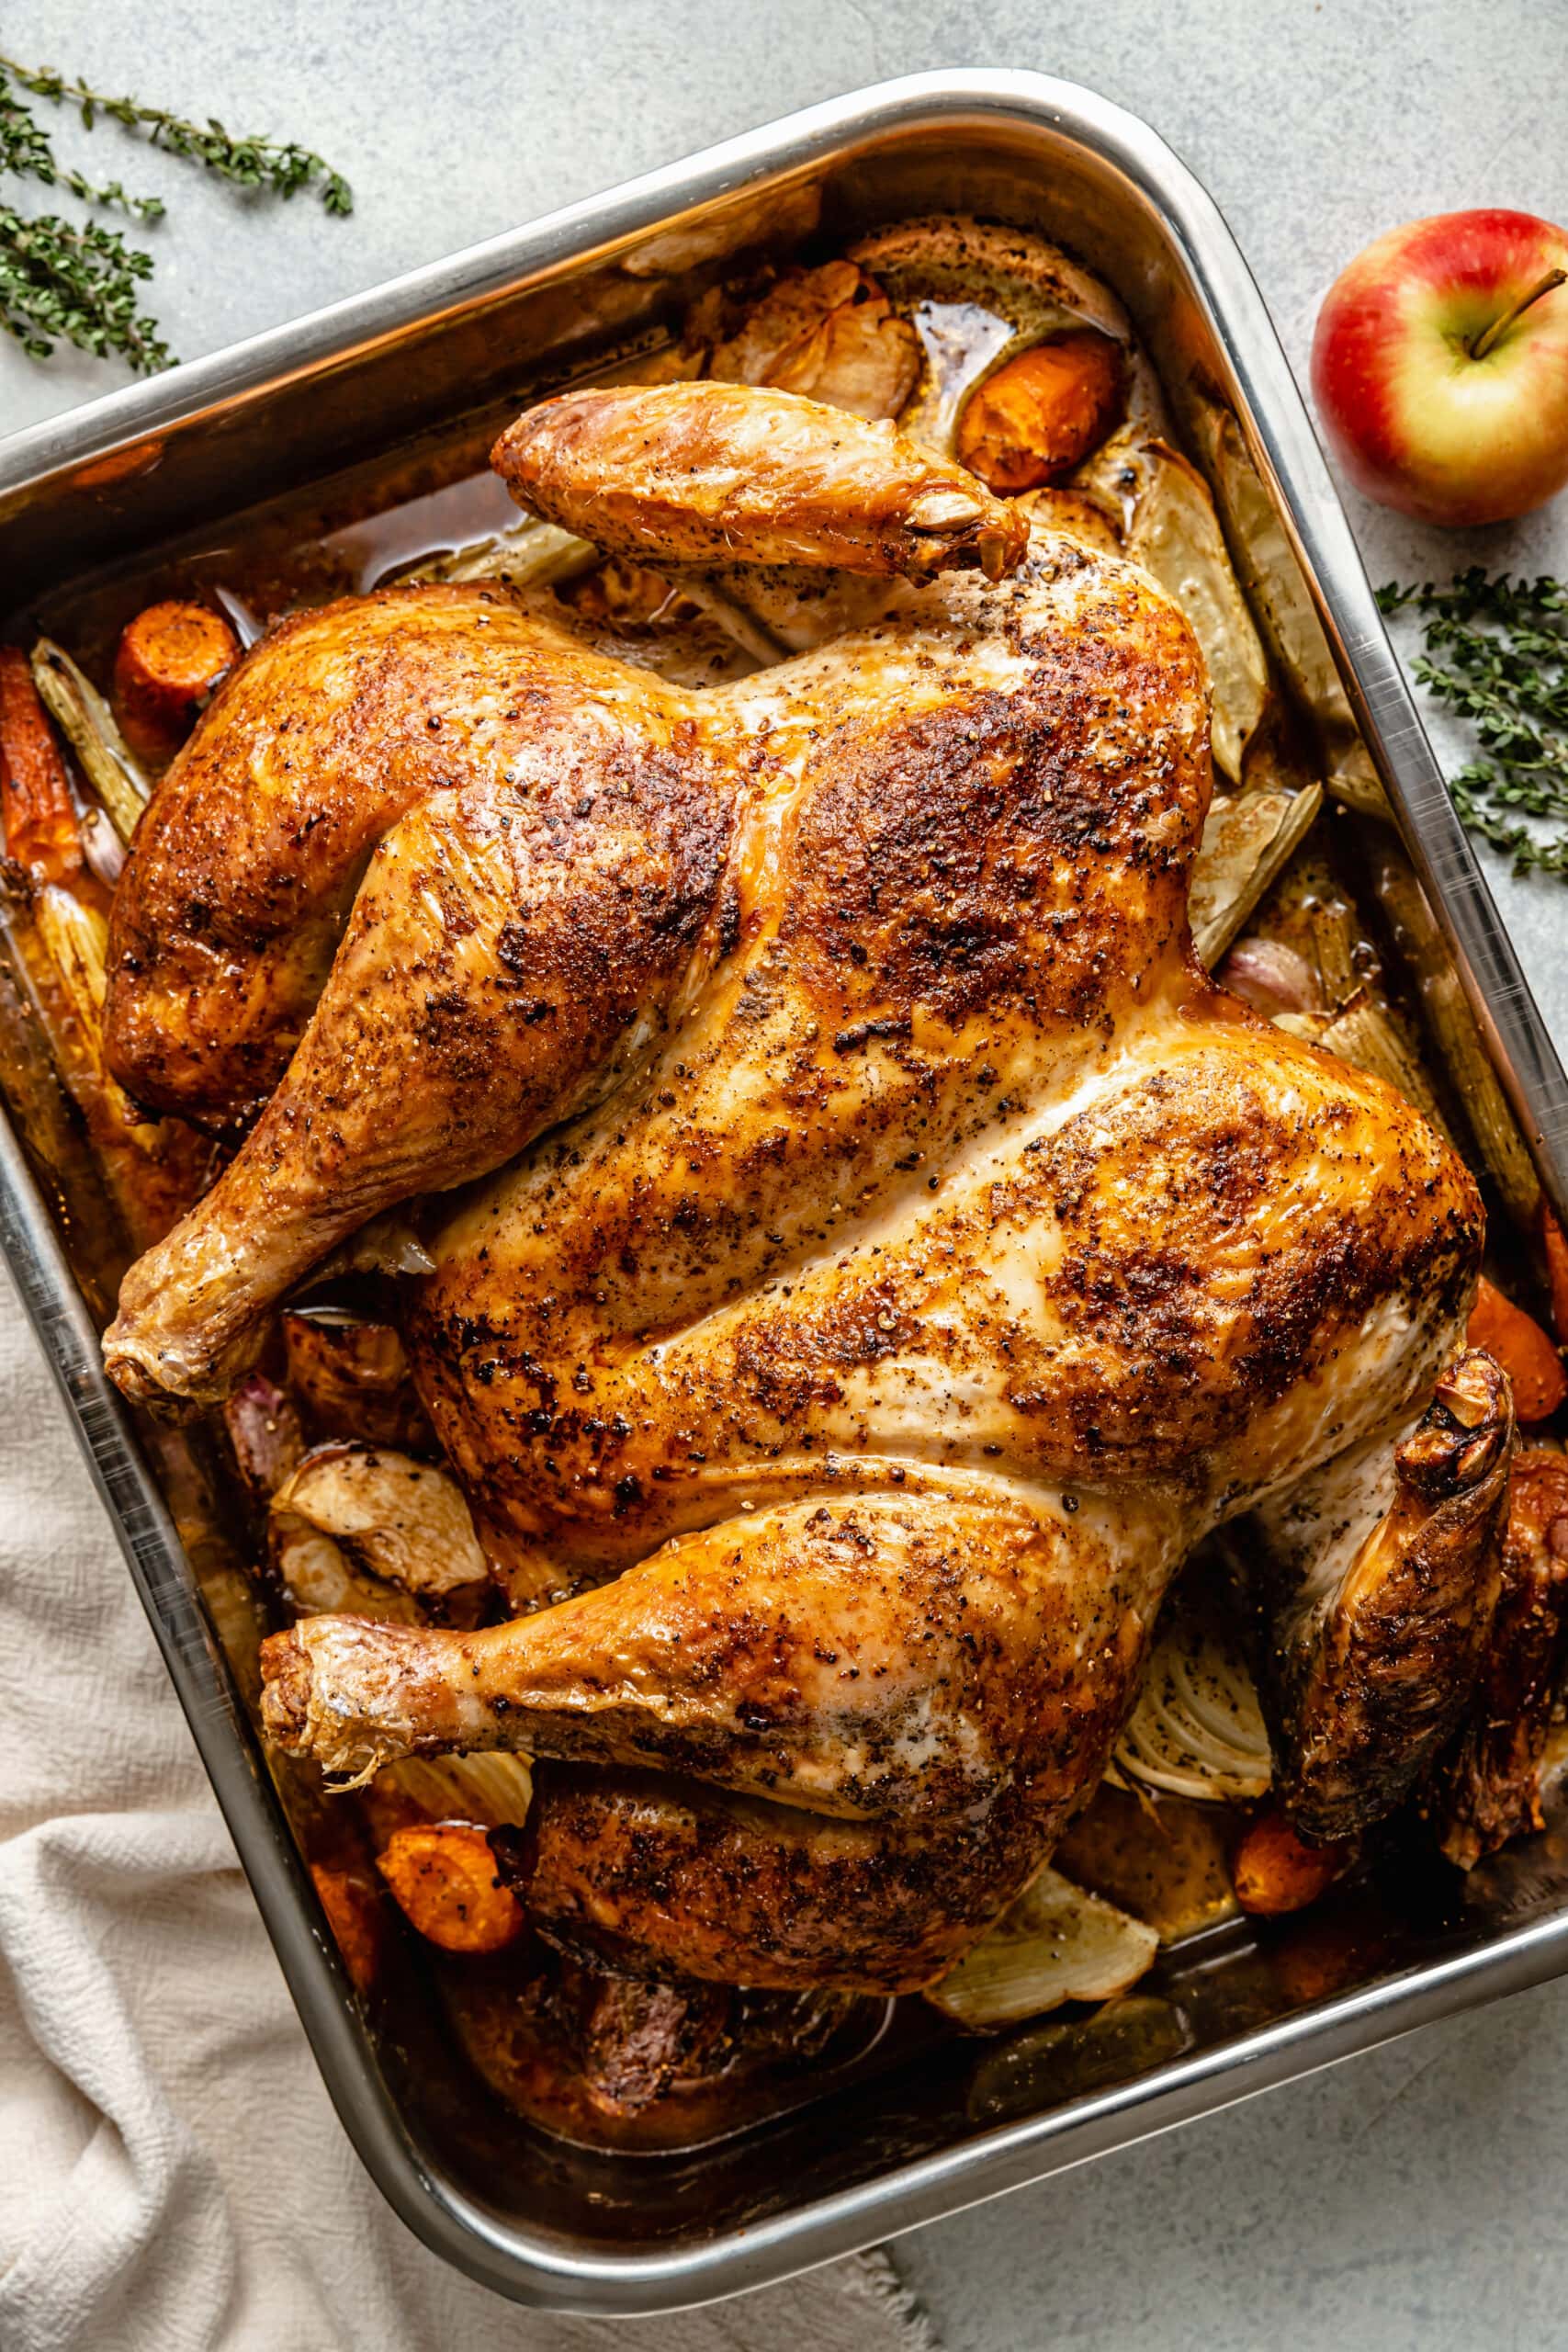
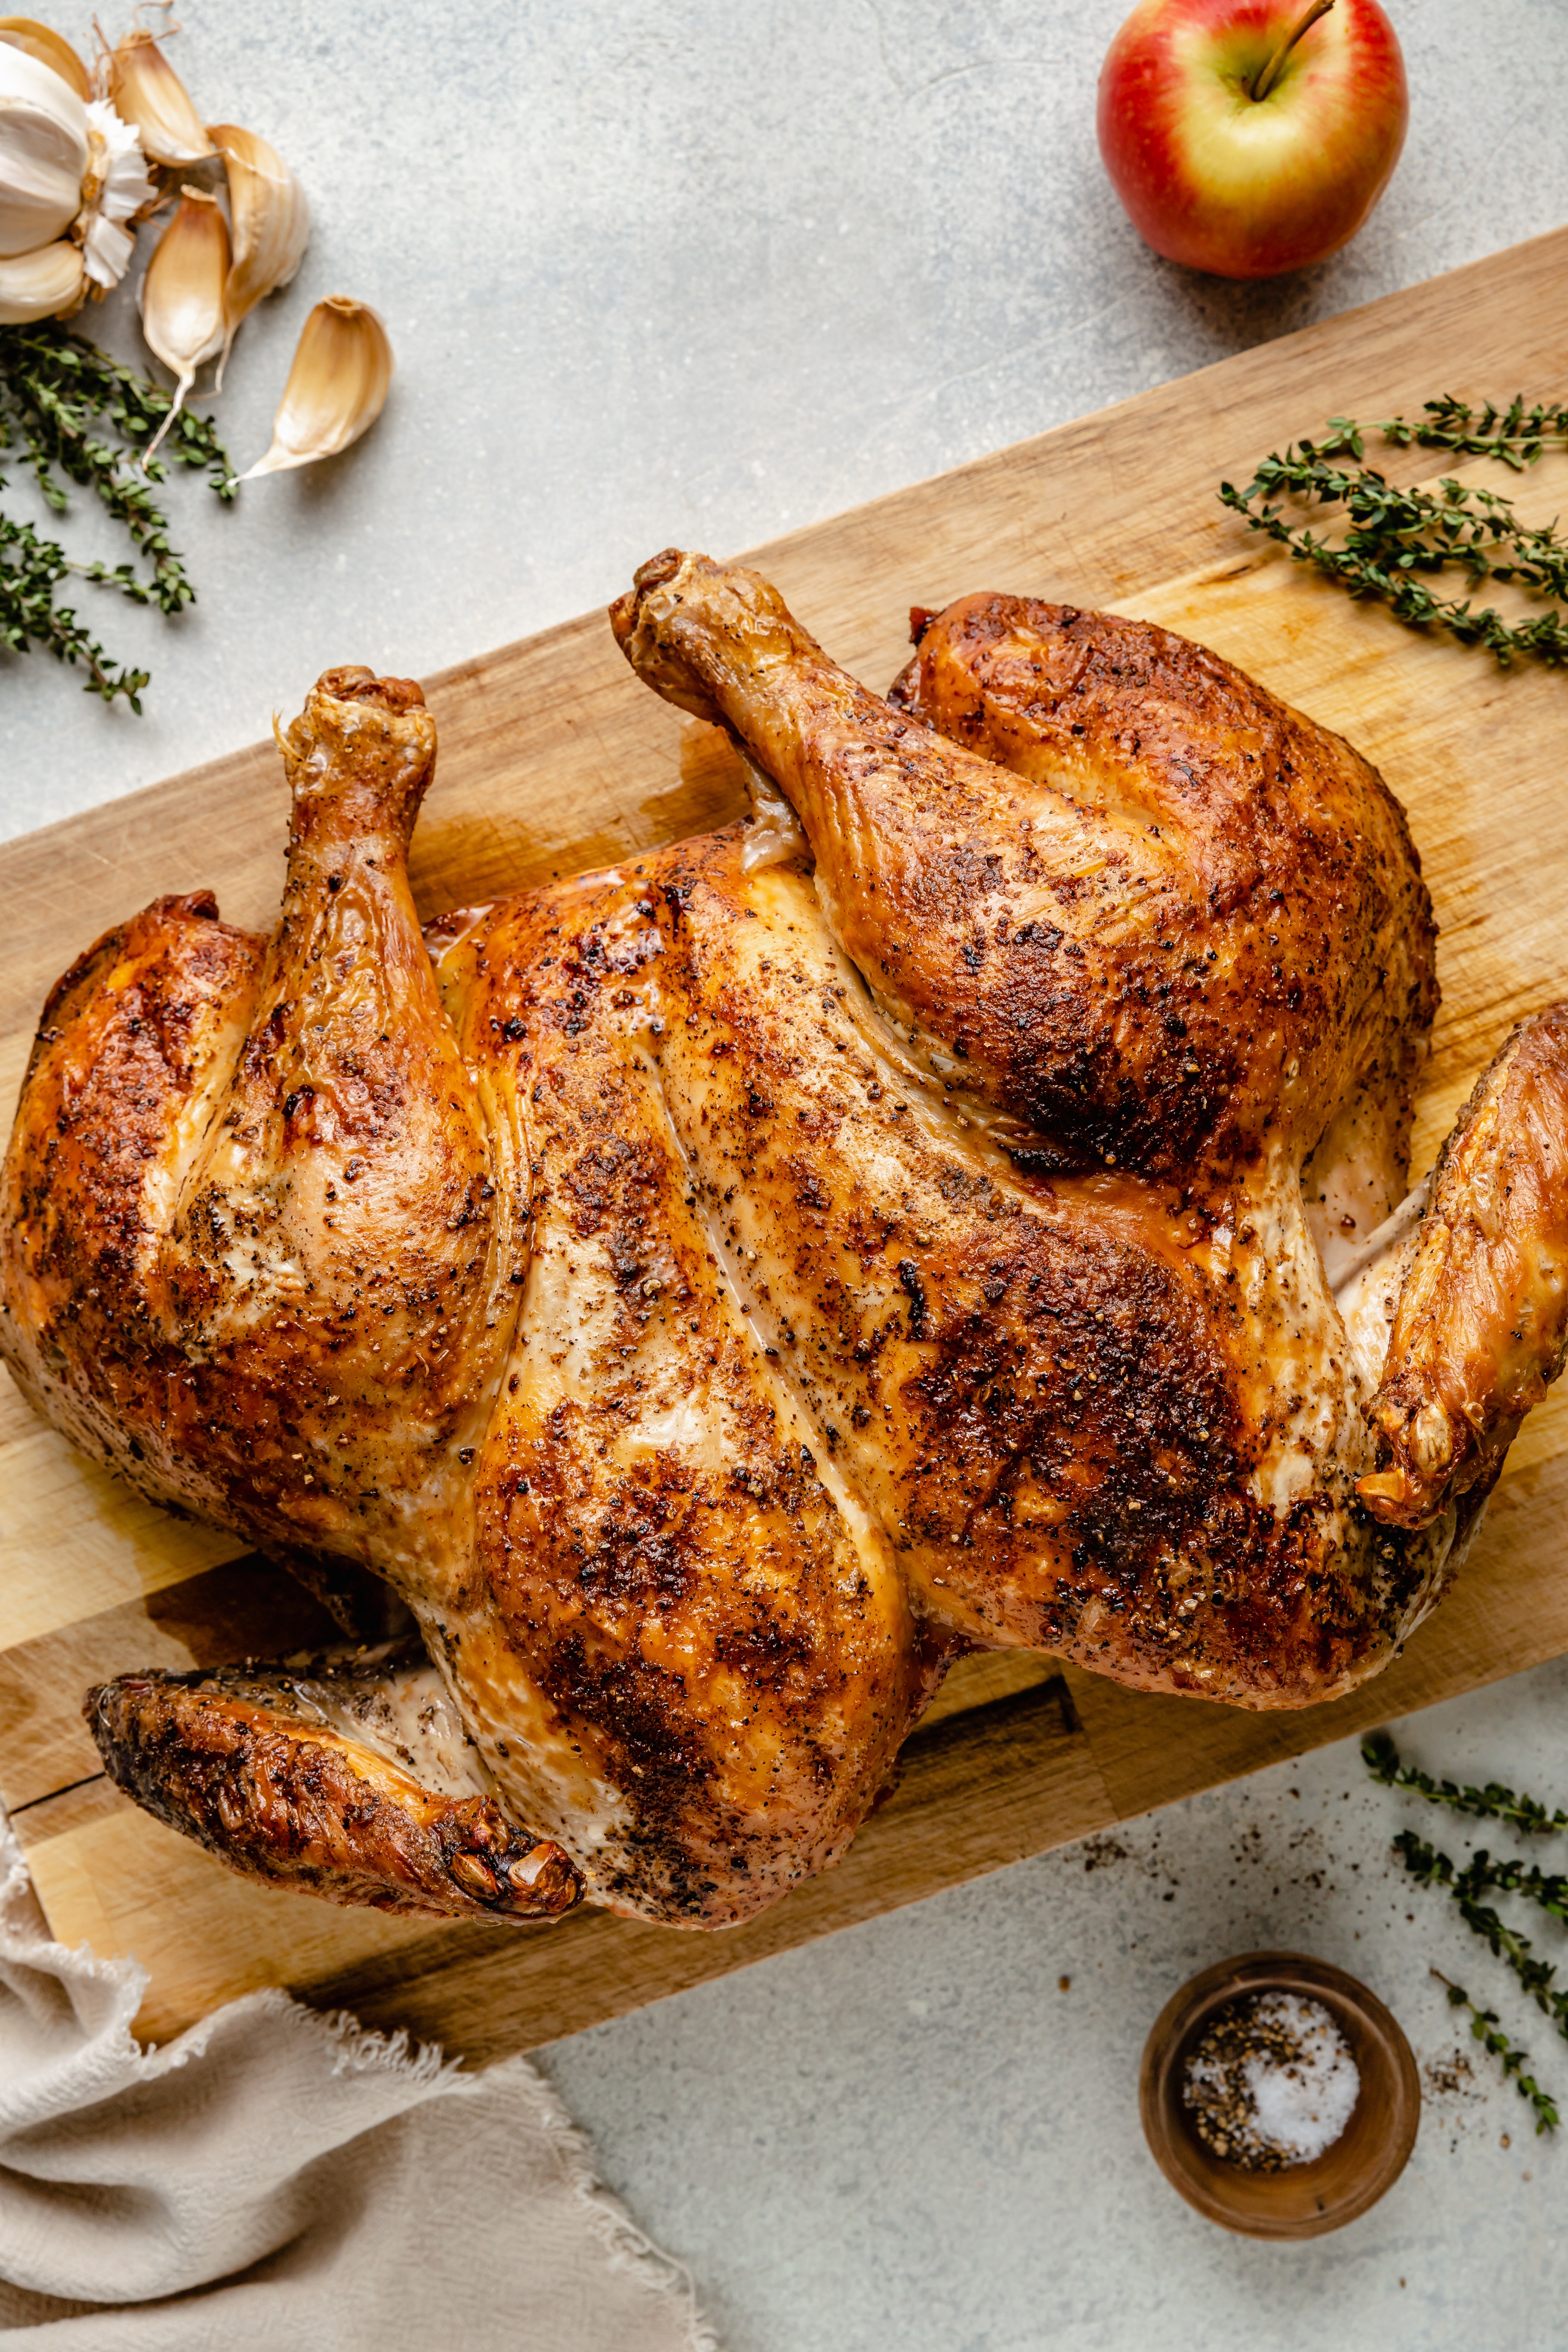
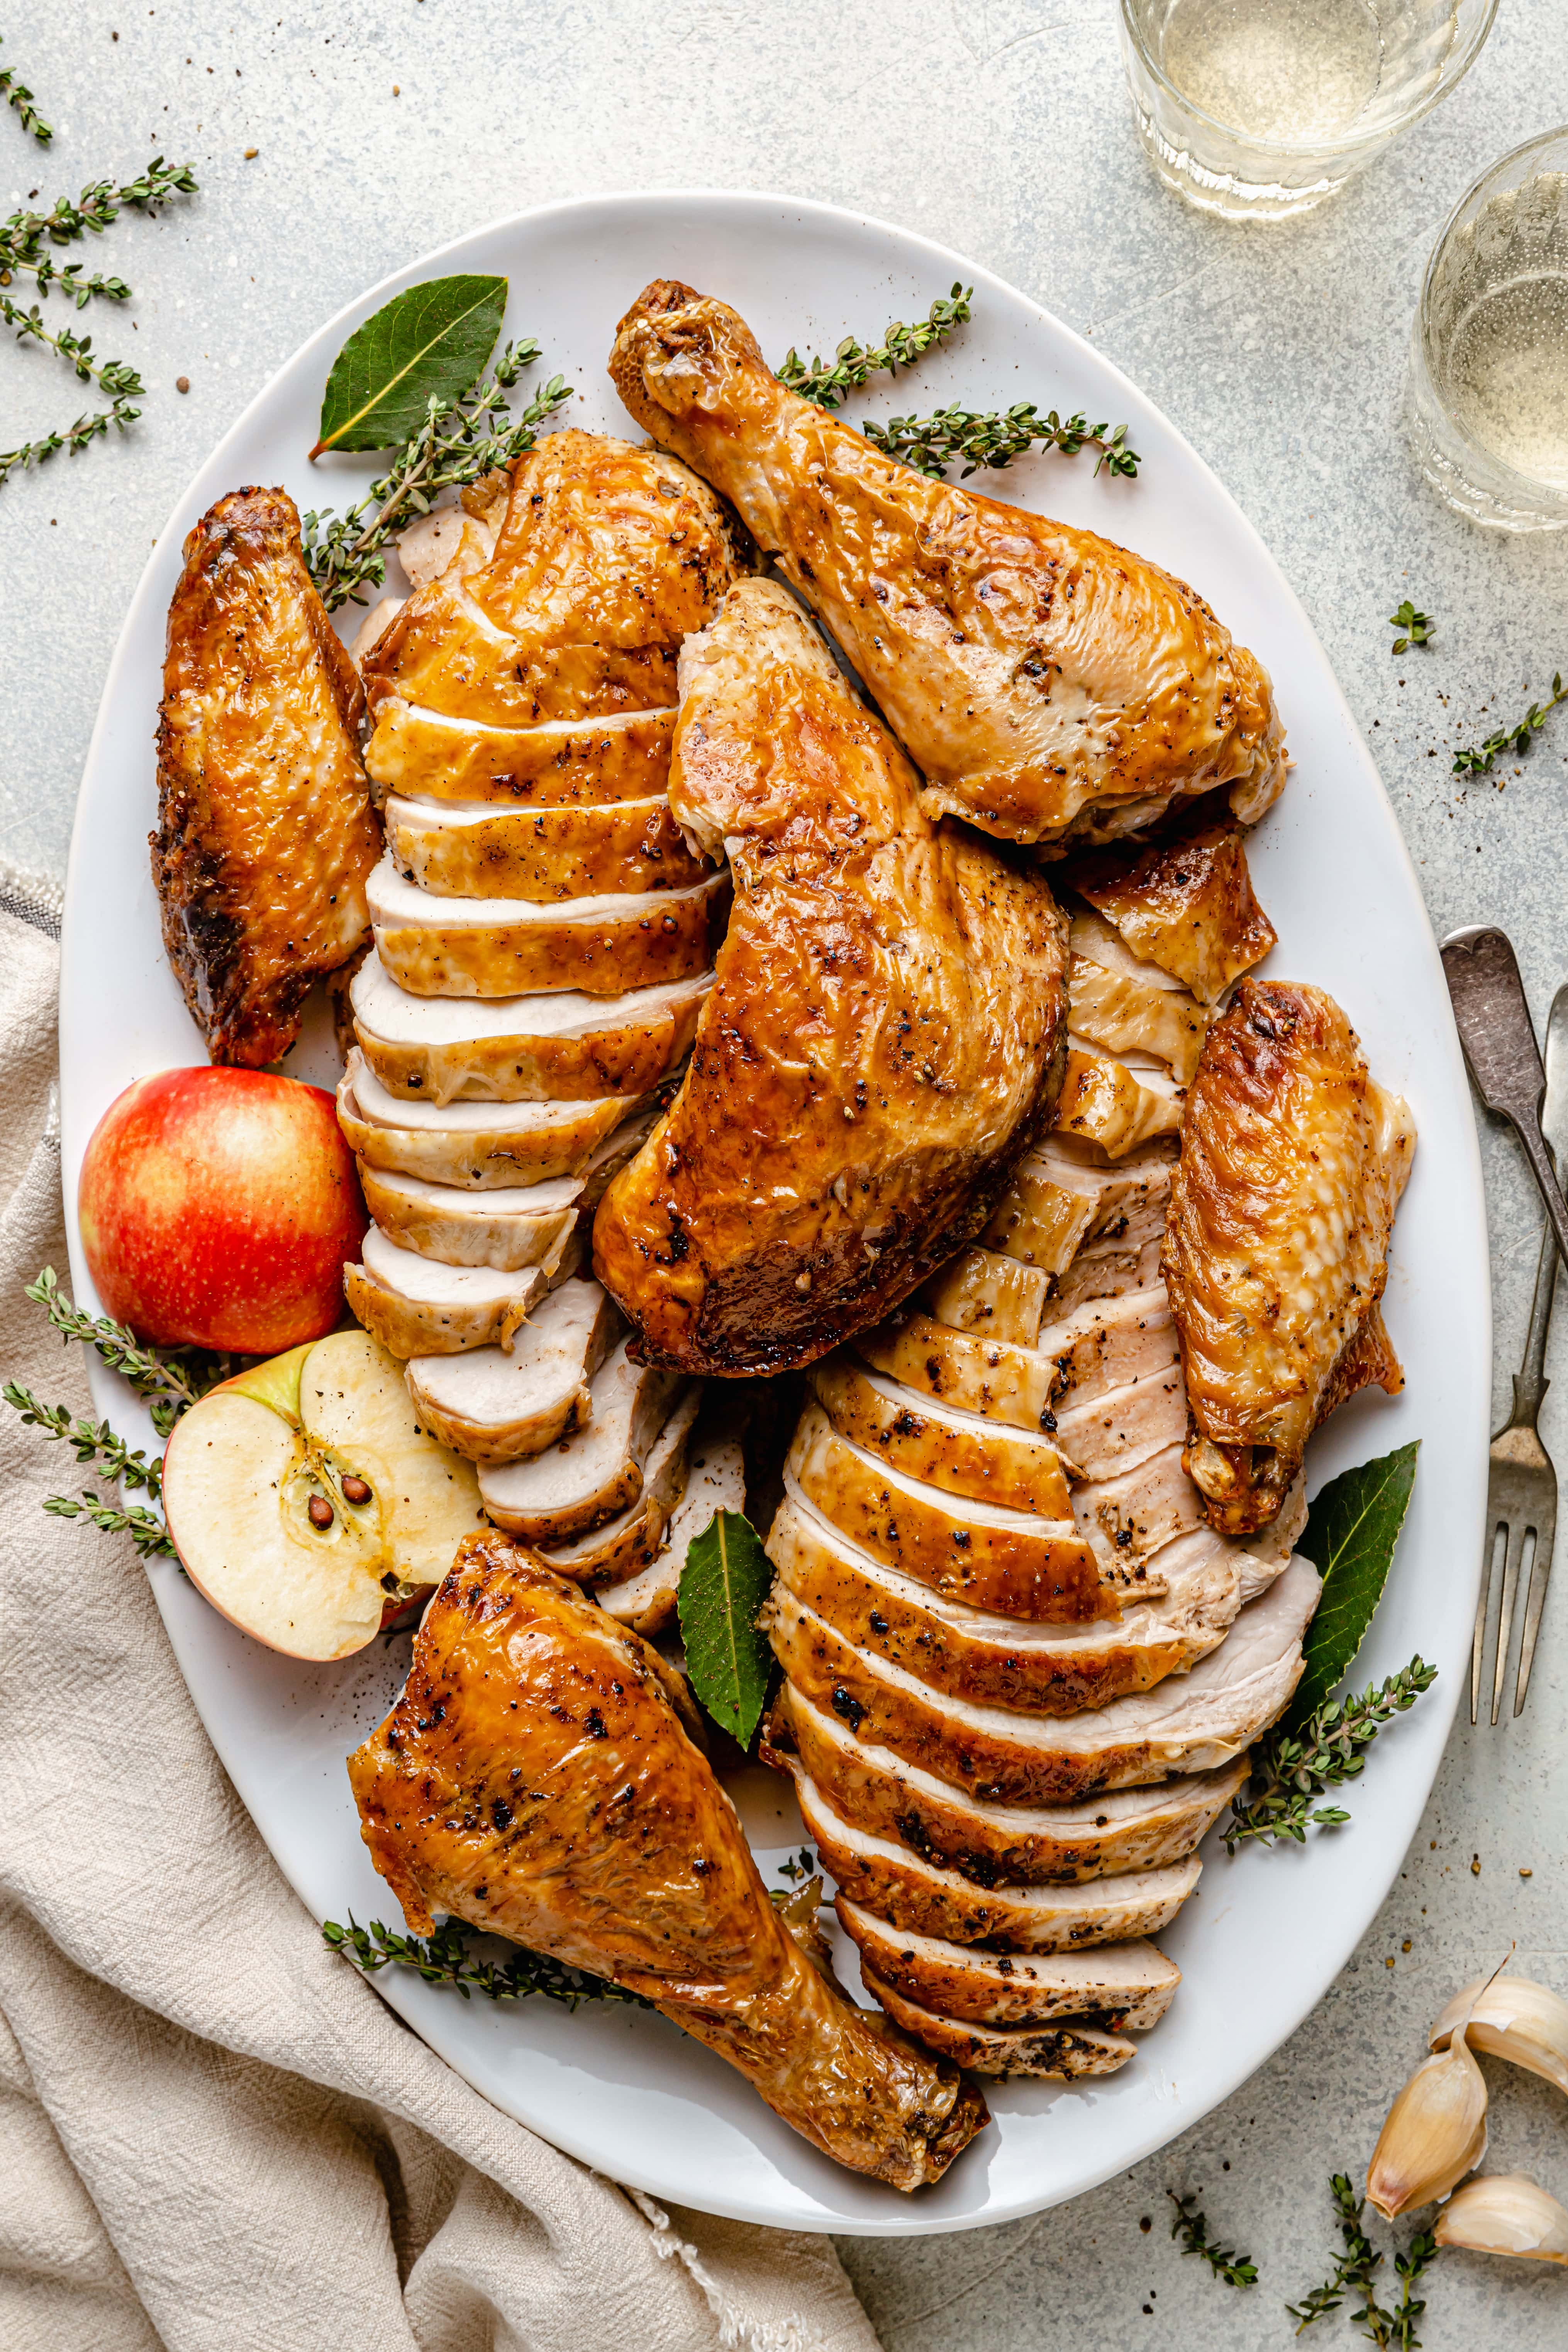
Step Six: Roast the turkey at 425, for 1-2 hours, or until the thickest part of the breast reaches 160 degrees Fahrenheit, rotating the pan halfway through. Start to check for doneness around 60 minutes. Remove the turkey from the oven and then transfer to a cutting board. Tent with foil and let the turkey rest for 30 minutes before carving.
Should You Roast the Turkey Covered or Uncovered?
For that golden brown crispy skin, you’ll need to roast the turkey uncovered. However, if the skin on the turkey starts to become too brown too quickly then you can lightly tent a piece of foil overtop of the turkey to prevent it from burning.
Tips and Tricks for the Best Roasted Turkey
- To ensure the turkey cooks evenly, I like to take it out of the fridge around 30 minutes before I begin to prep it.
- For ultimate crispy skin, every time, be sure to thoroughly pat both the outside and inside of the turkey dry with a paper towel.
- Poultry needs salt to really be flavorful so don’t skimp on it! There’s no need to be overly heavy handed but feel free to liberally season both the inside and the outside of the bird.
- Use a meat thermometer. Remove the turkey from the oven when the internal temperature reaches 160 degrees in the thickest part of the breast. The temperature of the turkey will continue to rise as it rests.
- Let the turkey rest before carving! This step makes all the difference when it comes to getting juicy turkey. Letting the turkey rest before carving allows the juices to redistribute evenly throughout the meat for the most tender and flavorful chicken every time.
Can I Prep The Turkey in Advance?
Yes! You can easily prep your veggies, and spatchcock and season your turkey up to two days in advance. When it’s time to cook, be sure to take the turkey out of the fridge 30 minutes before you are ready to cook so that it can reach room temperature and cook more evenly.
How to Store
You can store your roasted turkey in an air-tight container in the fridge for up to three to four days.
What to Do With Leftover Turkey
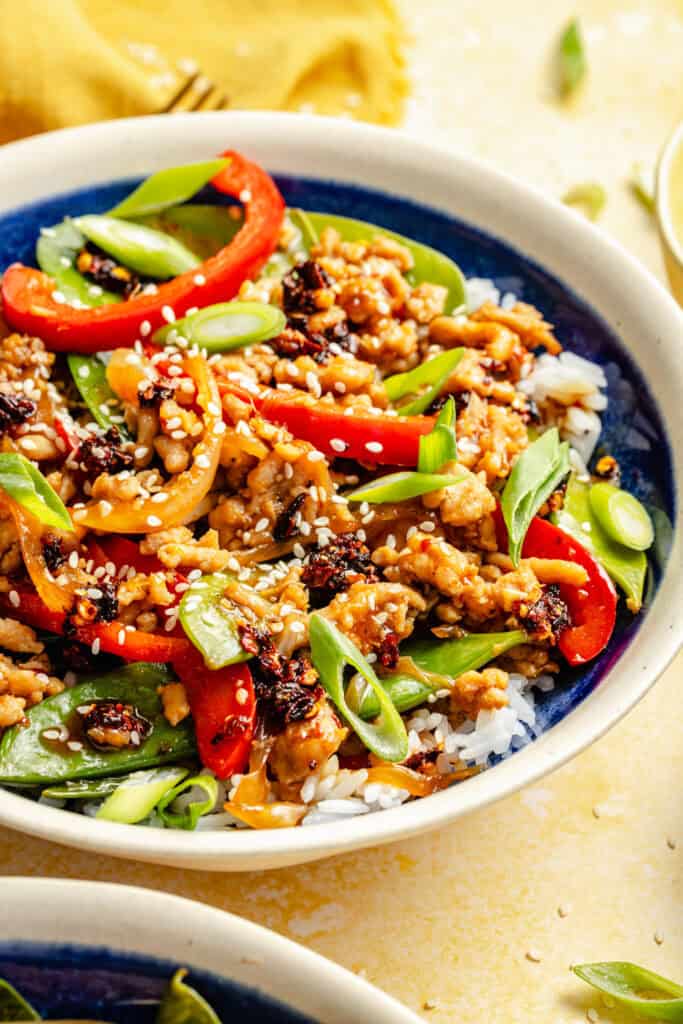
Leftover roasted turkey is one of my very favorite things because it’s incredibly versatile and it’s easy to use in recipes that call for cooked chicken. If you have leftover turkey, I’ve included a few ways to reuse it below! Be sure to check out this post on Healthy and Delicious Ways to Use Leftover Turkey.
Here are a few reader favorite ways to use leftover turkey:
More Reader Favorite Holiday Recipes
- Homemade Gravy
- Homemade Cranberry Sauce
- Healthier Green Bean Casserole
- Cornbread Sausage Stuffing
- Sweet Potato Casserole
- Loaded Mashed Cauliflower
- Butternut Squash Mac and Cheese
- Herbed Brown Butter Cornbread
I hope you give this Simple Roasted Spatchcock Turkey a try! It’s an easy and delicious dinner!
If you do give this recipe a try, I want to know! Leave a comment with a star rating below. You can also snap a photo & tag @allthehealthythings on INSTAGRAM. Your reviews help support All the Healthy Things and make it possible for me to continue to create the recipes you know and love.
Print
Simple Roasted Spatchcock Turkey
- Prep Time: 20 minutes
- Cook Time: 2 hours
- Total Time: 2 hours 20 minutes
- Yield: 8 1x
- Category: Dinner
- Method: Roasting
- Cuisine: American
- Diet: Gluten Free
Description
This Roasted Spatchcock Turkey recipe is incredibly simple and a great introduction to roasting a whole turkey. All you need are a few simple ingredients for a delicious and juicy turkey.
Ingredients
- 1 – 12 to 14 pound turkey, spatchcocked and patted dry
- 2 large carrots, cut into large chunks
- 1 large yellow onion, cut into pieces
- 2 celery stalks, cut into large pieces
- 1 large apple, cut into 4 large pieces (I used honey crisp)
- 6 cloves garlic, smashed
- 2 dried bay leaves
- 2 tablespoons avocado or olive oil
- kosher salt, to taste
- 1–2 teaspoons fresh cracked black pepper, plus more to taste
Instructions
- Preheat oven to 425 degrees.
- Spatchcock the Turkey: On a sturdy surface place the turkey breast side down. Use a sharp pair of kitchen shear to cut alongside the right side of the backbone. Next, cut alongside the left side of the backbone and remove it from the bird. Set the backbone aside to roast later. Flip the turkey over, breast side up, and point the legs inward toward the breast. Use your hands to press down on the middle of the turkey to break the backbone and flatten the bird. Trim off any excess fat or skin from around the neck of the turkey. Pat the turkey dry all over with paper towels and now you’re ready to cook the turkey!
- Place the carrots, onion, celery, apple, garlic cloves, and dried bay leaves in the bottom of your roasting pan.
- Next, season the underside of the turkey liberally with salt and pepper. Flip the turkey over, breast side up, and then place on top of the veggies. Tuck the turkey wings behind the breast to ensure they don’t burn.
- Use a basting brush to brush the turkey skin with oil being sure to get every nook and cranny of the skin. Then season liberally with salt and pepper.
- Roast the turkey at 425, for 1-2 hours, or until the thickest part of the breast reaches 160 degrees Fahrenheit, rotating the pan halfway through. Start to check for doneness around 60 minutes. Remove the turkey from the oven and then transfer to a cutting board. Tent with foil and let rest 30 minutes before carving.


Hi Ashlea! I’m wanting to use this method this year for thanksgiving, however we want to brine our turkey. Would you recommend we brine the turkey first, then spatchcock? Or spatchcock first, then brine & cook? Thanks!
Hi Kelsey! I’d recommend to spatchcock first and then brine and cook. I hope that helps!
Definitely fail proof. The spatchcock method also leaves room in the oven for other dishes.
It was crispy on the outside and breast was not dry. A success for us.
This was so simple and easy to make. It also cooked so fast! I made my turkey early and was able to make it and broth in one day. The recipe was easy to follow and the turkey came out so good.