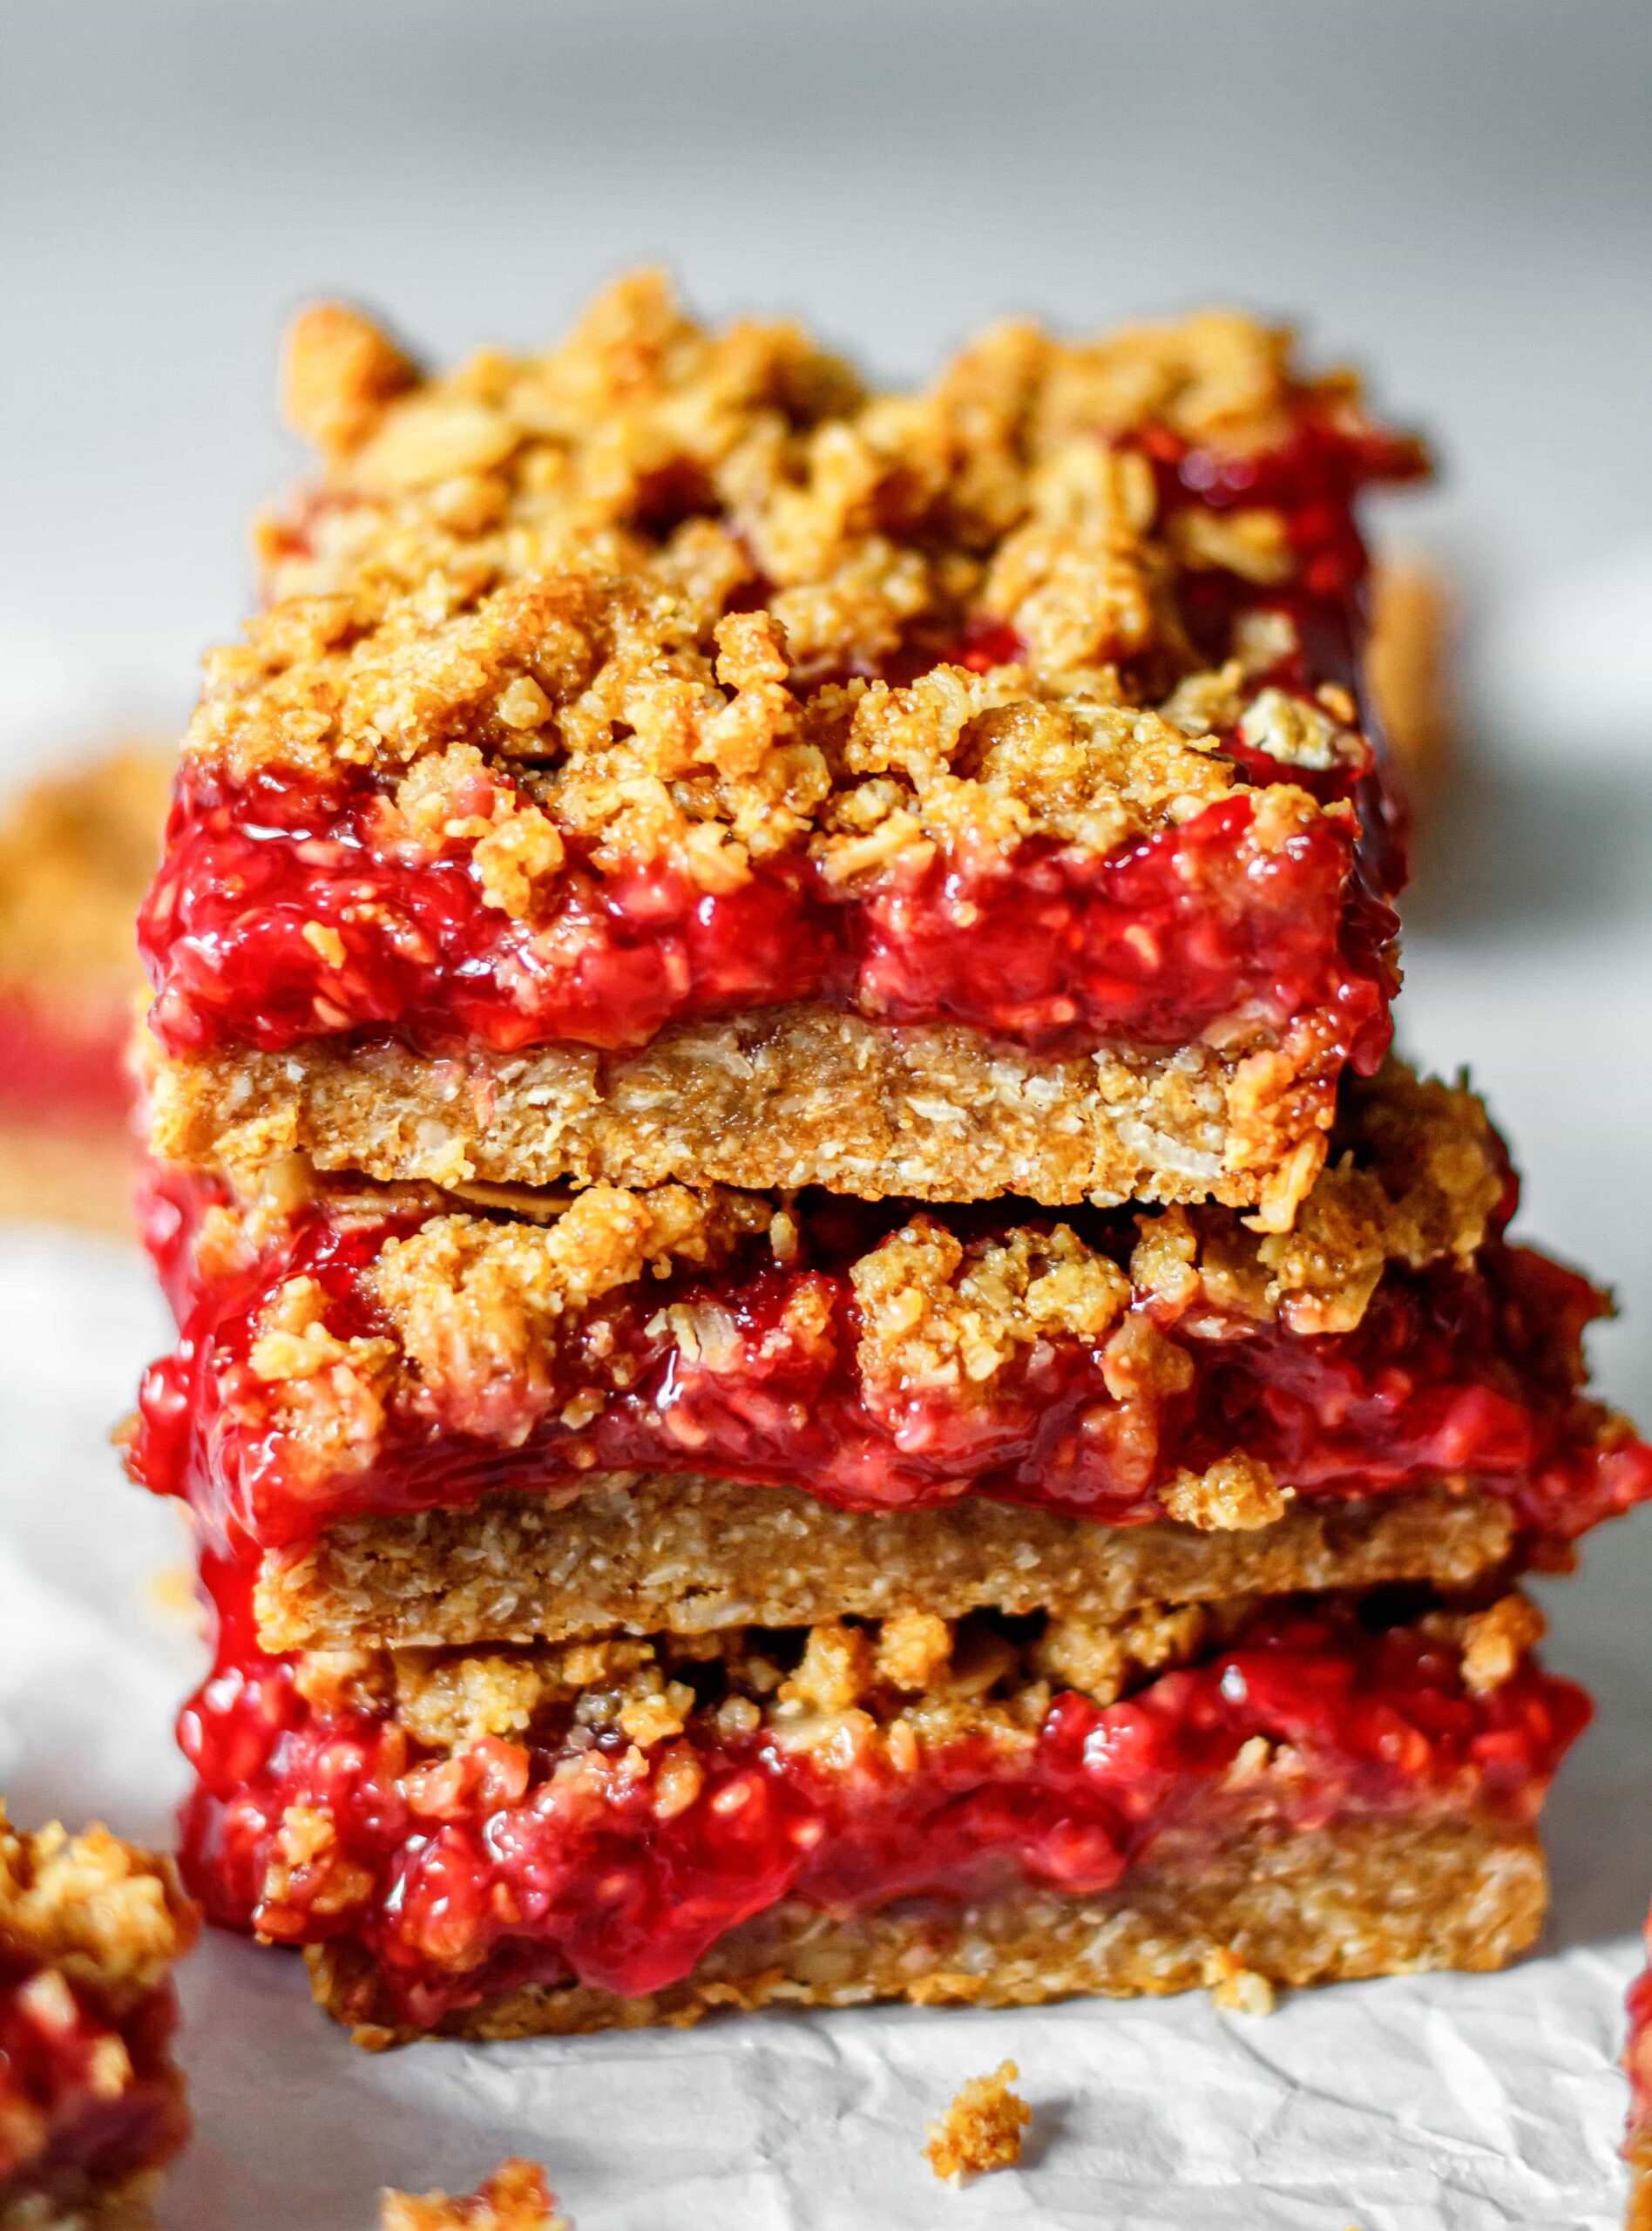
These Gluten Free Raspberry Oatmeal Bars are made with juicy fresh raspberries, whole grain oats, and sweetened with honey and brown sugar. Not only are they delicious, these raspberry bars are easy to make and perfect as either a treat or afternoon snack!

The BEST Raspberry Oatmeal Bars
To know me is to know I love a delicious slice of pie, but the next best thing are these delicious raspberry oatmeal crumb bars that take like a slice of pie with half the work.
There are so many delicious fruit-based desserts on All the Healthy Things and these raspberry crumb bars are no exception. They’re one of my favorite healthy raspberry recipes and with plenty of five-star ratings (and ultimate husband approval) I know you will love them. They’re a simple and easy treat to make with all of those juicy, delicious summer raspberries that are so perfect for baking.
These bars are naturally gluten free, made with simple ingredients, and sweetened with honey and a touch of brown sugar. They have the best oat cookie crust and the jammy filling has the perfect combination of sweet raspberry and tart lemon. The best part is that these bars won’t take you a lot of time to make and you can easily modify them to be completely vegan if needed!
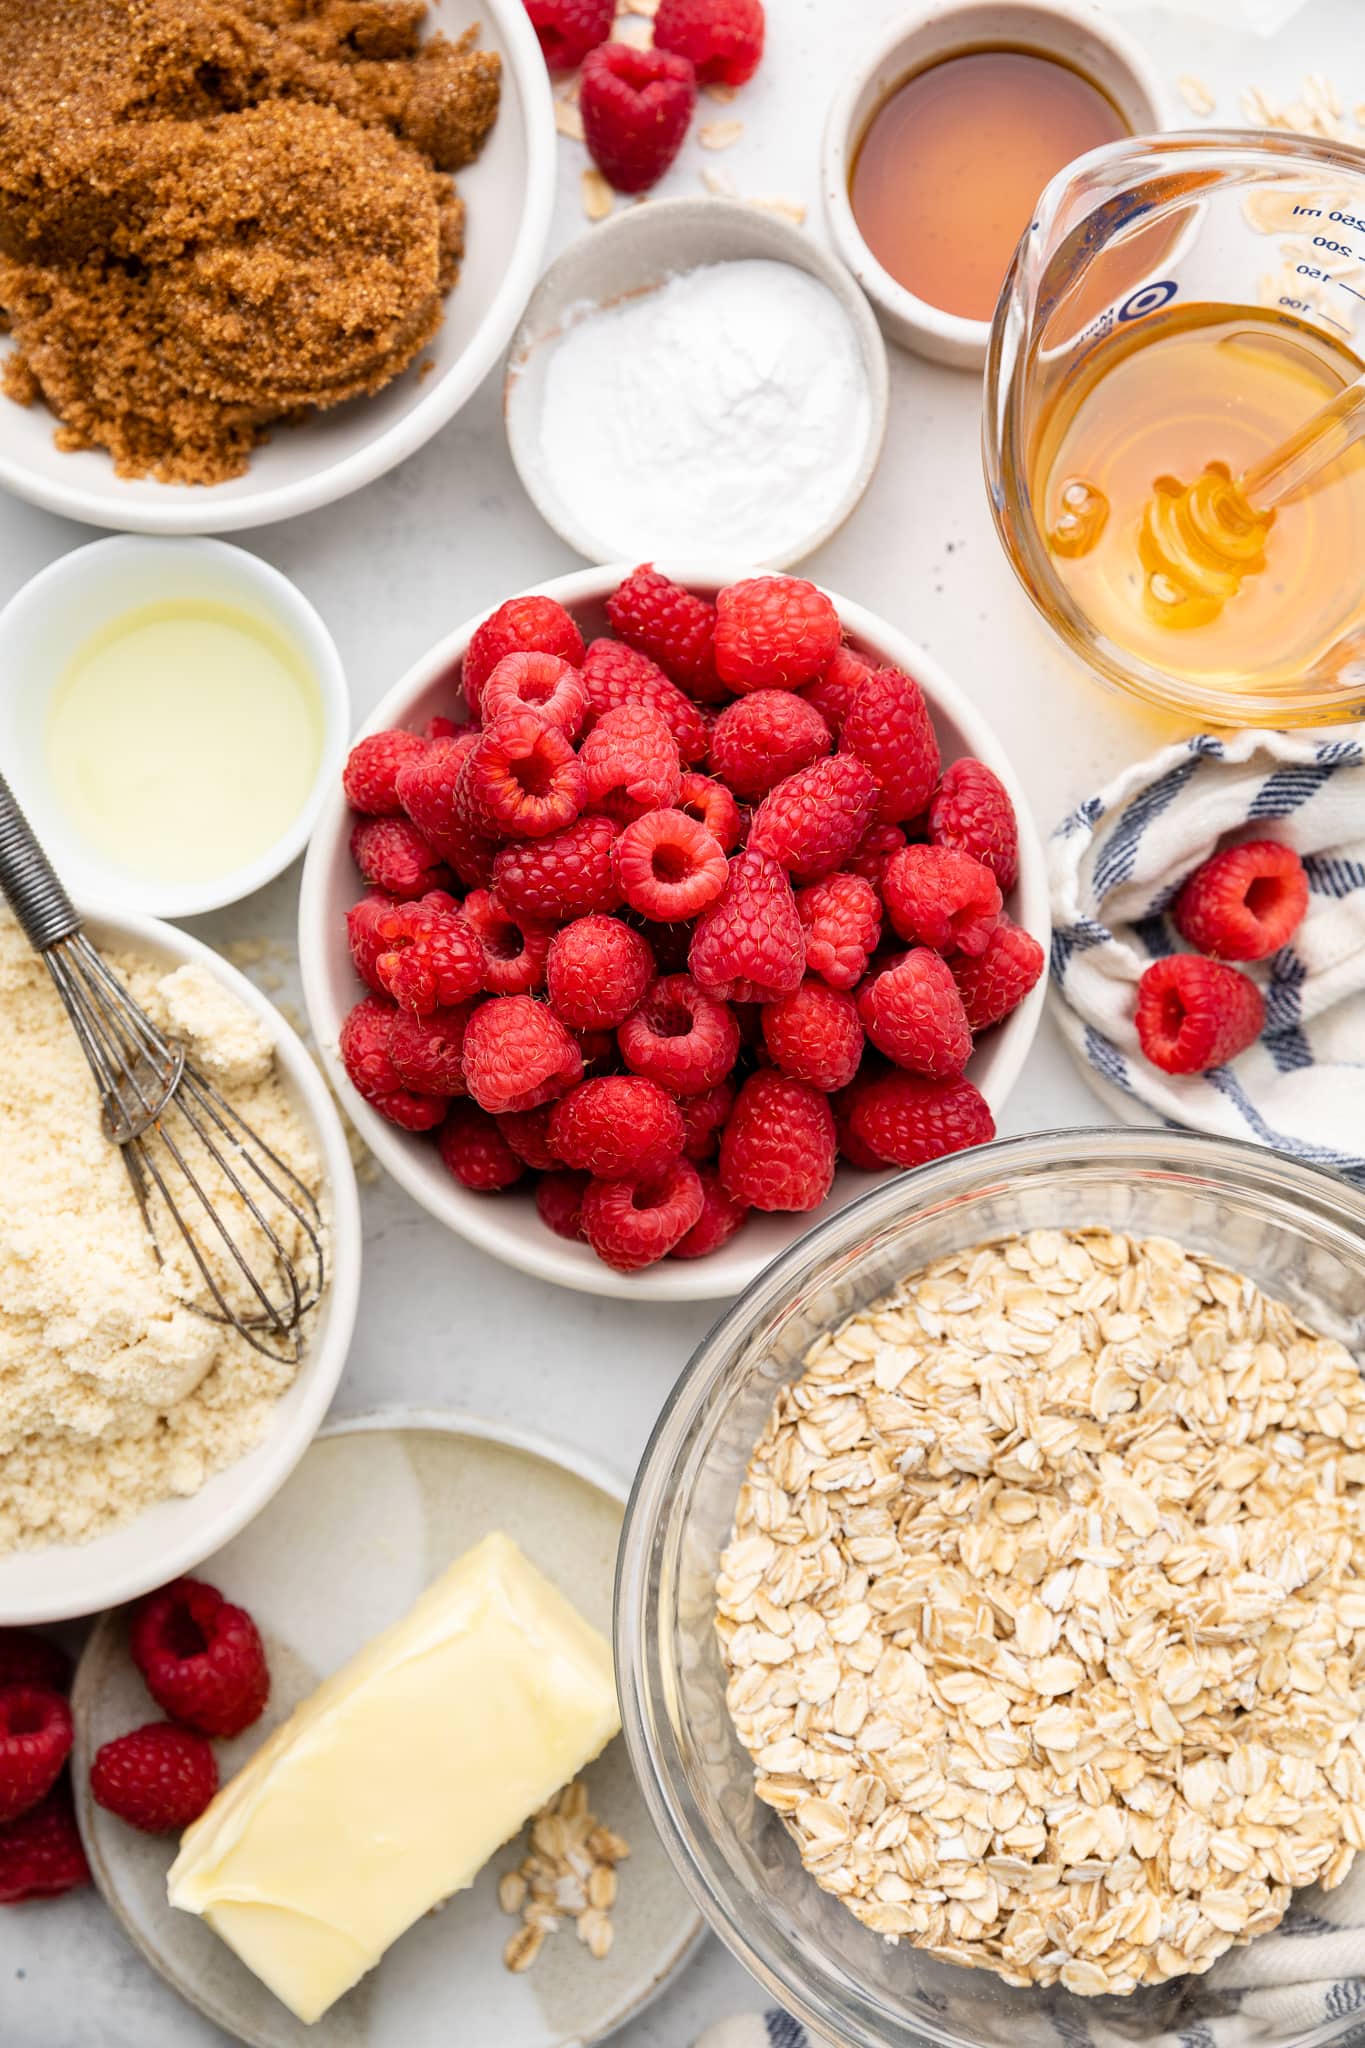
Ingredients for Gluten Free Raspberry Bars
Whole Grain Old-Fashioned Oats: if you need to ensure that these bars are completely gluten free, be sure to use certified gluten free old-fashioned oats.
Almond Flour: for the best results, I recommend using blanched almond flour. It has a finer texture and the almond skin is completely removed which gives the flour the best consistency. If you’re nut free, I include a great sub, below!
Butter: I recommend using unsalted butter for this recipe.
Brown Sugar: a bit of dark brown sugar gives the crust and crumb topping just the right amount of sweetness.
Raspberries: delicious fresh raspberries are the base of the jammy raspberry filling so be sure to pick some ripe and juicy ones.
Honey: adding a little honey is an all natural way to sweeten the raspberry filling.
Lemon Juice: you can’t have fresh berries without fresh lemon, in my personal opinion. A little citrus helps to balance out the sweet and give the bars the best flavor.
Arrowroot Starch: Arrowroot starch thickens the raspberry jam so it doesn’t spill out of the bars.
Vanilla Extract: are they even raspberry oat bars without some good vanilla flavor?!
Substitutions and Variations
- Raspberries – I include some instructions on using raspberries, below. Some readers have also made this recipe with their favorite pre-made raspberry jam with great results!
- Almond Flour – if you need to keep these bars nut free, no problem! you can swap the almond flour for oat flour instead. Thankfully, making oat flour is so easy to make. You can use this how to make oat flour tutorial to get all the information you need.
- Butter – to keep these bars dairy free, substitute coconut oil for the butter in this recipe. For the best results, make sure the coconut oil is solid when you use it. You could also use your favorite vegan butter as another way to keep these bars vegan and dairy free!
- Brown Sugar – swap the brown sugar for coconut sugar in this recipe if you prefer!
- Honey – you can easily swap the honey for maple syrup in these raspberry crumb bars. I haven’t used another liquid sweetener but I bet it would work!
- Arrowroot Starch – if you don’t have arrowroot starch you can use cornstarch instead.
- Add a few mix-ins – you can add a few chopped walnuts or slivered almonds to the crumb topping if you want a little more crunch in your raspberry bars. You could also add some unsweetened shredded coconut to the topping as well!
Can I Use Frozen Raspberries For The Filling?
Yes! Frozen raspberries will definitely work in this recipe! One thing to be mindful of is that frozen fruit often contains a bit of extra water. To fix that issue you can thaw the raspberries completely and drain any excess liquid before using.
Another option, if you are using frozen raspberries, is to use a bit more thickener in the filling. Don’t thaw the berries and then follow the recipe as written. If the filling does not thicken up add create more of the slurry with an extra teaspoon of arrowroot starch to add to the jam.
Helpful Kitchen Tools
How to Make Healthy Raspberry Oatmeal Bars
Step One: Preheat an oven to 350 degrees.
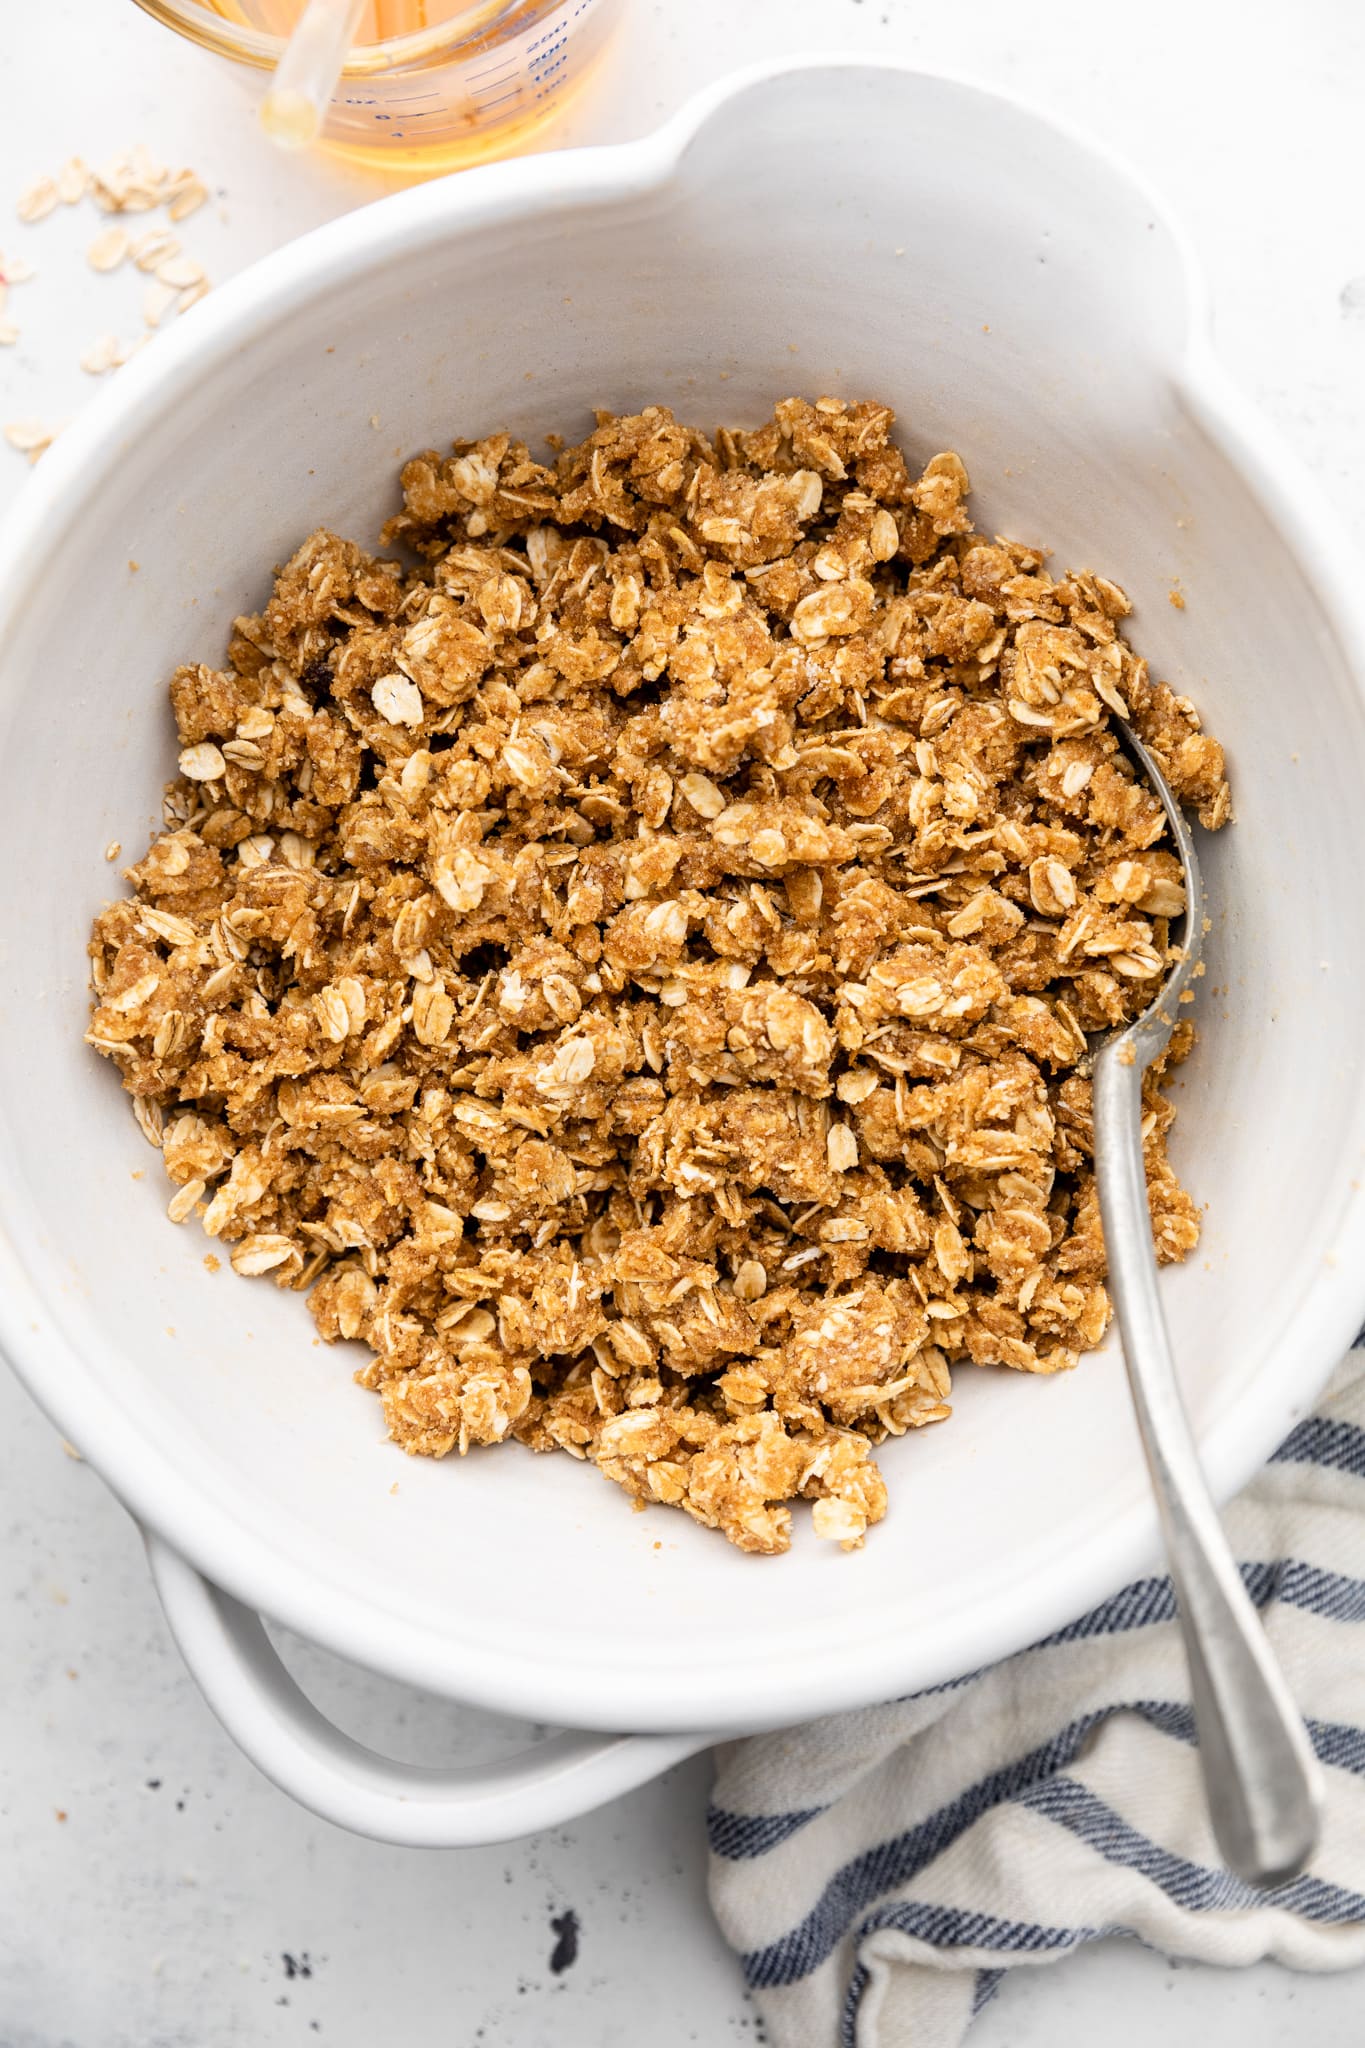
Step Two: Add the almond flour, oats, sugar, and butter to a mixing bowl. Use your hands to work the butter into the flour, sugar, and oats until it is well combined and forms a crumb like consistency.
Step Three: Press 2/3 of the crumb-crust mixture into a 8×8 pan lined with parchment paper. Bake the crust for 15 minutes, remove from the oven, and set aside.
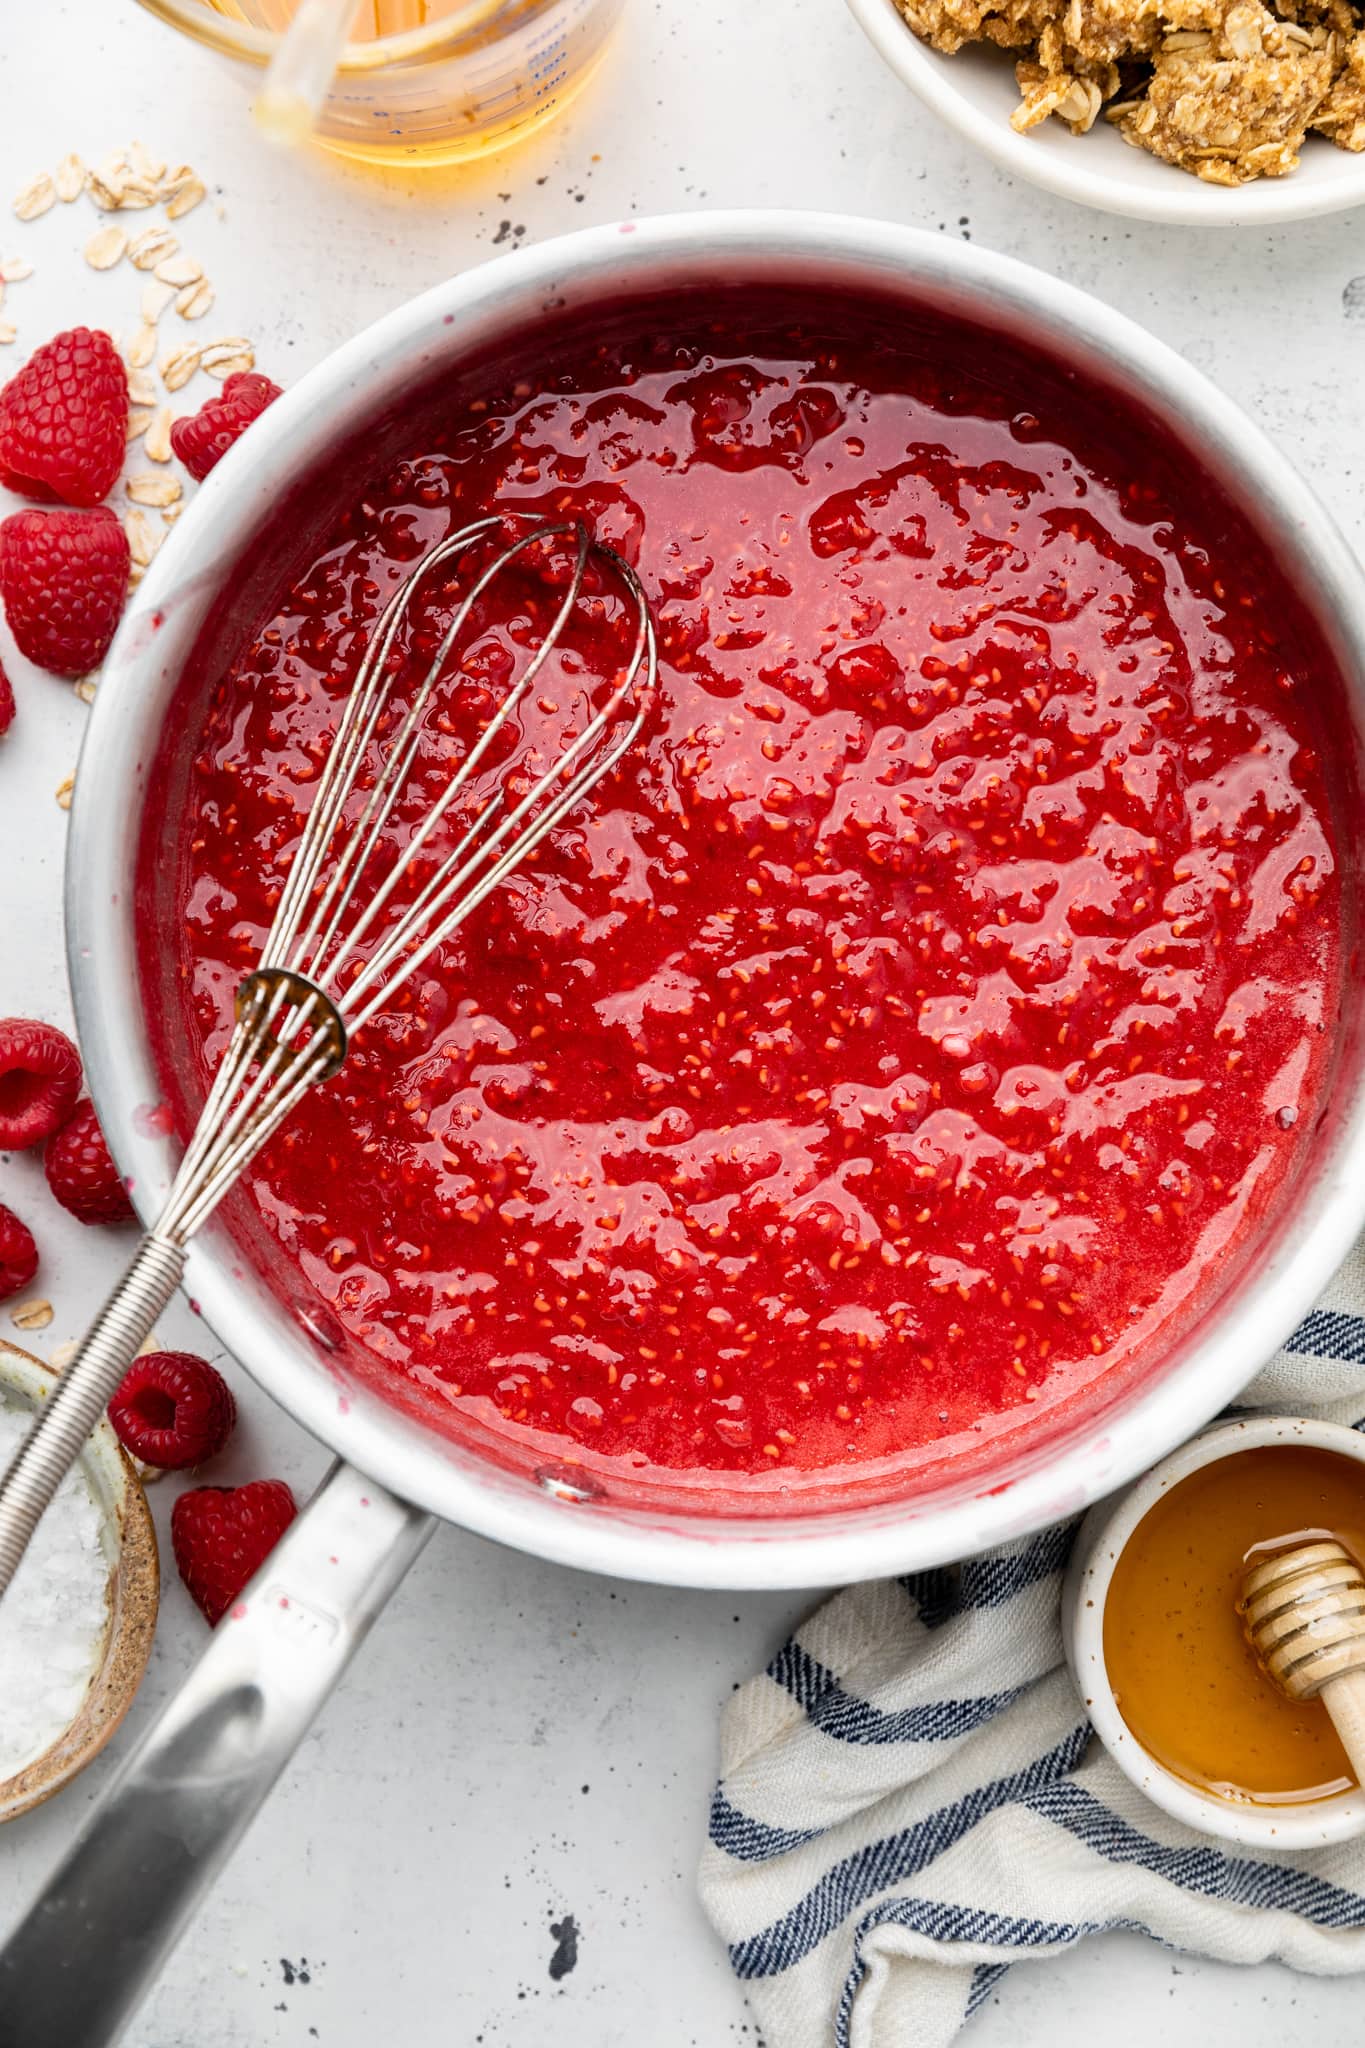
Step Four: In a medium saucepan, combine the raspberries, honey, and vanilla extract over medium-high heat. Use a wooden spoon to mash the raspberries and break them down. Bring the raspberry mixture to a boil and then boil for 5 minutes while constantly stirring.
Step Five: When the raspberries have all burst and deepened in color, whisk the lemon juice and arrowroot starch in a small bowl to make a slurry. Turn off the heat, and pour the slurry mixture into the raspberry mixture. Stir until the raspberries have thickened into a jam like consistency.
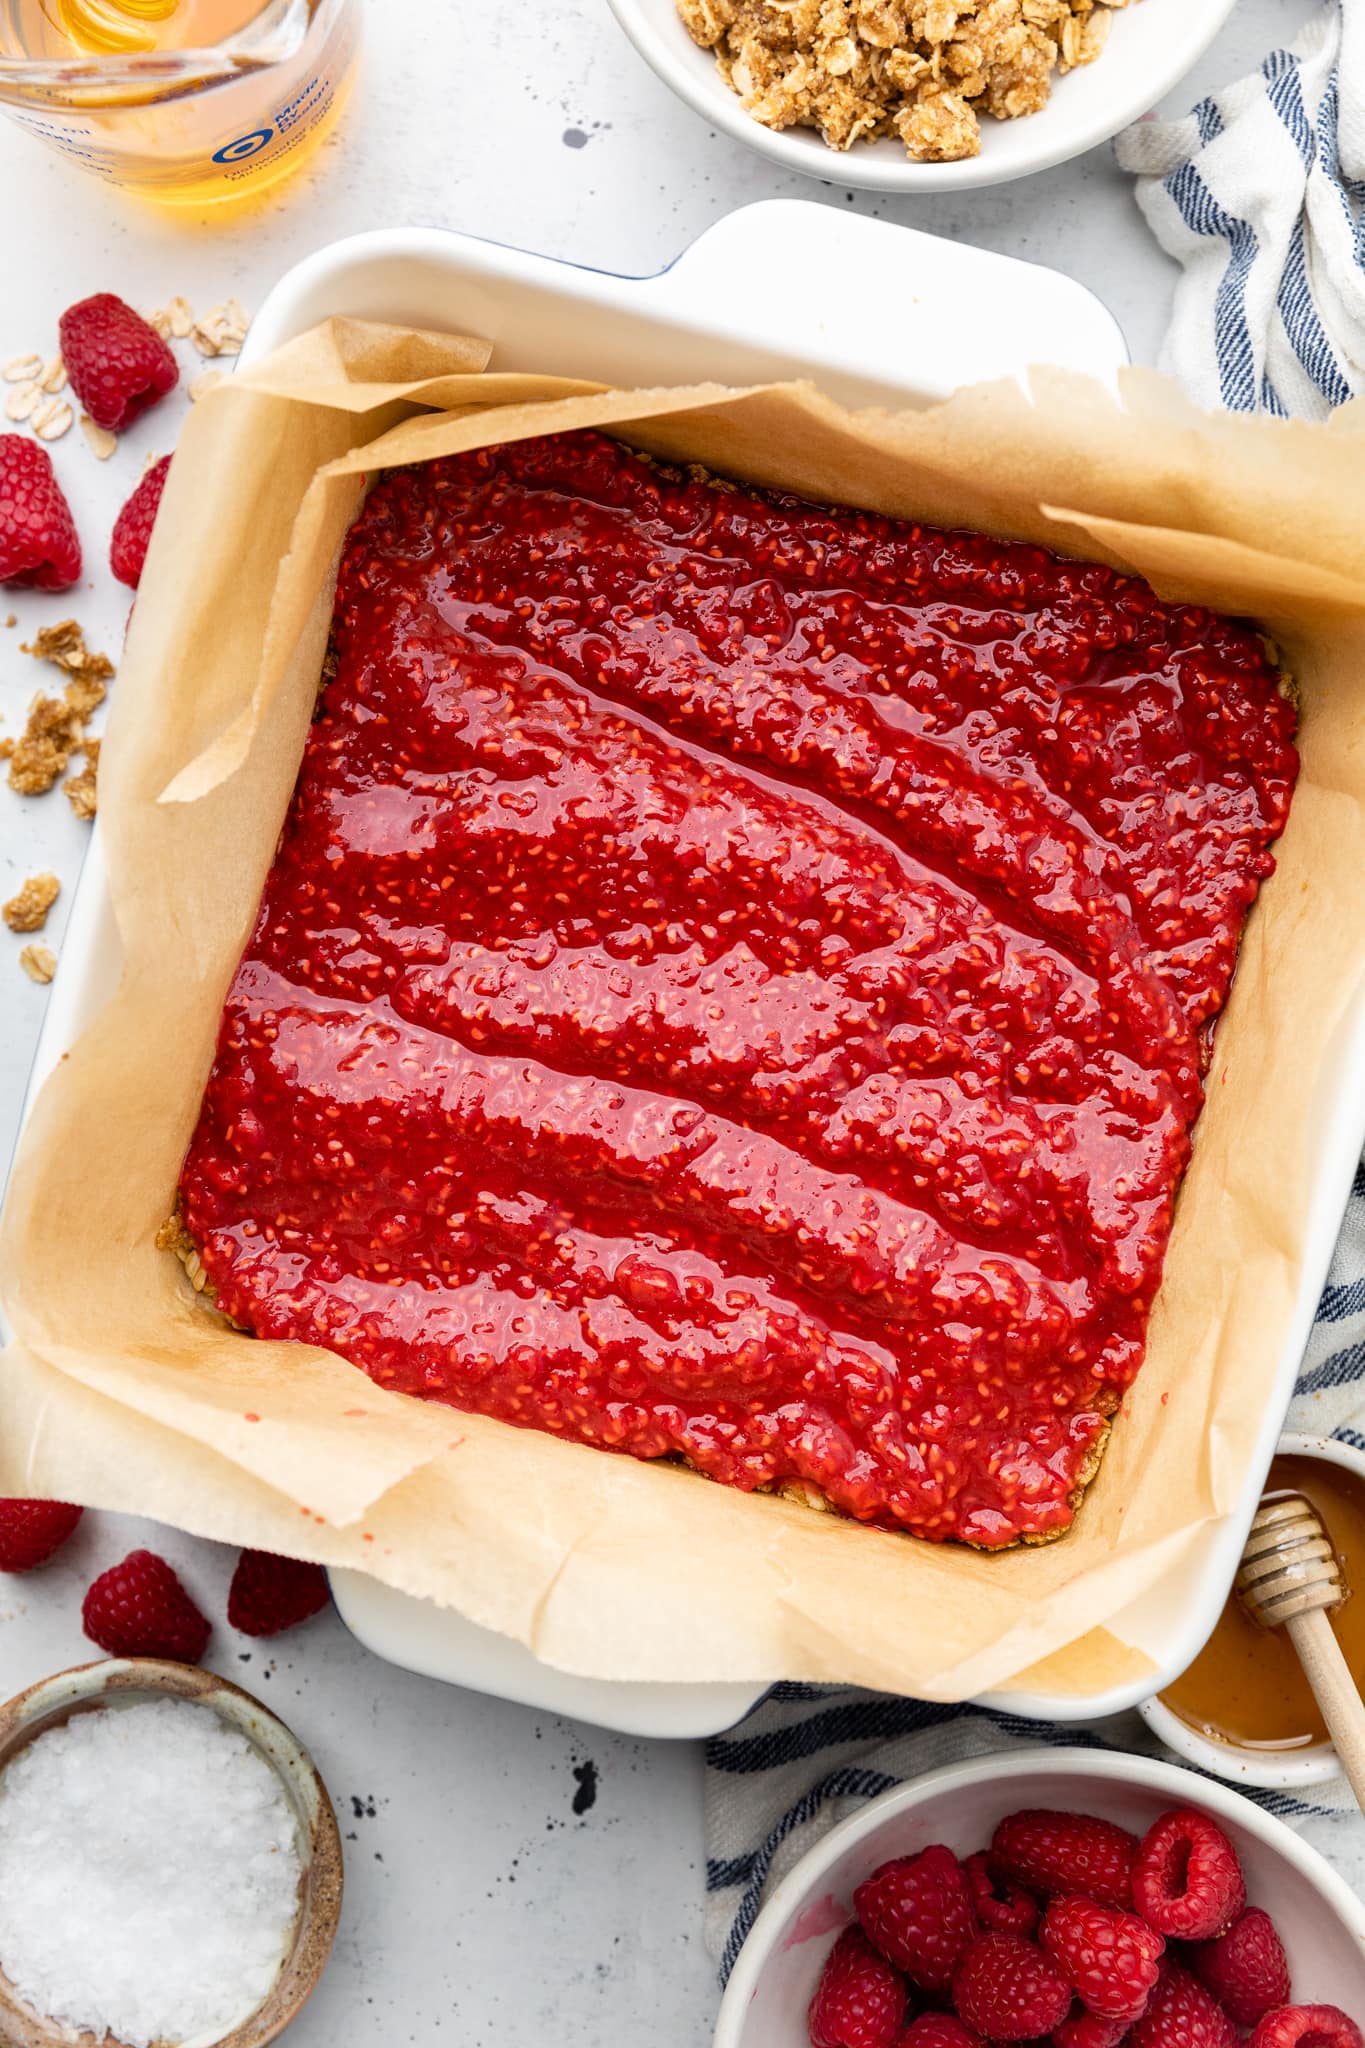
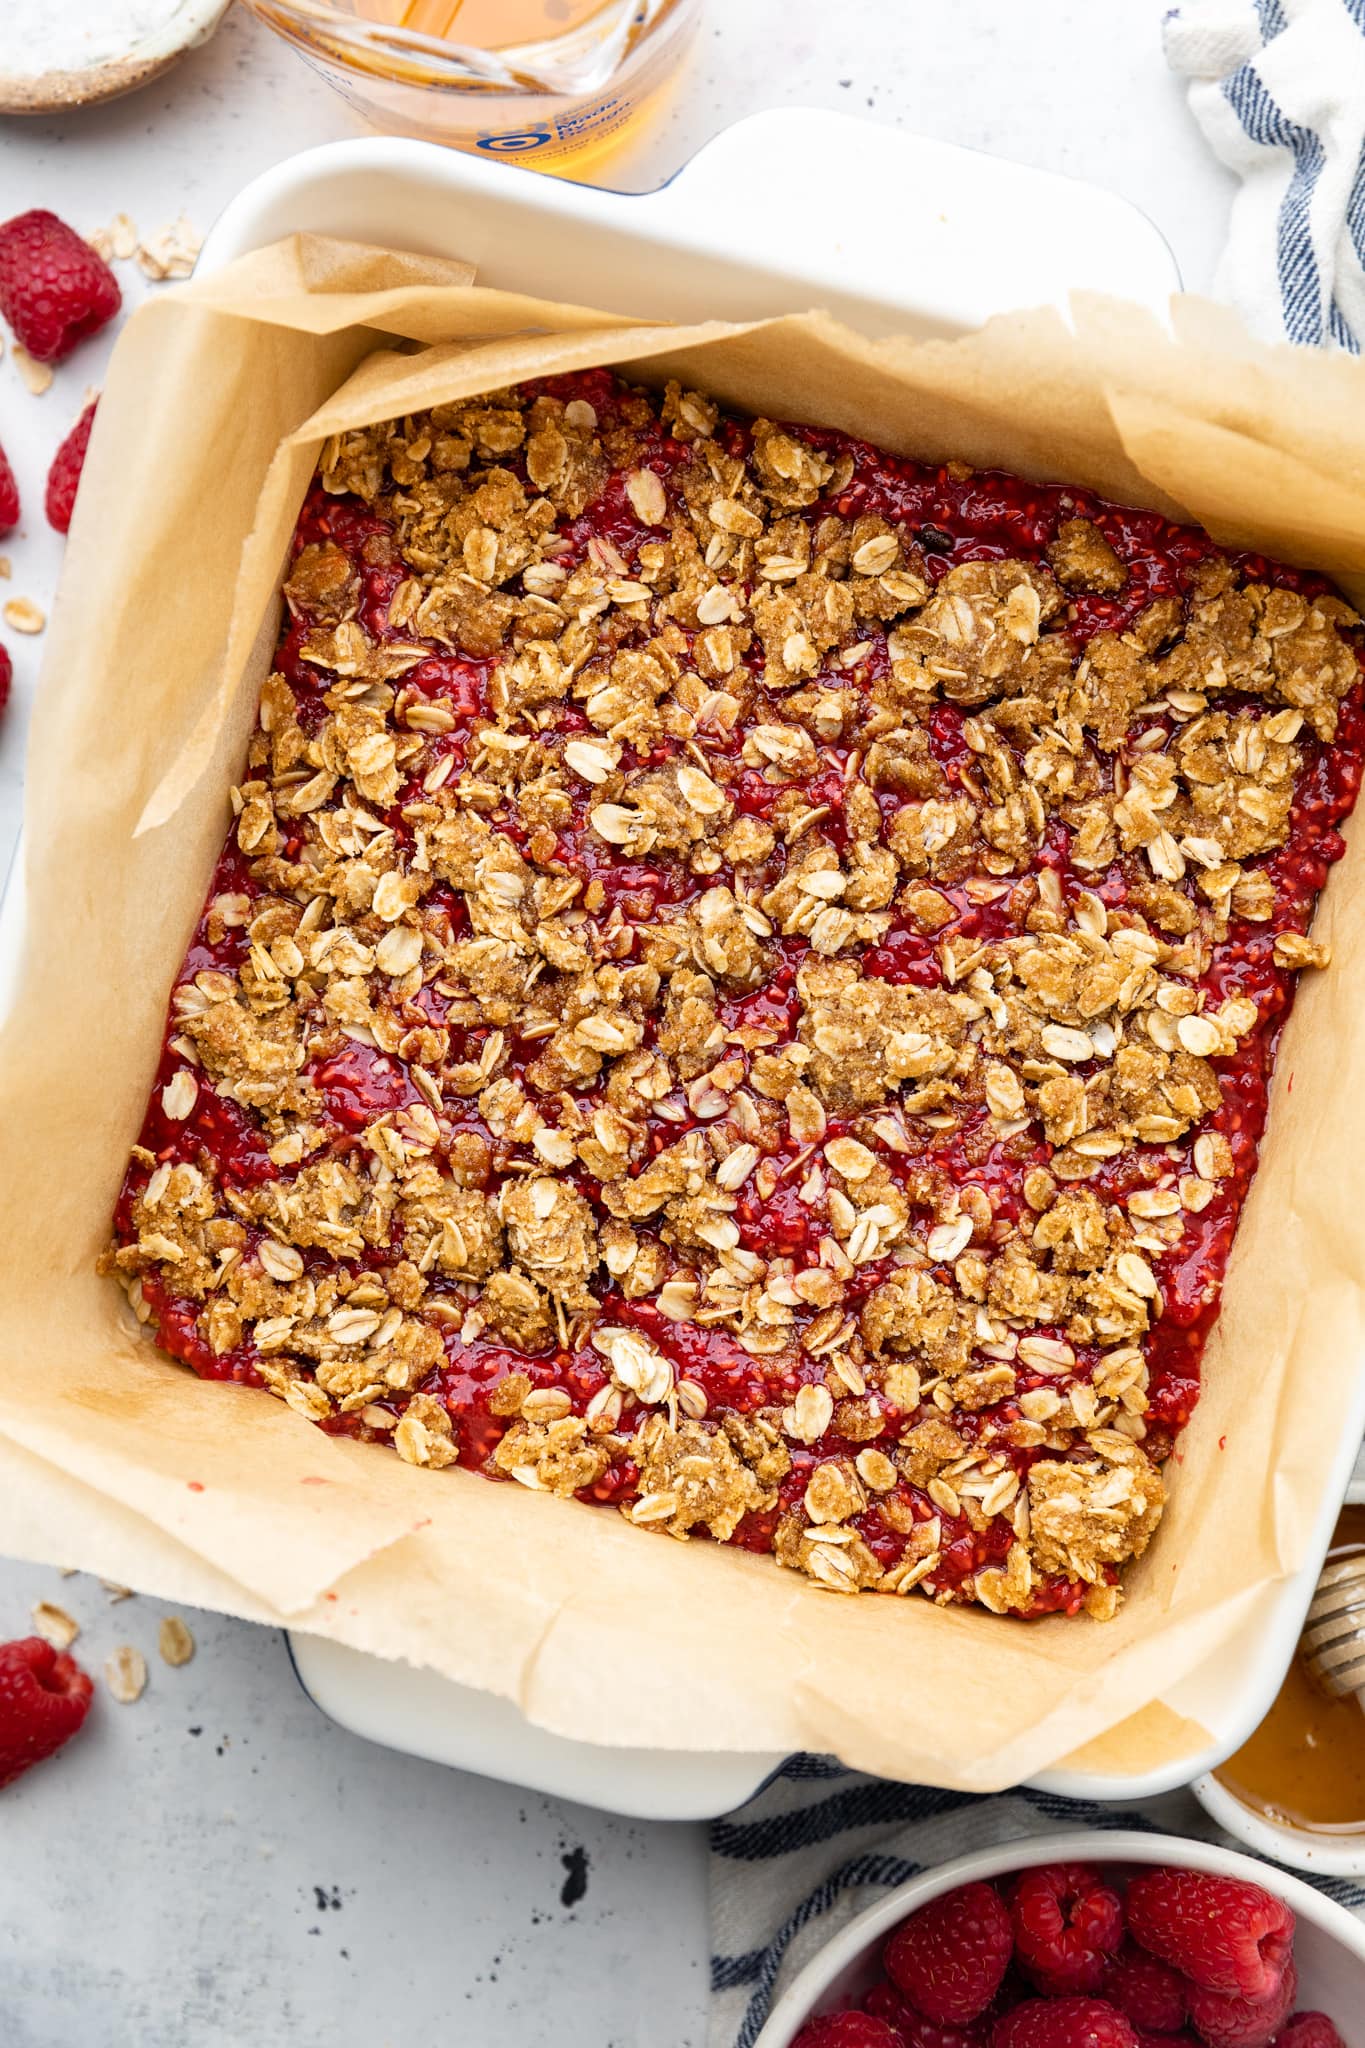
Step Six: Pour the raspberry jam on top of the baked crust. Use a silicone spatula to spread the jam evenly over the crust. Sprinkle the remaining crumb topping evenly over the jam.
Step Seven: Let the bars bake at 350 degrees for 25-30 minutes until the jam is bubbly around the edges and the topping is golden brown.
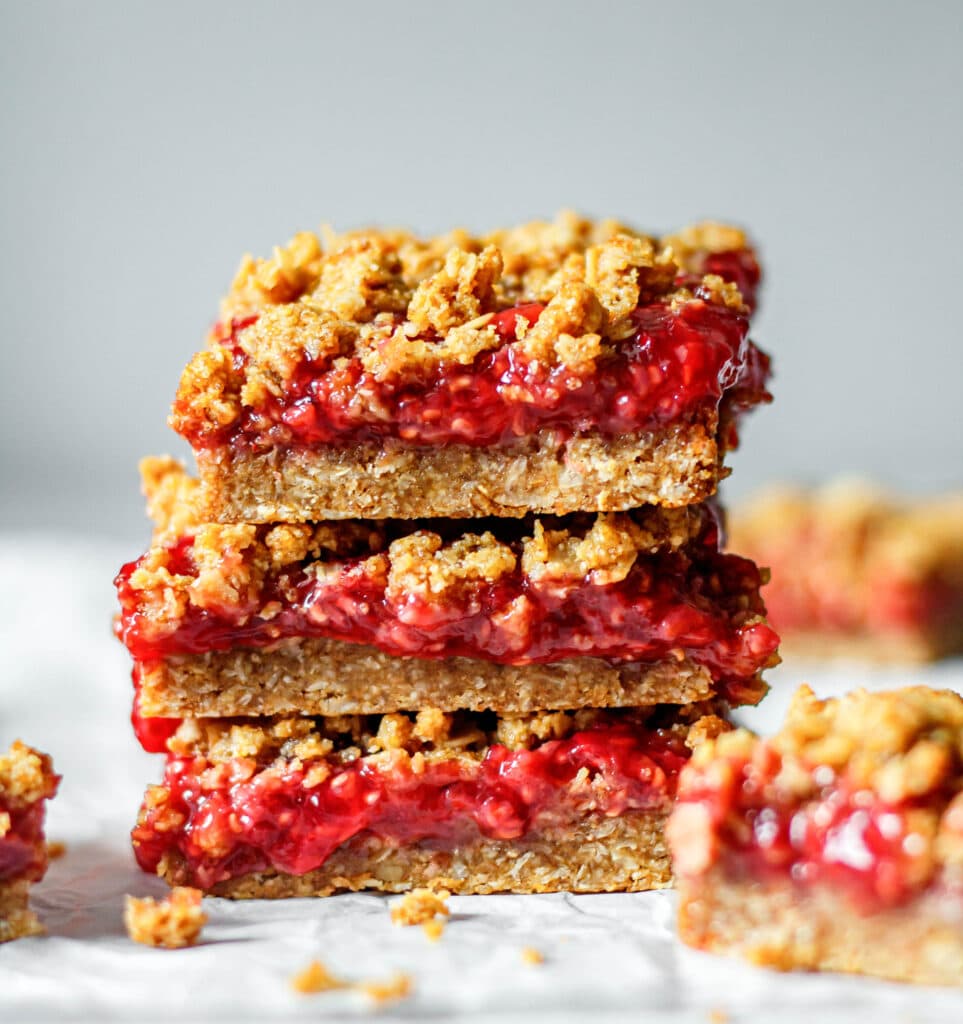
Step Eight: Let the bars come to a complete cool. Slice into squares and enjoy!
Tips and Tricks for the Raspberry Bars
- Use parchment paper. Grease the pan a bit before adding the parchment paper to help the parchment paper stick to the bottom of the pan so it won’t slip around while you are pressing in the crust.
- Let the bars come to a complete cool before slicing. It will be super tempting to cut these bars before they come to a complete cool, but to get the best results you will need to let them come to a complete cool before slicing. To help speed up the process you can stick the bars in the fridge while they cool.
- Use a sharp knife to cut the bars. A sharp knife will help you make a clean cut and get through the thick bottom layer of crust.
- Store the bars in the fridge. There is a good chance that these bars will not even last that long, but just in case you have any leftovers, store them in the fridge for safe keeping.
Will Other Fruits Work?
Yes, but thankfully, I’ve already done the work for you! Here are a few of our favorite pie and crumb bar recipes that I know you’ll love:
- Strawberry Oatmeal Crumb Bars
- Blueberry Pie Bars
- Healthy Apple Pie Crumble Bars
- Grain Free Berry Crumble Bars with Lemon Glaze
- Cranberry Crumble Bars
How to Serve and Store
Serve: these raspberry bars are great all on their own! They’re also perfect served with a scoop of vanilla ice cream or a dollop of whipped cream on top!
Store: the raspberry bars will last in the fridge for up to five days. The texture of the bars does change a bit each day. They’ll still be delicious but the crust and crumble topping will both soften as the bars sit in the fridge. You can eat the bars chilled and straight out of the fridge or you can allow them to reach room temperature before eating. You can also reheat them in the microwave for a few seconds to warm just a bit.
How to Freeze
If you don’t think you’ll be able to eat the bars fast enough you can freeze them for up 3 months. Let the bars come to a complete cool, slice, and then place on a sheet pan in the freezer. Once the bars have frozen solid, add them to a freezer safe storage bag and place them in the freezer for 3 months. When you’re ready, let each individual bar thaw in the freezer before eating.
More Reader Dessert Recipes
- Dutch Apple Pie
- Gluten Free Peach Crisp
- Oatmeal Chocolate Chip Skillet Cookie
- The Best Gluten Free Lemon Bars
- Gluten Free Blueberry Crisp
I hope you give these Healthy Raspberry Oat Bars a try! They are so easy to make, delicious, and naturally gluten free! If you do give this recipe a try, let me know!
Leave a comment with a star rating below. You can also snap a photo & tag @allthehealthythings on INSTAGRAM. Your reviews and ratings help support All the Healthy Things and make it possible for me to continue to create the recipes you trust and love.
Print
Gluten-Free Raspberry Oatmeal Bars
- Prep Time: 25 minutes
- Cook Time: 25 minutes
- Total Time: 1 hour
- Yield: 9 bars 1x
- Category: dessert
- Method: baking
- Cuisine: american
- Diet: Gluten Free
Description
These Gluten-Free Raspberry Oatmeal Bars are a delicious treat made with real food ingredients that I know you’ll love. These gluten-free bars have the perfect crust and crumb topping that is made with almond flour, gluten-free rolled oats, and a touch of brown sugar. The filling is made with fresh raspberries and just a touch of honey for sweetness. The best part is that these bars won’t take you a lot of time to make and you can easily modify them to be vegan if needed. Go ahead and add these Gluten-Free Raspberry Oatmeal Bars to your weekend baking list. With just a few simple steps you’ll have a crowd pleasing wholesome dessert that everyone will love.
Ingredients
- 1 1/2 cups gluten-free rolled oats
- 1 cup almond flour
- 2/3 cup dark brown sugar
- 1/2 cup butter or coconut oil
- 12oz fresh raspberries
- 1/3 cup honey
- 1 teaspoon vanilla extract
- 2 tablespoons lemon juice
- 2 tbsp arrowroot starch
Instructions
- Preheat an oven to 350 degrees.
- Add the almond flour, oats, sugar, and butter to a mixing bowl. Use your hands to work the butter into the flour, sugar, and oats until it is well combined and forms a dough like consistency.
- Press 2/3 of the crumb-crust mixture into a 8×8 pan lined with parchment paper. Bake the crust for 15 minutes, remove from the oven, and set aside.
- In a medium saucepan, combine the raspberries, honey, and vanilla extract over medium-high heat. Use a wooden spoon to mash the raspberries and break them down. Bring the raspberry mixture to a boil and then boil for 5 minutes while constantly stirring.
- When the raspberries have all burst and deepened in color, whisk the lemon juice and arrowroot starch in a small bowl to make a slurry. Turn off the heat, and pour the slurry mixture into the raspberries. Stir until the mixture has thickened into a jam like consistency.
- Pour the raspberry jam on top of the crust and then use a silicone spatula to spread it evenly over the crust. Sprinkle the remaining crumb topping evenly over the jam.
- Let the bars bake at 350 degrees for 25-30 minutes until the jam is bubbly around the edges and the top is golden brown.
- Let the bars come to a complete cool. Slice into squares and enjoy!
Recipe by: Ashlea Carver / All the Healthy Things | Photography by: THE MINDFUL HAPA


Wow! These bars are absolutely delicious! One of my children just started a dairy free diet, and I made them for him, only to discover he doesn’t like raspberries! Whatever, lol! More for me! I will definitely be making these again!
I made these today & they’ll be added to our regular rotation when we want a sweet treat. So easy and absolutely delicious! It was hard waiting for them to cool, but it really was worth it!
I’m so glad you love the recipe, Crystal! Thank you for sharing!
These raspberry bars were a bit! Super simple and delicious. We will definitely make these again!
So glad you loved them, Megan!
These were soooo delicious. I ate one while it was still warm and that was divine. I am not gluten free but I love to have people over for tea and I have various friends who are GF, so it’s great to have easy, delicious recipes like this!
Thanks for sharing, Steph! I’m so glad you enjoyed the recipe!
How can I sub monk fruit or other alternative sweetness for the sugar in your recipes?
These are sooo good! I made these late last night and just had one this morning. I loved how quick they were to make and how all the ingredients are some of our pantry staples. I used frozen raspberries and thawed and drained them as the instructions said and they came out great!
My husband and I both loved them! Thanks for this great recipe! As hard as it is to wait for them to cool, I actually thought they tasted even better on day 2!!
SO delicious! And so easy to make! I’ll definitely be making them again and again.
Super simple with ingredients I had in my pantry. I made them with cherries and it turned out great!
Absolutely delicious! The filling is perfection and the crumbly top is so satisfying. I served these warm with vanilla ice cream on top and they were a huge hit with my entire family! 10/10 will make again!
Just made these and they are delicious! Has anyone tried to freeze then? Either making up the full recipe and freezing uncooked, or cooking and freezing them as individual bars? Thanks!
Do you think I could sub cornstarch for the arrowroot starch? These look amazing.
Made this recipe tonight for my family. It was the perfect treat. Not too sweet and super easy to put together. Another pantry-friendly dessert that is great for summer. I cooked it for a bit longer to really brown up the crust and that might have been because I used coconut oil instead of butter? Regardless- it turned out great!
I love these! I didn’t combo of fresh raspberries and frozen berry mix since i didn’t have enough fresh. Have you done this with other fruits like apple?
Thanks for the quick response!! I tried it and they are amazing!! Excited to have a quick snack for tomorrow now!
You’re so welcome, Kim! And YAY!! I’m so happy to know it worked well! Enjoy your yummy snacks!!
Yum! Do you think these would be ok with raspberry jam if I don’t have fresh raspberries on hand?
I think so! You may need to bake them for 5-10 minutes less but I think it’s worth a try!
I just made these with jam and it worked beautifully. I did slightly less cooking time.