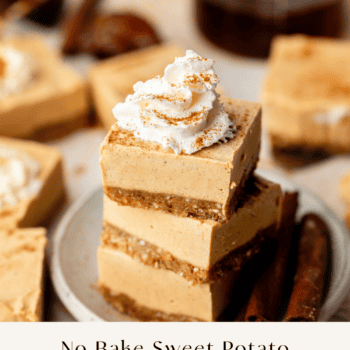
These Sweet Potato Cheesecake Bars are made with a spiced almond flour crust and a creamy sweet potato filling. This recipe is naturally sweetened, gluten-free, dairy-free, and vegan, so it’s an easy no-bake fall dessert everyone can enjoy!

Delicious No Bake Sweet Potato Cheesecake Bars
The perfect sweet treat for fall.
These Vegan Sweet Potato Cheesecake Bars taste like real-deal cheesecake but they are completely dairy-free and don’t require any baking. I love that I can make a batch of and store them in the freezer so that I always have a quick treat to enjoy at a moment’s notice.
While a traditional cheesecake will always be my jam, these are a great option for anyone who may need to avoid dairy or has someone their life that is avoiding dairy. They are also naturally sweetened, made with a few simple whole food ingredients, and entirely gluten free.
— Ashlea
More Reader Favorite No Bake Desserts
- Vegan Pumpkin Cheesecake Bars
- No Bake Strawberry Cheesecake Bars
- No Bake Lemon Blueberry Cheesecake Bars
- Healthy Key Lime Pie Bars
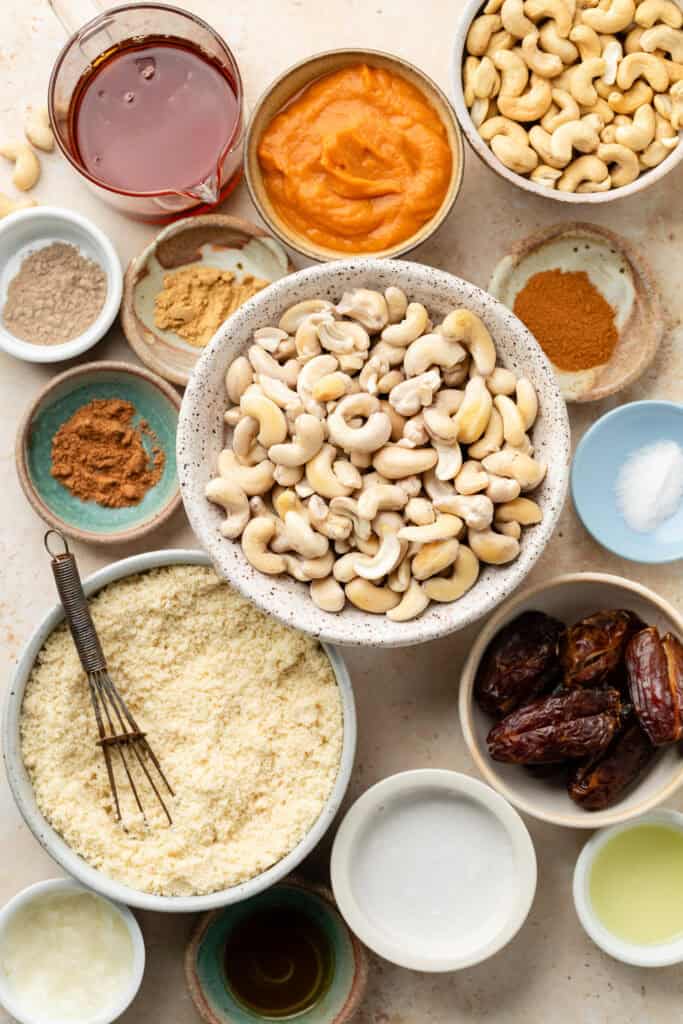
Recipe Ingredients
- Medjool Dates: these add sweet flavor, and the sticky consistency helps hold the crust together without having to use eggs as the binder to keep the bars vegan.
- Whole Cashews: you’ll use whole raw cashews in both the crust and the filling. To make the creamy cheesecake filling, you’ll soak the cashews first before blending. You can usually find raw cashews in the nut aisle or in the bulk bins of your local grocery store.
- Almond Flour: for this recipe, go with blanched almond flour which means the almond skins have been removed before grinding.
- Spices: cinnamon, ginger, nutmeg, and cardamom add warm flavor to both the crust and the filling. You’ll also need a pinch of salt to enhance the flavor of the crust.
- Vanilla Extract: a must-have in any good cheesecake recipe!
- Maple Syrup: this sweetens the bars and gives them a delicious maple flavor. Feel free to add more if you prefer your bars on the sweeter side.
- Coconut Cream: use full-fat coconut milk to create the creamy base of the cheesecake filling. Make sure to use canned coconut milk, not a refrigerated milk alternative!
- Lemon Juice: any good cheesecake has lemon juice for a bit of tang! Start with one tablespoon, and add more if you want an even more tart flavor.
- Sweet Potato Puree: you can either bake your own sweet potatoes to make puree or use canned sweet potato puree.
- Coconut Oil: this helps stabilize and solidify the bars once chilled.
Ingredient Substitutions and Additions
- Sweetener – swap the maple syrup for honey if that’s why you prefer. Feel free to add a bit more or less to the filling to suit your tastebuds.
- Almond Flour – you can use almond meal instead of finely ground almond flour if you like. Coconut flour does not work well in this recipe as it’s too drying.
- Coconut Milk – if you can’t find canned coconut milk, feel free to use full-fat coconut cream instead.
How to Make These Sweet Potato Cheesecake Bars
Step One: Line an 8×8 pan with parchment paper.
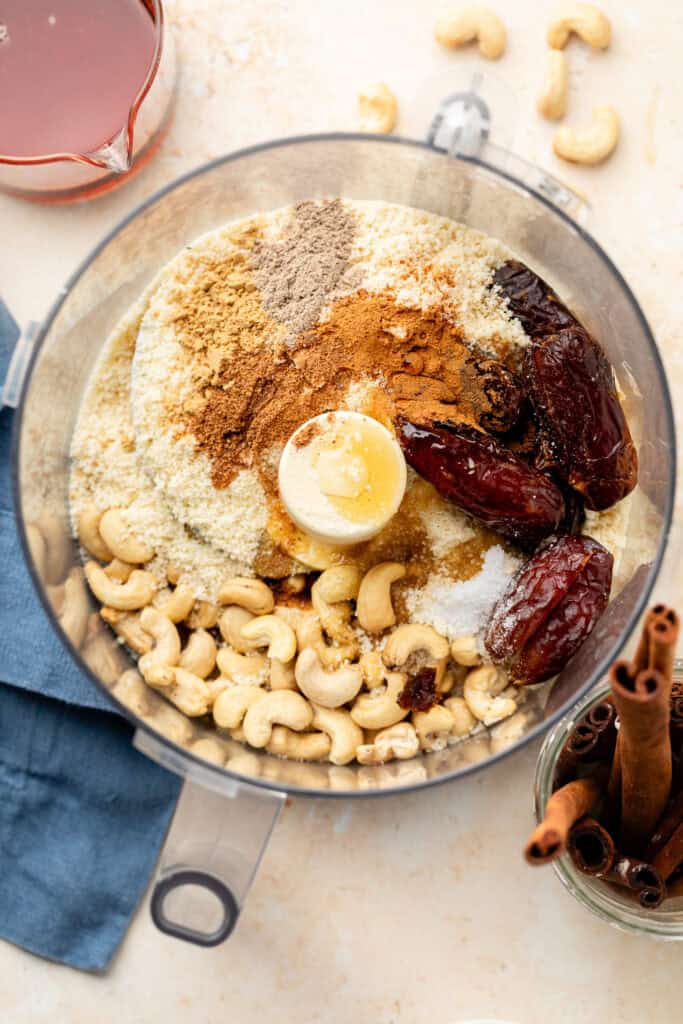
Step Two: Add all the crust ingredients to a food processor, and pulse until a sticky dough forms. Press the mixture into the prepared baking pan, patting it down evenly. Transfer the crust to the freezer.
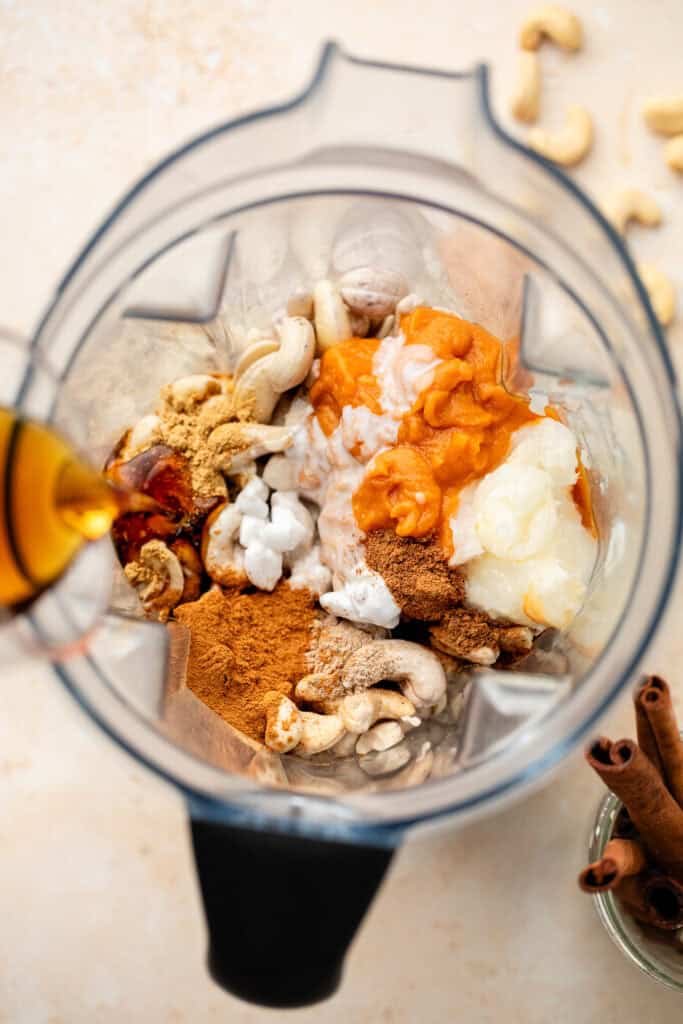
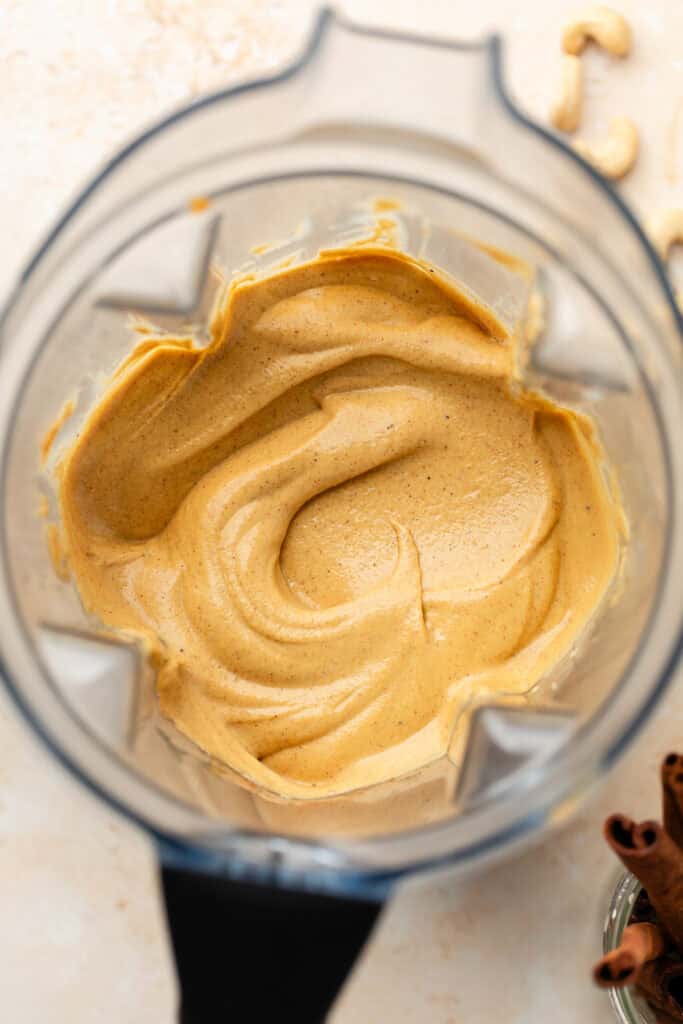
Step Three: Next, add the soaked cashews, coconut cream, lemon juice, sweet potato puree, maple syrup, spices, vanilla extract, and coconut oil to a food processor or high-powered blender. Blend until the filling is silky smooth and creamy. Then, adjust the flavor to taste.
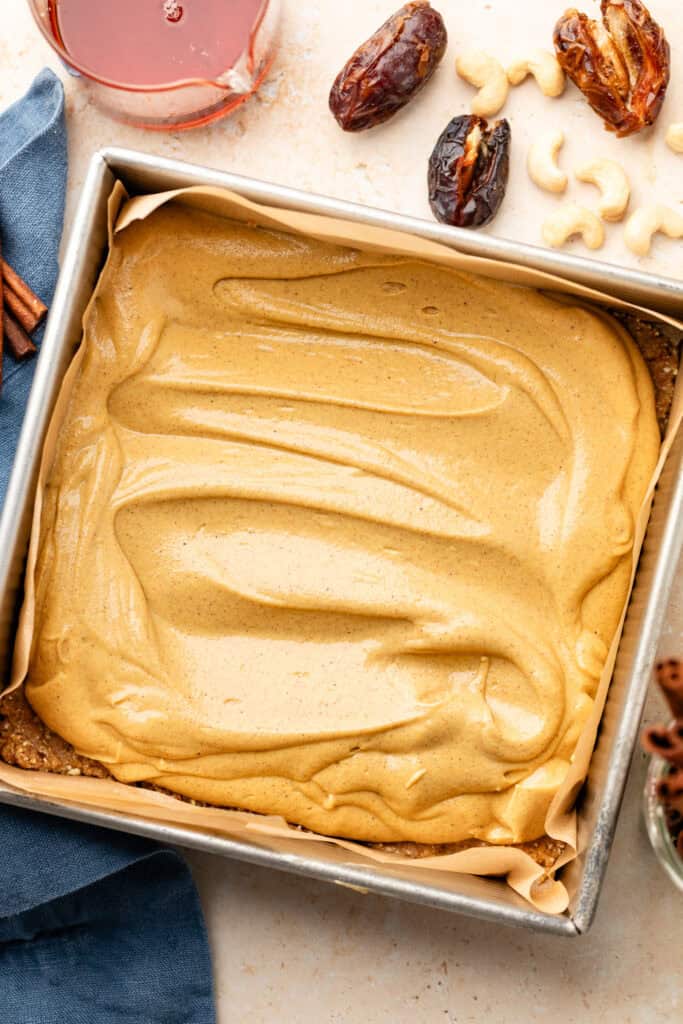
Step Four: Pour the cheesecake filling over the prepared crust, and smooth out the top. I like to tap the pan on the counter to remove any air bubbles and help everything smooth out evenly!
Step Five: Transfer the bars to the freezer until they are completely firm and set, about 5 to 6 hours or overnight.
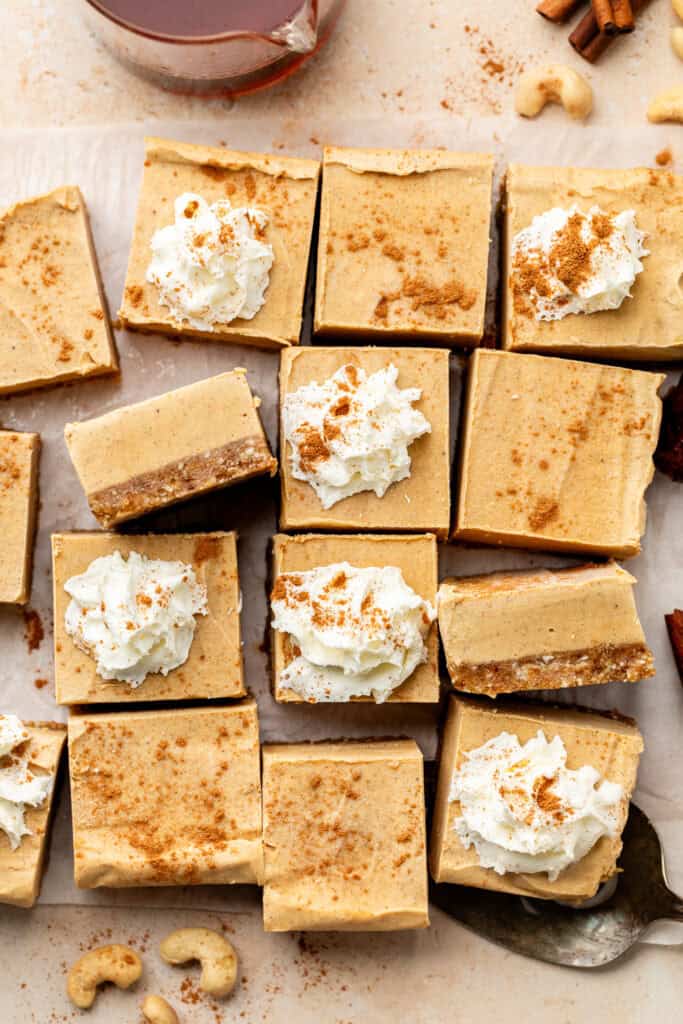
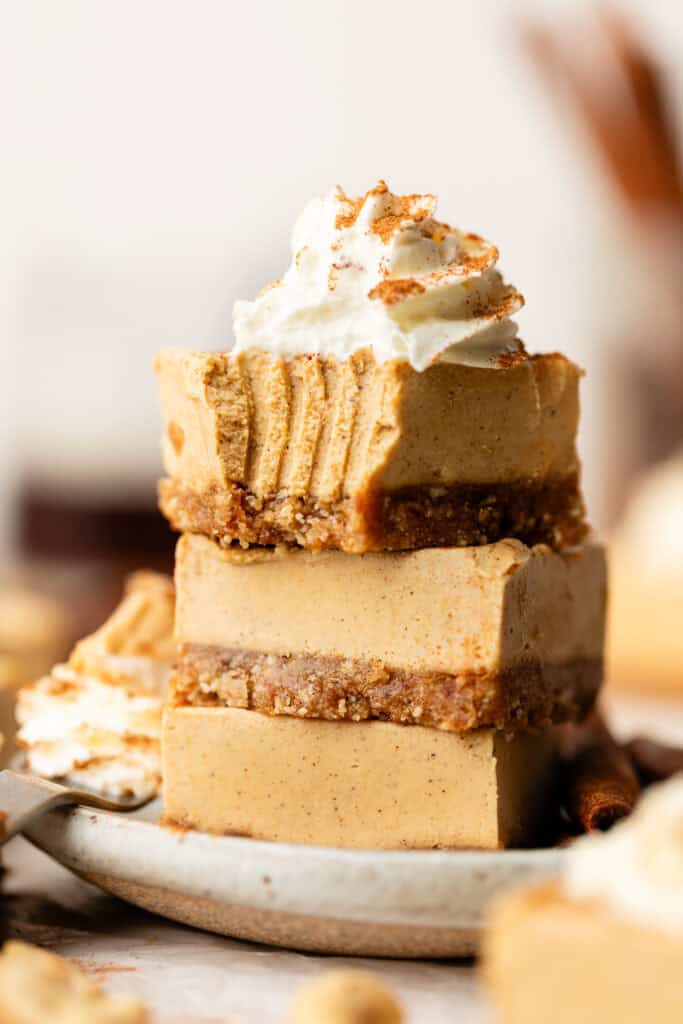
Step Six: When you’re ready to serve, use a sharp knife to cut the bars into 16 squares. Then, top with whipped cream, and enjoy!
Ashlea’s Tips and Tricks
- Do not forget to remove the pits from your dates before adding them to the food processor. You can buy pre-pitted dates to make things even easier.
- Do not over-process the crust. It should be sticky, similar to cookie dough batter or pie crust but not completely smooth like nut butter.
- It takes a little extra work, but I like to use my food processor for the cheesecake crust and my high-powered blender for the filling. I find that the blender gets the filling a bit more smooth than the food processor.
- I like to tap the pan on the counter to remove any air bubbles in the filling before placing it in the freezer. This helps to ensure that the bars come out perfectly smooth.
- Let the bars freeze until they are completely solid before slicing. It will be tempting to dive in right away but freezing them until completely firm makes the bars much easier to slice.
- You can run your sharp knife under warm water before slicing to ensure that you get a clean slice. Then, wipe it clean, after each cut.
How to Store
Store leftover sweet potato cheesecake bars in the freezer for up to 3 months. I like to flash-freeze the bars individually and add them to a freezer-safe storage container.
When you are ready to eat, remove the bars from the freezer, and let them thaw at room temperature for a few minutes before serving.
More Delicious Sweet Potato Recipes
- Sweet Potato Cake with Brown Butter Cream Cheese Frosting
- Sweet Potato Cornbread Muffins
- Healthy Sweet Potato Casserole
- Vanilla Cardamom Sweet Potato Pancakes
- Chai Spiced Sweet Potato Smoothie
- Brown Butter Sweet Potato Bread with Maple Cream Cheese Frosting
- Almond Butter Sweet Potato Muffins
I hope you give this Sweet Potato Cheesecake Bars Recipe a try! It’s sweet, spiced, and easy to make! If you do give this recipe a try, let me know! Leave a comment with a star rating below. You can also snap a photo & tag @allthehealthythings on INSTAGRAM. Your reviews and ratings help support All the Healthy Things and make it possible for me to continue to create the recipes you trust and love.
Print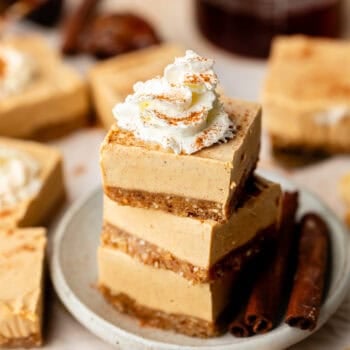
No Bake Sweet Potato Cheesecake Bars
- Prep Time: 6 hours 30 minutes
- Total Time: 6 hours 30 minutes
- Yield: 16 bars 1x
- Category: Dessert
- Method: No Bake
- Cuisine: American
- Diet: Vegan
Description
These Sweet Potato Cheesecake Bars are made with a spiced almond flour crust and a creamy sweet potato filling. This recipe is naturally sweetened, gluten-free, dairy-free, and vegan, so it’s an easy no-bake fall dessert everyone can enjoy!
Ingredients
For the Crust:
- 6 pitted medjool dates
- 3/4 cup raw whole cashews
- 1 1/4 cups almond flour
- 1 teaspoon cinnamon
- 1/4 teaspoon ginger
- 1/4 teaspoon nutmeg
- 1/4 teaspoon cardamom
- 1 teaspoon vanilla extract
- 2 tablespoons maple syrup
- 1/2 teaspoon sea salt
Cheesecake Filling
- 2 cups raw whole cashews, soaked overnight and drained
- 1/4 cup coconut cream
- 1 tablespoon lemon juice
- 1/2 cup sweet potato puree (can use canned for these)
- 1/2 cup maple syrup
- 2 teaspoons cinnamon
- 1/2 teaspoon ginger
- 1/2 teaspoon nutmeg
- 1/4 teaspoon cardamom
- 1 teaspoon vanilla extract
- 2 tablespoons coconut oil
Instructions
- Line an 8×8 pan with parchment paper.
- Add the crust ingredients to a food processor and pulse until a sticky dough forms. Press the into an 8×8 baking pan lined with parchment paper. Put the crust in the freezer while you prepare the cheesecake filling.
- Add the soaked cashews, coconut cream, lemon juice, sweet potato puree, maple syrup, spices, vanilla extract, and coconut oil to your food process or high powered blender. Blend the filling until it is completely silky smooth and creamy. Give it a taste and adjust the sweetness/tartness level to your liking.
- Pour the cheesecake filling over the prepared crust and smooth out the top of the cheesecake. I like to tap the pan on the counter to remove any air bubbles and to help everything smooth out evenly.
- Freeze the cheesecake bars until completely firm and set, around 5-6 hours or overnight.
- When you are ready to serve, remove the cheesecake bars from the freezer and use a sharp knife to cut into 16 squares. Top with whipped cream and enjoy!
Recipe by: Ashlea Carver / All the Healthy Things | Photography by: The Mindful Hapa