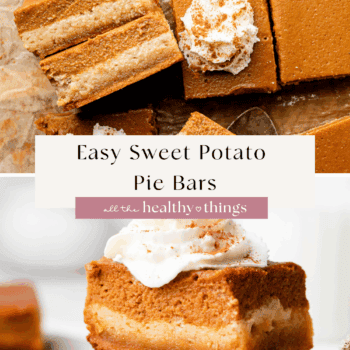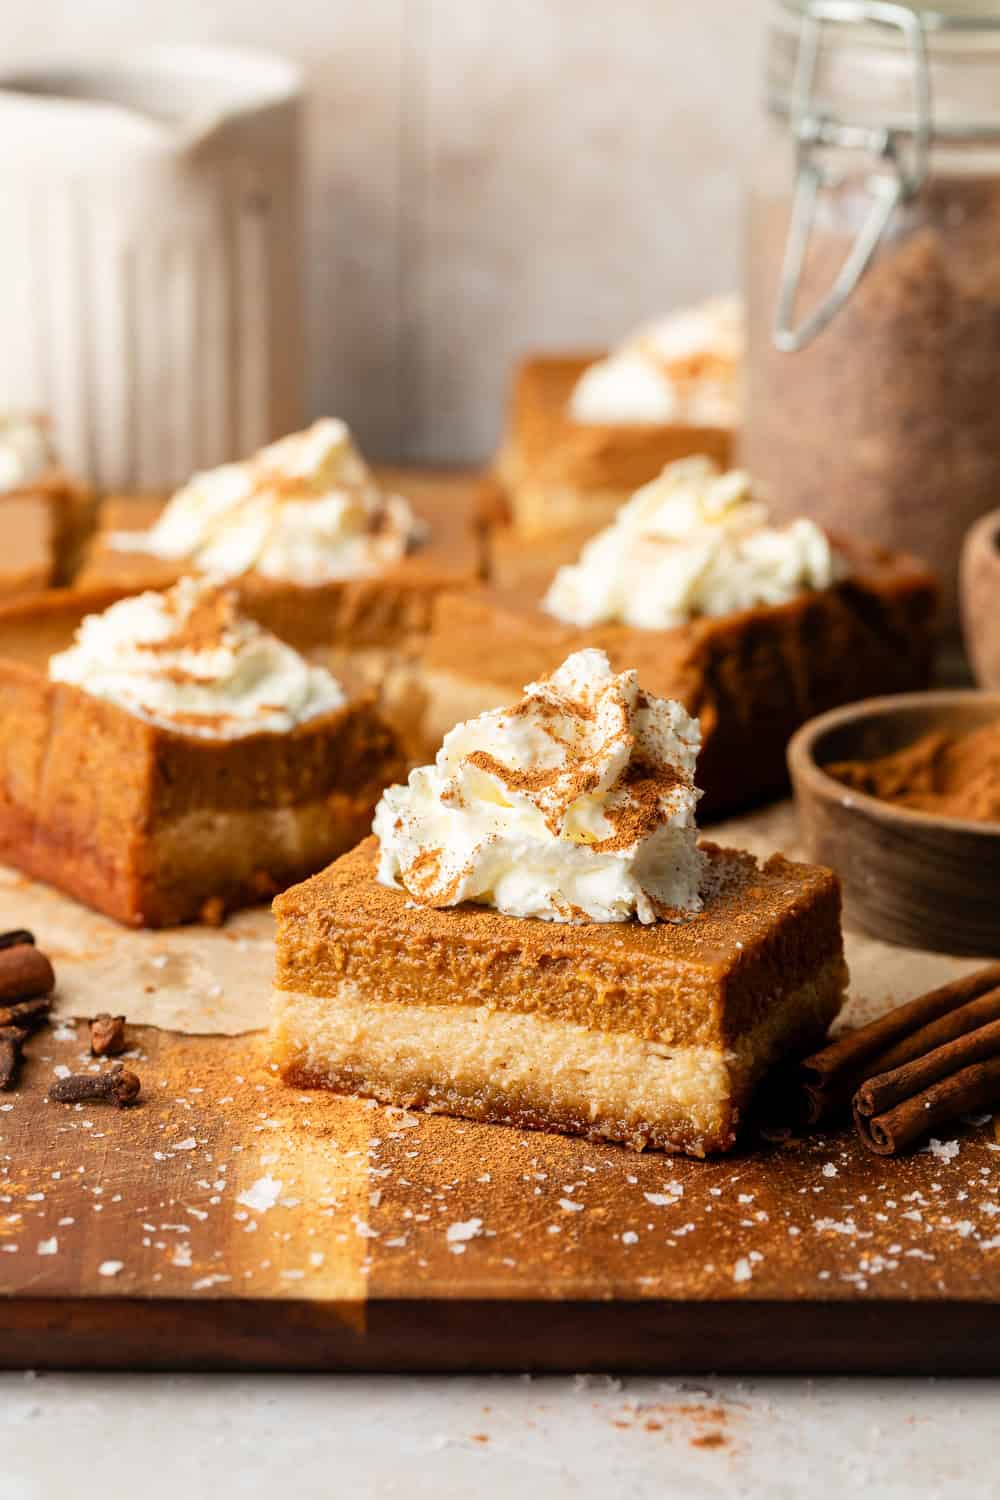
These easy Sweet Potato Pie Bars have an almond flour crust and a spiced sweet potato filling. Naturally sweetened with pure maple syrup, they’re gluten-free and dairy-free for a healthier twist on classic sweet potato pie!

The Best Sweet Potato Bars Recipe That Everyone Can Eat
I’m a huge fan of sweet potatoes, and sweet potato pie is one of my favorite holiday desserts. Personally, I think it’s better than pumpkin pie, but that’s a discussion for another day.
Unfortunately, I don’t always have time to prepare a whole pie from scratch. So, I make sweet potato pie bars instead! They’re just as tasty, and you don’t need to spend hours preparing and rolling out dough.
Instead, just combine the ingredients, bake, and chill. It’s super easy and has all the sweet, spiced flavors you know and love.
Plus, I gave this recipe a bit of a healthier twist, making it gluten-free, dairy-free, and refined sugar-free for a slightly better-for-you dessert that accommodates different dietary needs. One bite and you may never go back to traditional pies again!

Ingredients You’ll Need
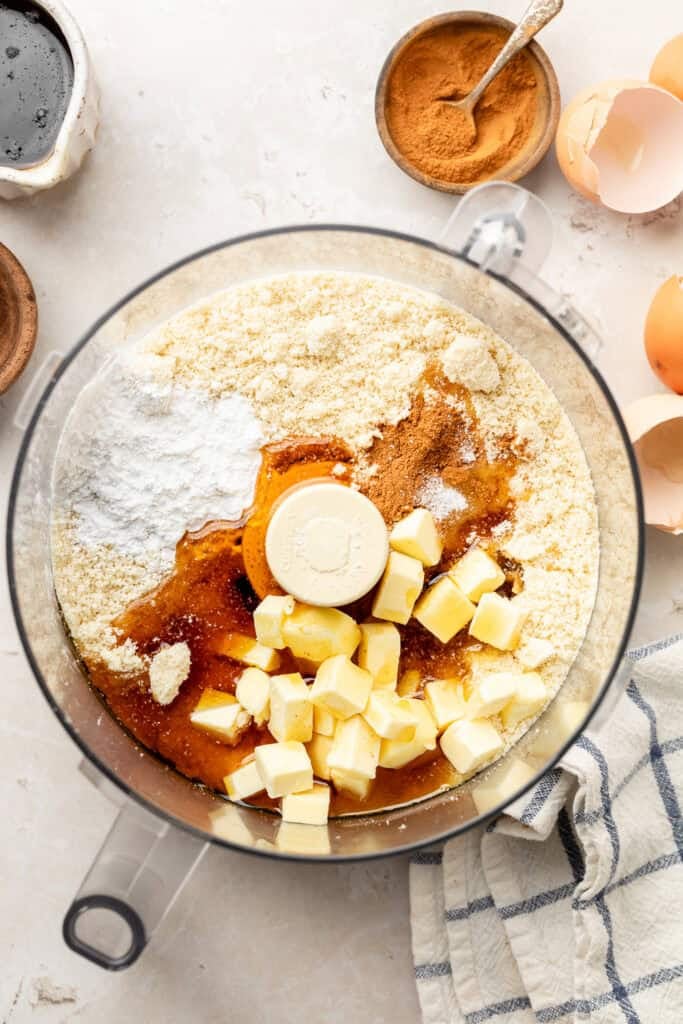
- Almond Flour: this forms the crust, keeping the bars gluten and grain-free. For the best results, use a finely blanched almond flour. You cannot substitute coconut flour for almond flour in this recipe.
- Tapioca Starch: this helps keep the crust firm and staple so it holds up and doesn’t become soggy under the sweet potato filling. you can easily sub the tapioca starch in these bars for arrowroot starch if you prefer.
- Maple Syrup: this sweetens both the crust and the filling!
- Butter: I like to include a little butter in the crust for a richer filling. If you need to keep these bars completely dairy-free you can easily swap the butter for your favorite vegan butter or coconut oil. If you use coconut oil be sure that it is solid and not melted.
- Vanilla Extract: a must-have in all the best desserts!
- Sweet Potato Puree: I use canned sweet potato puree to keep this recipe super easy, but you can also use homemade sweet potato puree if preferred. Can’t find store-bought sweet potato puree? You can easily make your own by baking sweet potatoes, boiling, or microwaving them. Then, remove the skin, and mash until smooth.
- Eggs: we’re using two eggs and one egg yolk to stabilize the filling and create a rich, custardy taste and texture.
- Plain Almond Milk: use this to combine the filling ingredients, keeping it smooth and creamy. Don’t want to use almond milk? Any non-dairy milk will work in these bars. Oat, cashew, or canned coconut milk are all great options

How to Make Easy Sweet Potato Pie Bars
Step One: Preheat the oven to 350 degrees, and line an 8×8 baking dish with parchment paper.
Step Two: Add the almond flour, tapioca starch, maple syrup, cold butter, vanilla extract, ground cinnamon, and sea salt to a food processor. Process the ingredients for about 30 seconds or until a sticky ball of dough forms. You may have to scrape down the sides to ensure everything is well incorporated!
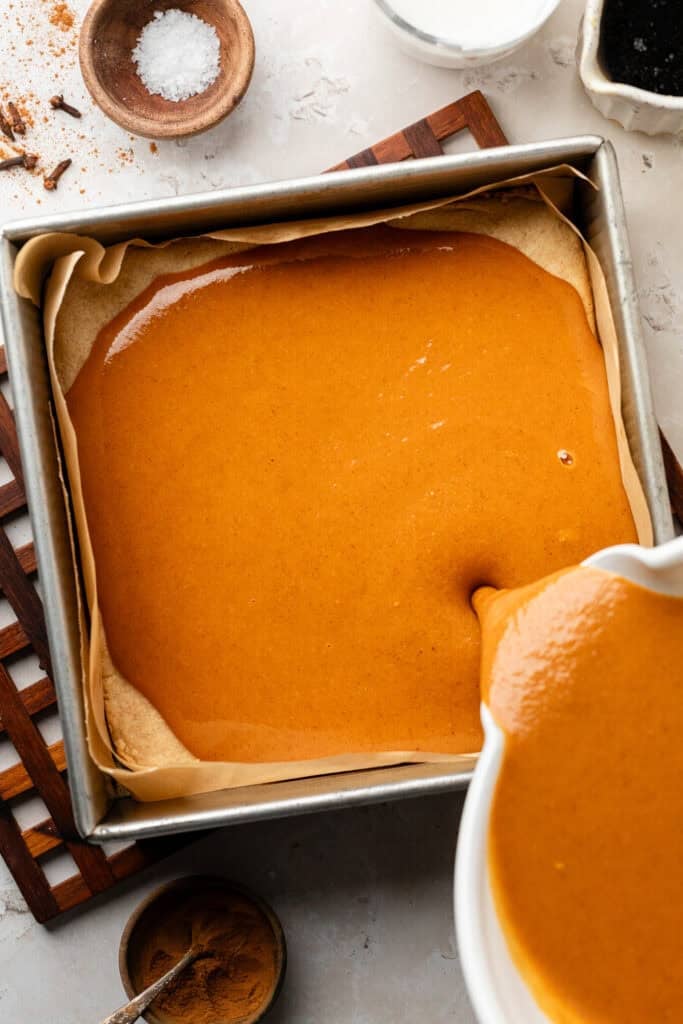
Step Three: Next, press the dough evenly into the prepared pan. Bake for 15 to 18 minutes or until lightly golden. Then, set the crust aside while you make the filling.
Step Four: Add the sweet potato puree, maple syrup, vanilla extract, eggs, almond milk, and spices to a whisking bowl. Whisk until the ingredients are well combined and smooth.
Step Five: Pour the filling over the crust, and gently tap the pan on the counter to release any air bubbles and ensure the filling is evenly distributed.
Step Six: Bake the sweet potato pie bars for 50 to 60 minutes or until the filling is set. Then, let the bars chill for 6 to 8 hours or overnight before slicing.
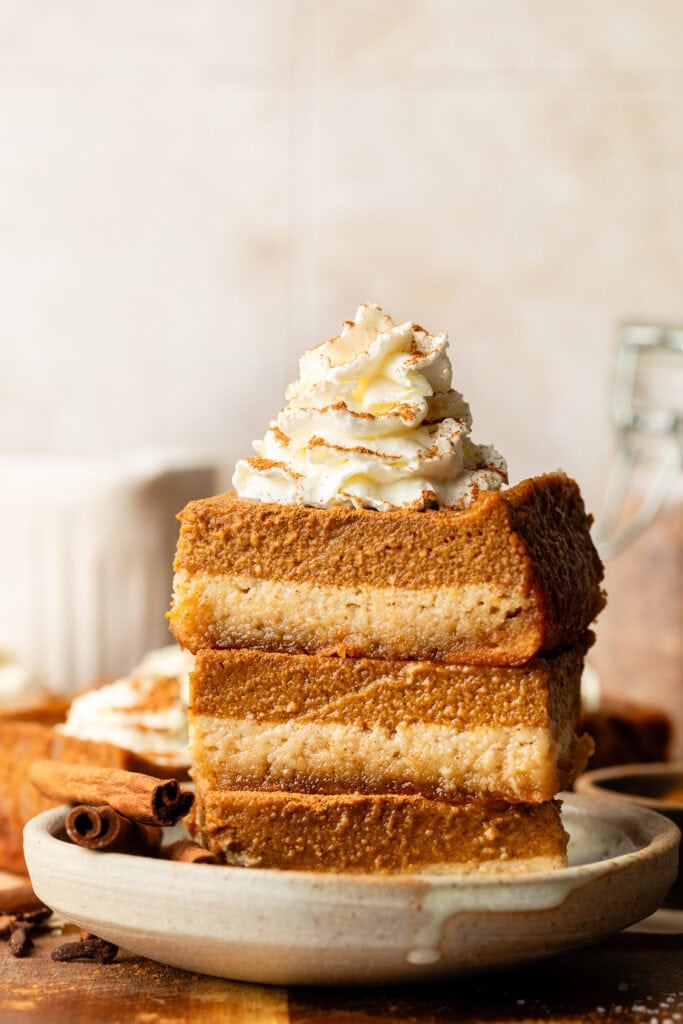
Step Seven: Once chilled, slice the pie slab into 12 equal-sized bars, and serve them with a dollop of whipped cream and a sprinkle of cinnamon. Enjoy!
Ashlea’s Tips for the Best Sweet Potato Pie Bars
- Use parchment paper. Grease the pan a bit before adding the parchment paper to help the parchment paper stick to the bottom of the pan so it won’t slip around while you are pressing in the crust.
- Let the bars come to a complete cool before slicing. It will be super tempting to cut these bars immediately, but to get the best results you will need to let them come to a complete cool before slicing. To help speed up the process you can stick the bars in the fridge while they cool.
- Use a sharp knife to cut the bars. A sharp knife will help you make a clean cut and get through the thick bottom layer of crust.
- Store the bars in the fridge. There is a good chance that these bars will not even last that long,
How to Store
Store: Once completely cool, leftover sweet potato pie bars will stay fresh in an airtight container in the fridge for up to 3 to 4 days.
Freeze: You can freeze these bars for up to 2 months. To do so, I recommend wrapping each bar in plastic wrap and transferring them to a sealable bag or airtight container to store. Thaw in the fridge overnight when you’re ready to serve.
More Reader Favorite Sweet Potato Recipes
- Healthy Sweet Potato Casserole
- Brown Butter Orange Sweet Potato Casserole
- Sweet Potato Cornbread Muffins
- Sweet Potato Cinnamon Rolls
- Brown Butter Sweet Potato Bread with Maple Cream Cheese Frosting
- Almond Butter Sweet Potato Muffins
I hope you give these Sweet Potato Pie Bars a try! They’re easy to make and are always a crowd favorite. If you do give this recipe a try, I want to know! Leave a comment with a star rating below. You can also snap a photo & tag @allthehealthythings on INSTAGRAM. Your reviews help support All the Healthy Things and make it possible for me to continue to create the recipes you know and love.
Print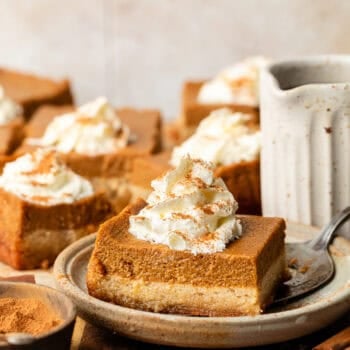
Sweet Potato Pie Bars
- Prep Time: 40 minutes
- Cook Time: 60 minutes
- Total Time: 1 hour 40 minutes
- Yield: 12 bars 1x
- Category: Dessert
- Method: Baking
- Cuisine: American
- Diet: Gluten Free
Description
These easy Sweet Potato Pie Bars have an almond flour crust and a spiced sweet potato filling. Naturally sweetened with pure maple syrup, they’re gluten-free and dairy-free for a healthier twist on classic sweet potato pie!
Ingredients
For the Crust:
- 2 cups almond flour
- 1 tablespoon tapioca starch
- 1/4 cup maple syrup
- 4 tablespoons butter, diced
- 1 teaspoon vanilla extract
- 1/4 teaspoon ground cinnamon
- 1/4 teaspoon sea salt
For the Filling:
- 15oz canned sweet potato puree
- 2/3 cup maple syrup
- 1 tablespoon vanilla extract
- 2 eggs + 1 egg yolk, whisked
- 1/2 cup plain almond milk
- 2 teaspoons cinnamon
- 1/2 teaspoon ginger
- 1/2 teaspoon nutmeg
- 1/4 teaspoon cardamom
- small pinch of cloves
Instructions
- Preheat oven to 350 degrees and line an 8×8 pan with parchment paper.
- Add the almond flour, tapioca starch, maple syrup, cold butter, vanilla extract, ground cinnamon, and sea salt to a food processor. Process the ingredients for around 30 seconds until a sticky ball of dough forms. You may have the scrape down the sides once to ensure that everything is well incorporated.
- Remove the dough from the food processor and press it evenly into an 8×8 pan that has been lined with parchment paper. Bake the crust at 350 degrees for 15-18 minutes until lightly golden. Set aside while you make the filling.
- Add the sweet potato puree, maple syrup, vanilla extract, eggs, almond milk, and spices to a whisking bowl. Whisk everything together until well combined and smooth.
- Pour the filling over the crust and gently tap the pan on the counter to release any air bubbles and ensure that the filling is evenly distributed over the crust.
- Bake the sweet potato pie bars at 350 degrees for 50-60 minutes until the filling is set. Let the bars chill 6-8 hours or overnight before slicing.
- Once chilled, slice into 12 bars and top each bar with a small dollop of whipped cream and a sprinkle of cinnamon before serving.
Notes
Store: Once completely cool, leftover sweet potato pie bars will stay fresh in an airtight container in the fridge for up to 3 to 4 days.
Freeze: You can freeze these bars for up to 2 months. To do so, I recommend wrapping each bar in plastic wrap and transferring them to a sealable bag or airtight container to store. Thaw in the fridge overnight when you’re ready to serve.
Photography by: Casey Colodny