Description
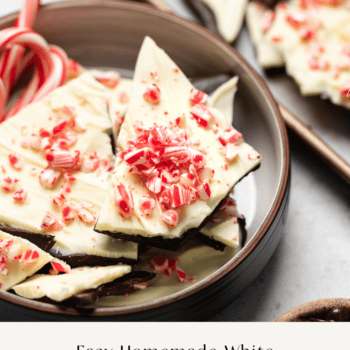
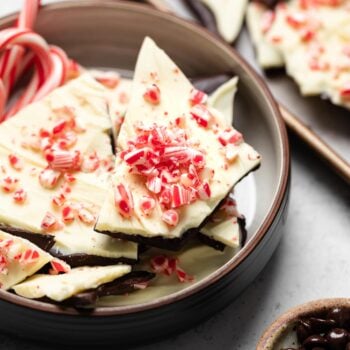
This homemade white chocolate peppermint bark is made with just five simple ingredients! It is a delicious and festive holiday treat that looks complicated but really could not be easier to make. This recipe makes the perfect treat for gifting, too!
Ingredients
Scale
- 2 cups dark chocolate chips
- 2 cups white chocolate chips
- 1 teaspoon peppermint extract, divided
- 6 crushed candy canes + a little extra for the top
Instructions
- Add the dark chocolate chips to a microwave safe bowl. Microwave the chocolate for 30 seconds at a time until it is melted, stirring occasionally.
- Add half a teaspoon of peppermint extract to the melted dark chocolate.
- Pour the dark chocolate onto a baking sheet lined with parchment or wax paper and spread into an even layer. Place the baking sheet in the fridge to chill for 30-45 minutes or until the chocolate is firm.
- Add the white chocolate chips to another microwave safe bowl. Microwave the chocolate for 30 seconds at a time until it’s melted. Add the remaining half of the peppermint extract as well as the crushed candy canes and stir until well combined.
- Pour the white chocolate mixture on top of the solid dark chocolate layer and spread it out evenly with the back of a spatula. Sprinkle the extra crushed candy canes on top.
- Place the peppermint bark back into the fridge to firm up for another hour.
- Once it’s firm, cut or break the bark into large pieces and enjoy! Store in the fridge to keep it fresh and to prevent it from melting.
Notes
- Be sure to use chocolate with a good flavor and that you enjoy eating for the best results.
- If you do not have peppermint extract feel free to leave it out. The bark will still be good, it just won’t have the same level of peppermint flavor.
- Allow the bark to completely cool and harden before breaking into pieces. This is the hardest part but so worth it to ensure you get a clean crisp broken pieces and not a gooey mess.