Fluffy and delicious homemade cinnamon rolls with the perfect balance of sweet sugar, warm cinnamon, and fresh orange. These cinnamon rolls are a family favorite and know you will love them!

Homemade Buttermilk Cinnamon Rolls
Cinnamon rolls! One of my very favorite things to make AND eat. There’s something special about starting the day with a batch of warm, fluffy cinnamon rolls, especially on holiday mornings. Not only do they taste great, but for me cinnamon rolls have become a family tradition and a way to mark special moments.
Watch How to Make The Recipe
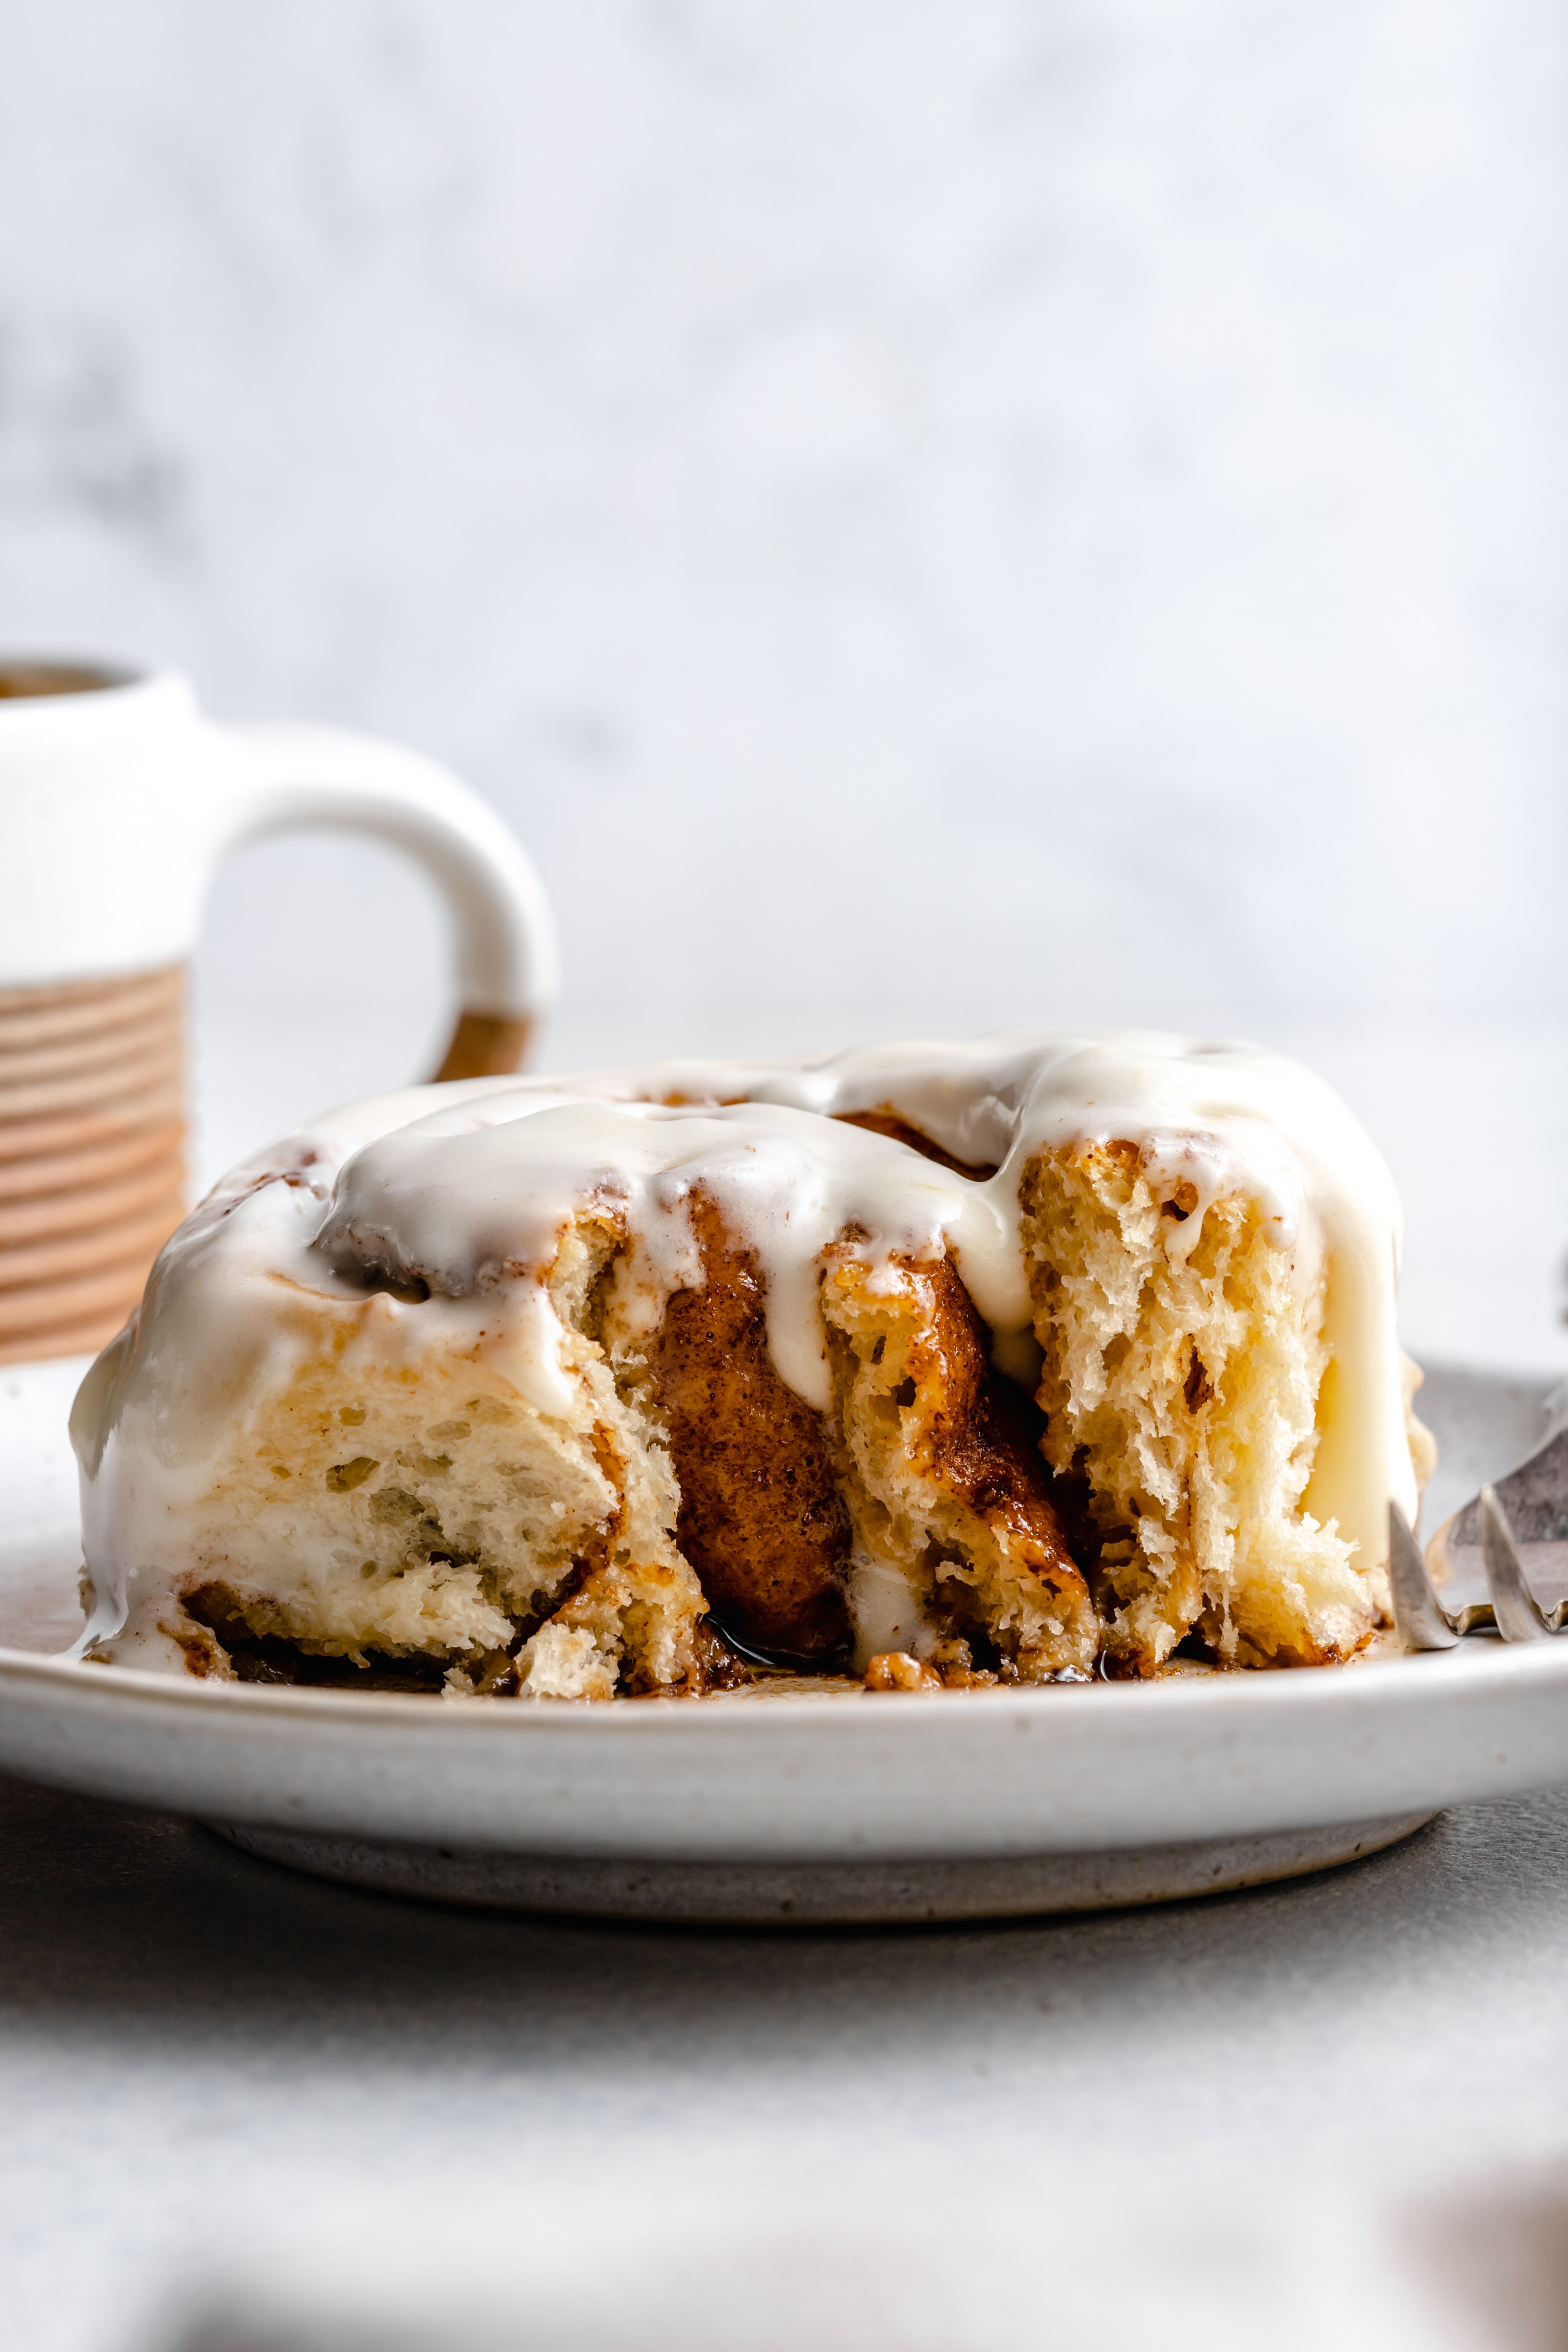
This recipe for homemade buttermilk cinnamon rolls is my tried and true recipe that never fails me. The cinnamon rolls come out perfect every time – filled with plenty of warm cinnamon sugar flavor, not overly sweet, and slathered in the best cream cheese icing.
If you have never made cinnamon rolls before, I know you will love these and I hope this blog post answers all the questions you may have!
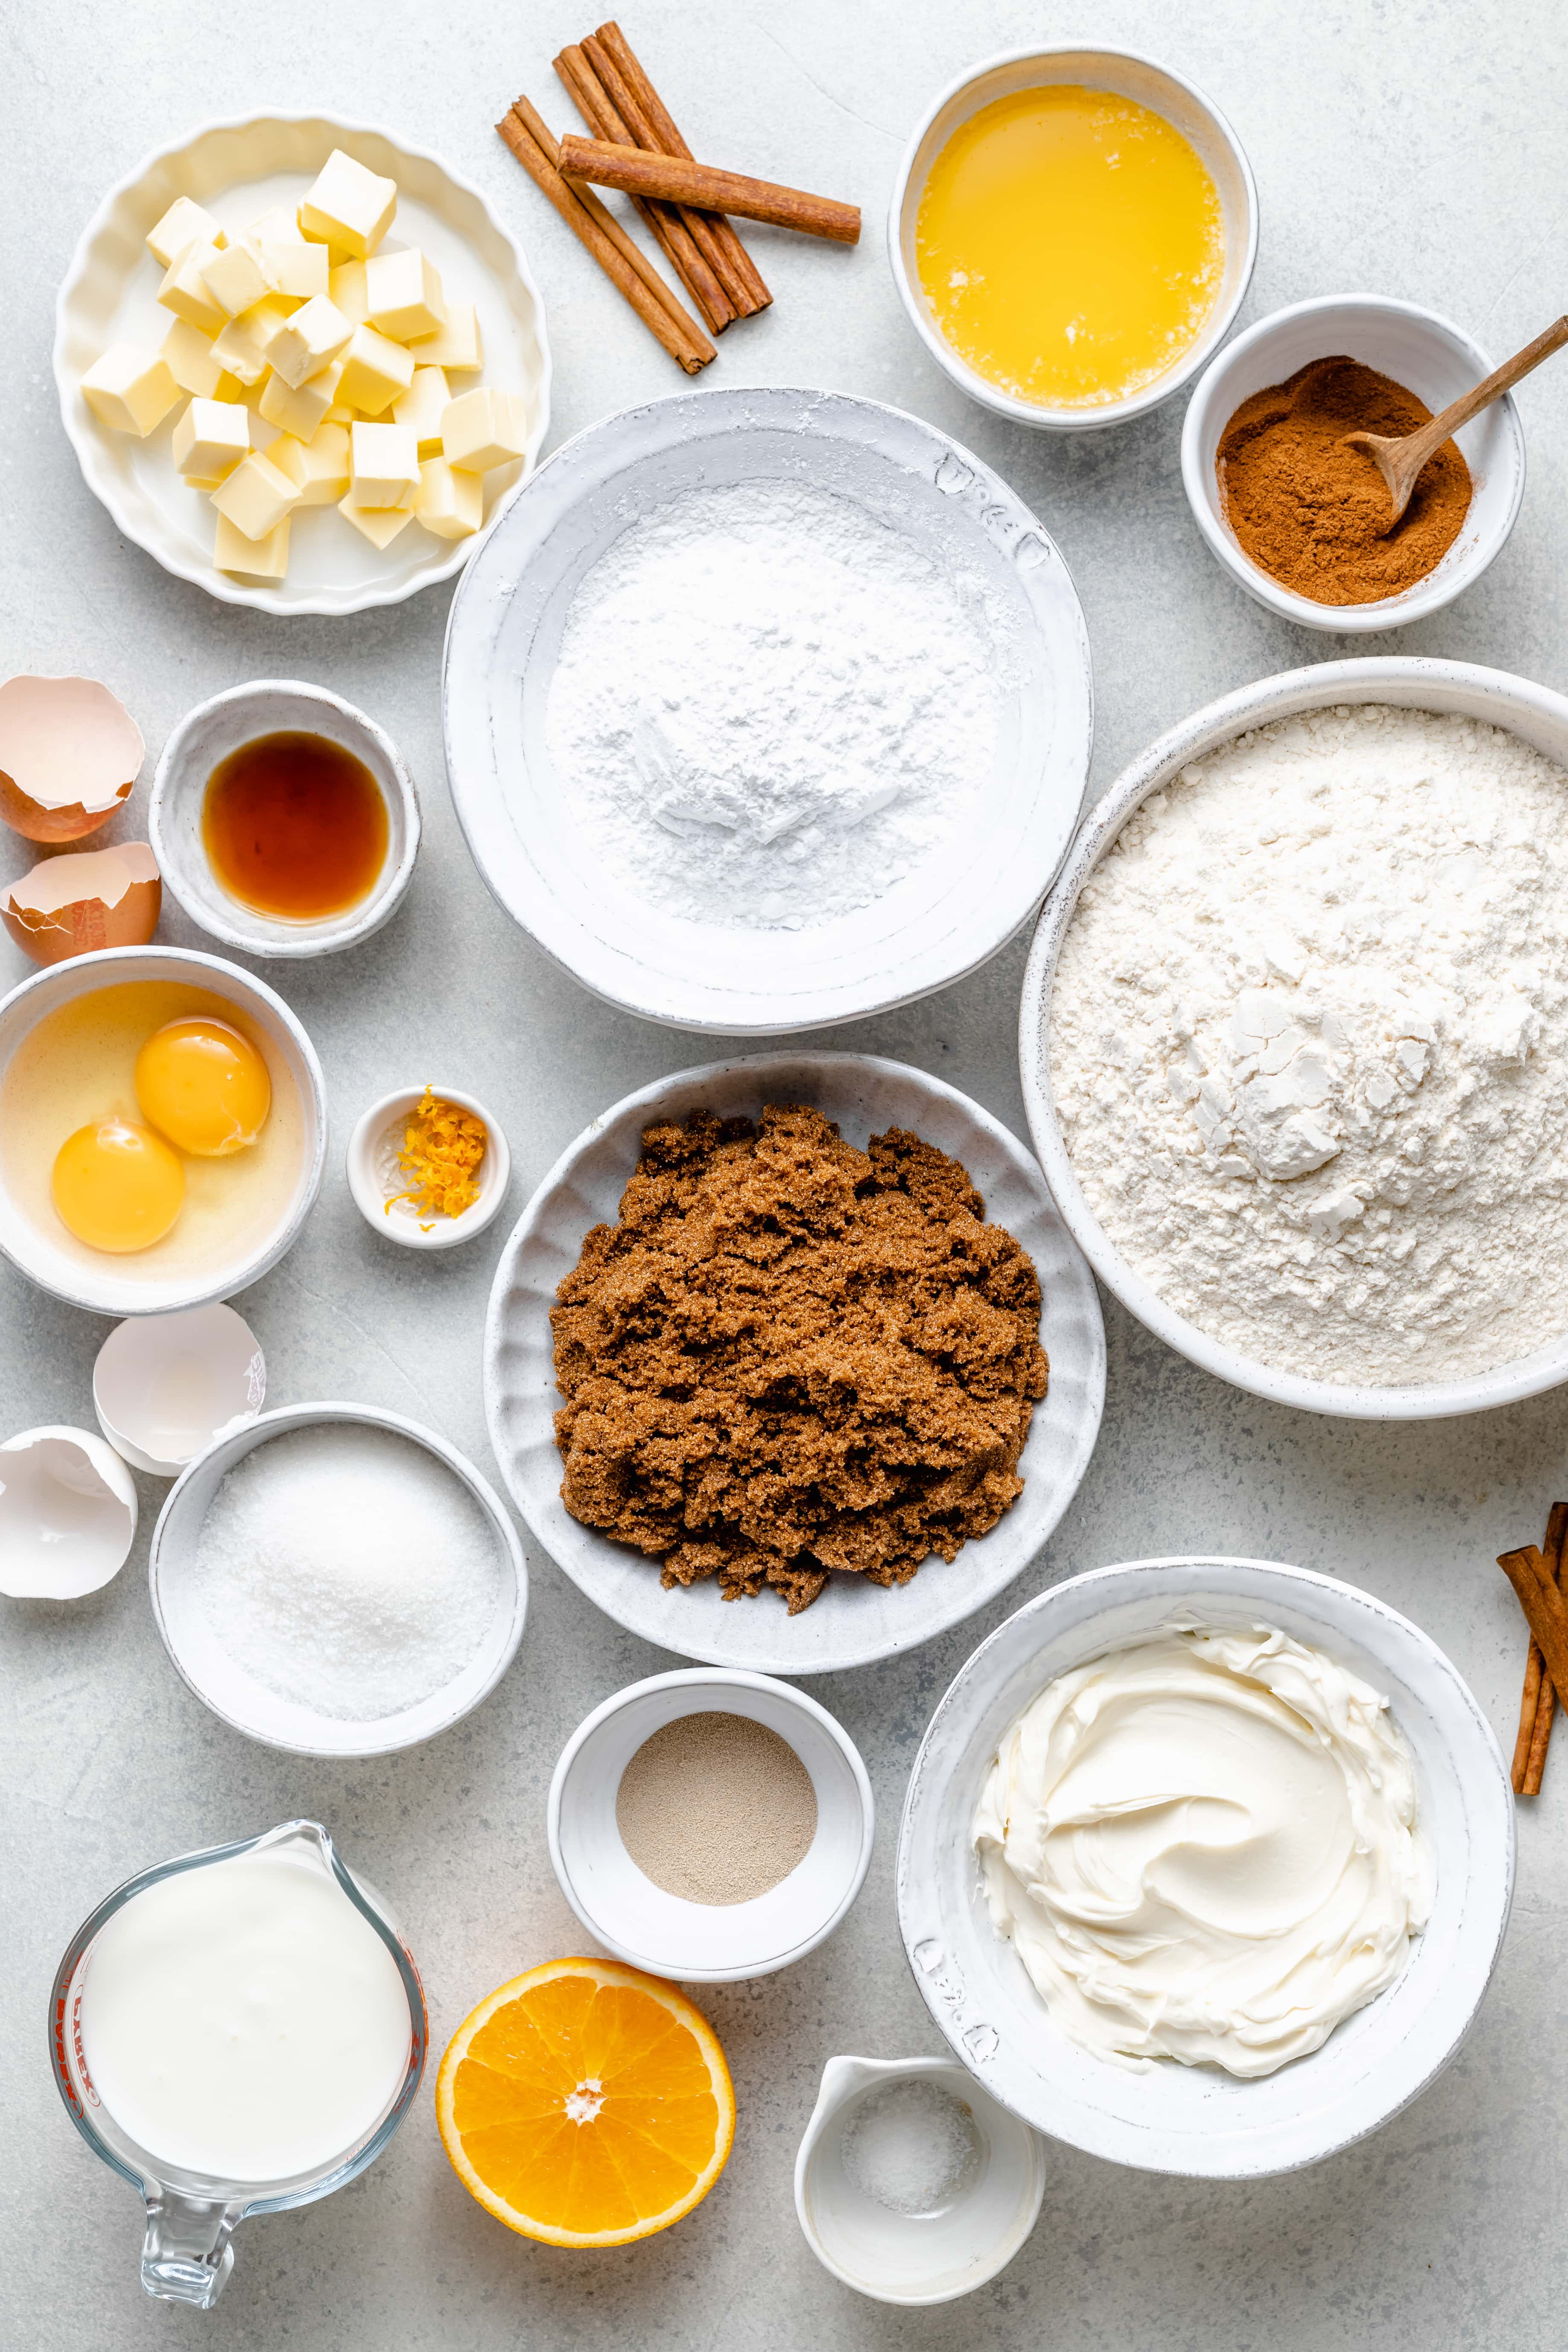
Cinnamon Roll Recipe Ingredients
Buttermilk: my secret to a super flavorful, tender, and delicious cinnamon roll dough is buttermilk. It’s always my liquid of choice for these rolls.
Active Dry Yeast: yeast helps the rolls to rise. We’re using two packets of yeast these cinnamon rolls.
Sugar: you’ll need a little granulated sugar for the dough.
Eggs: we’re using one egg and egg yolk for the perfect texture.
All Purpose Flour: regular white all purpose flour is all you need.
Salt: this is a must and helps to give your cinnamon roll dough flavor.
Butter: I prefer to use unsalted butter when baking.
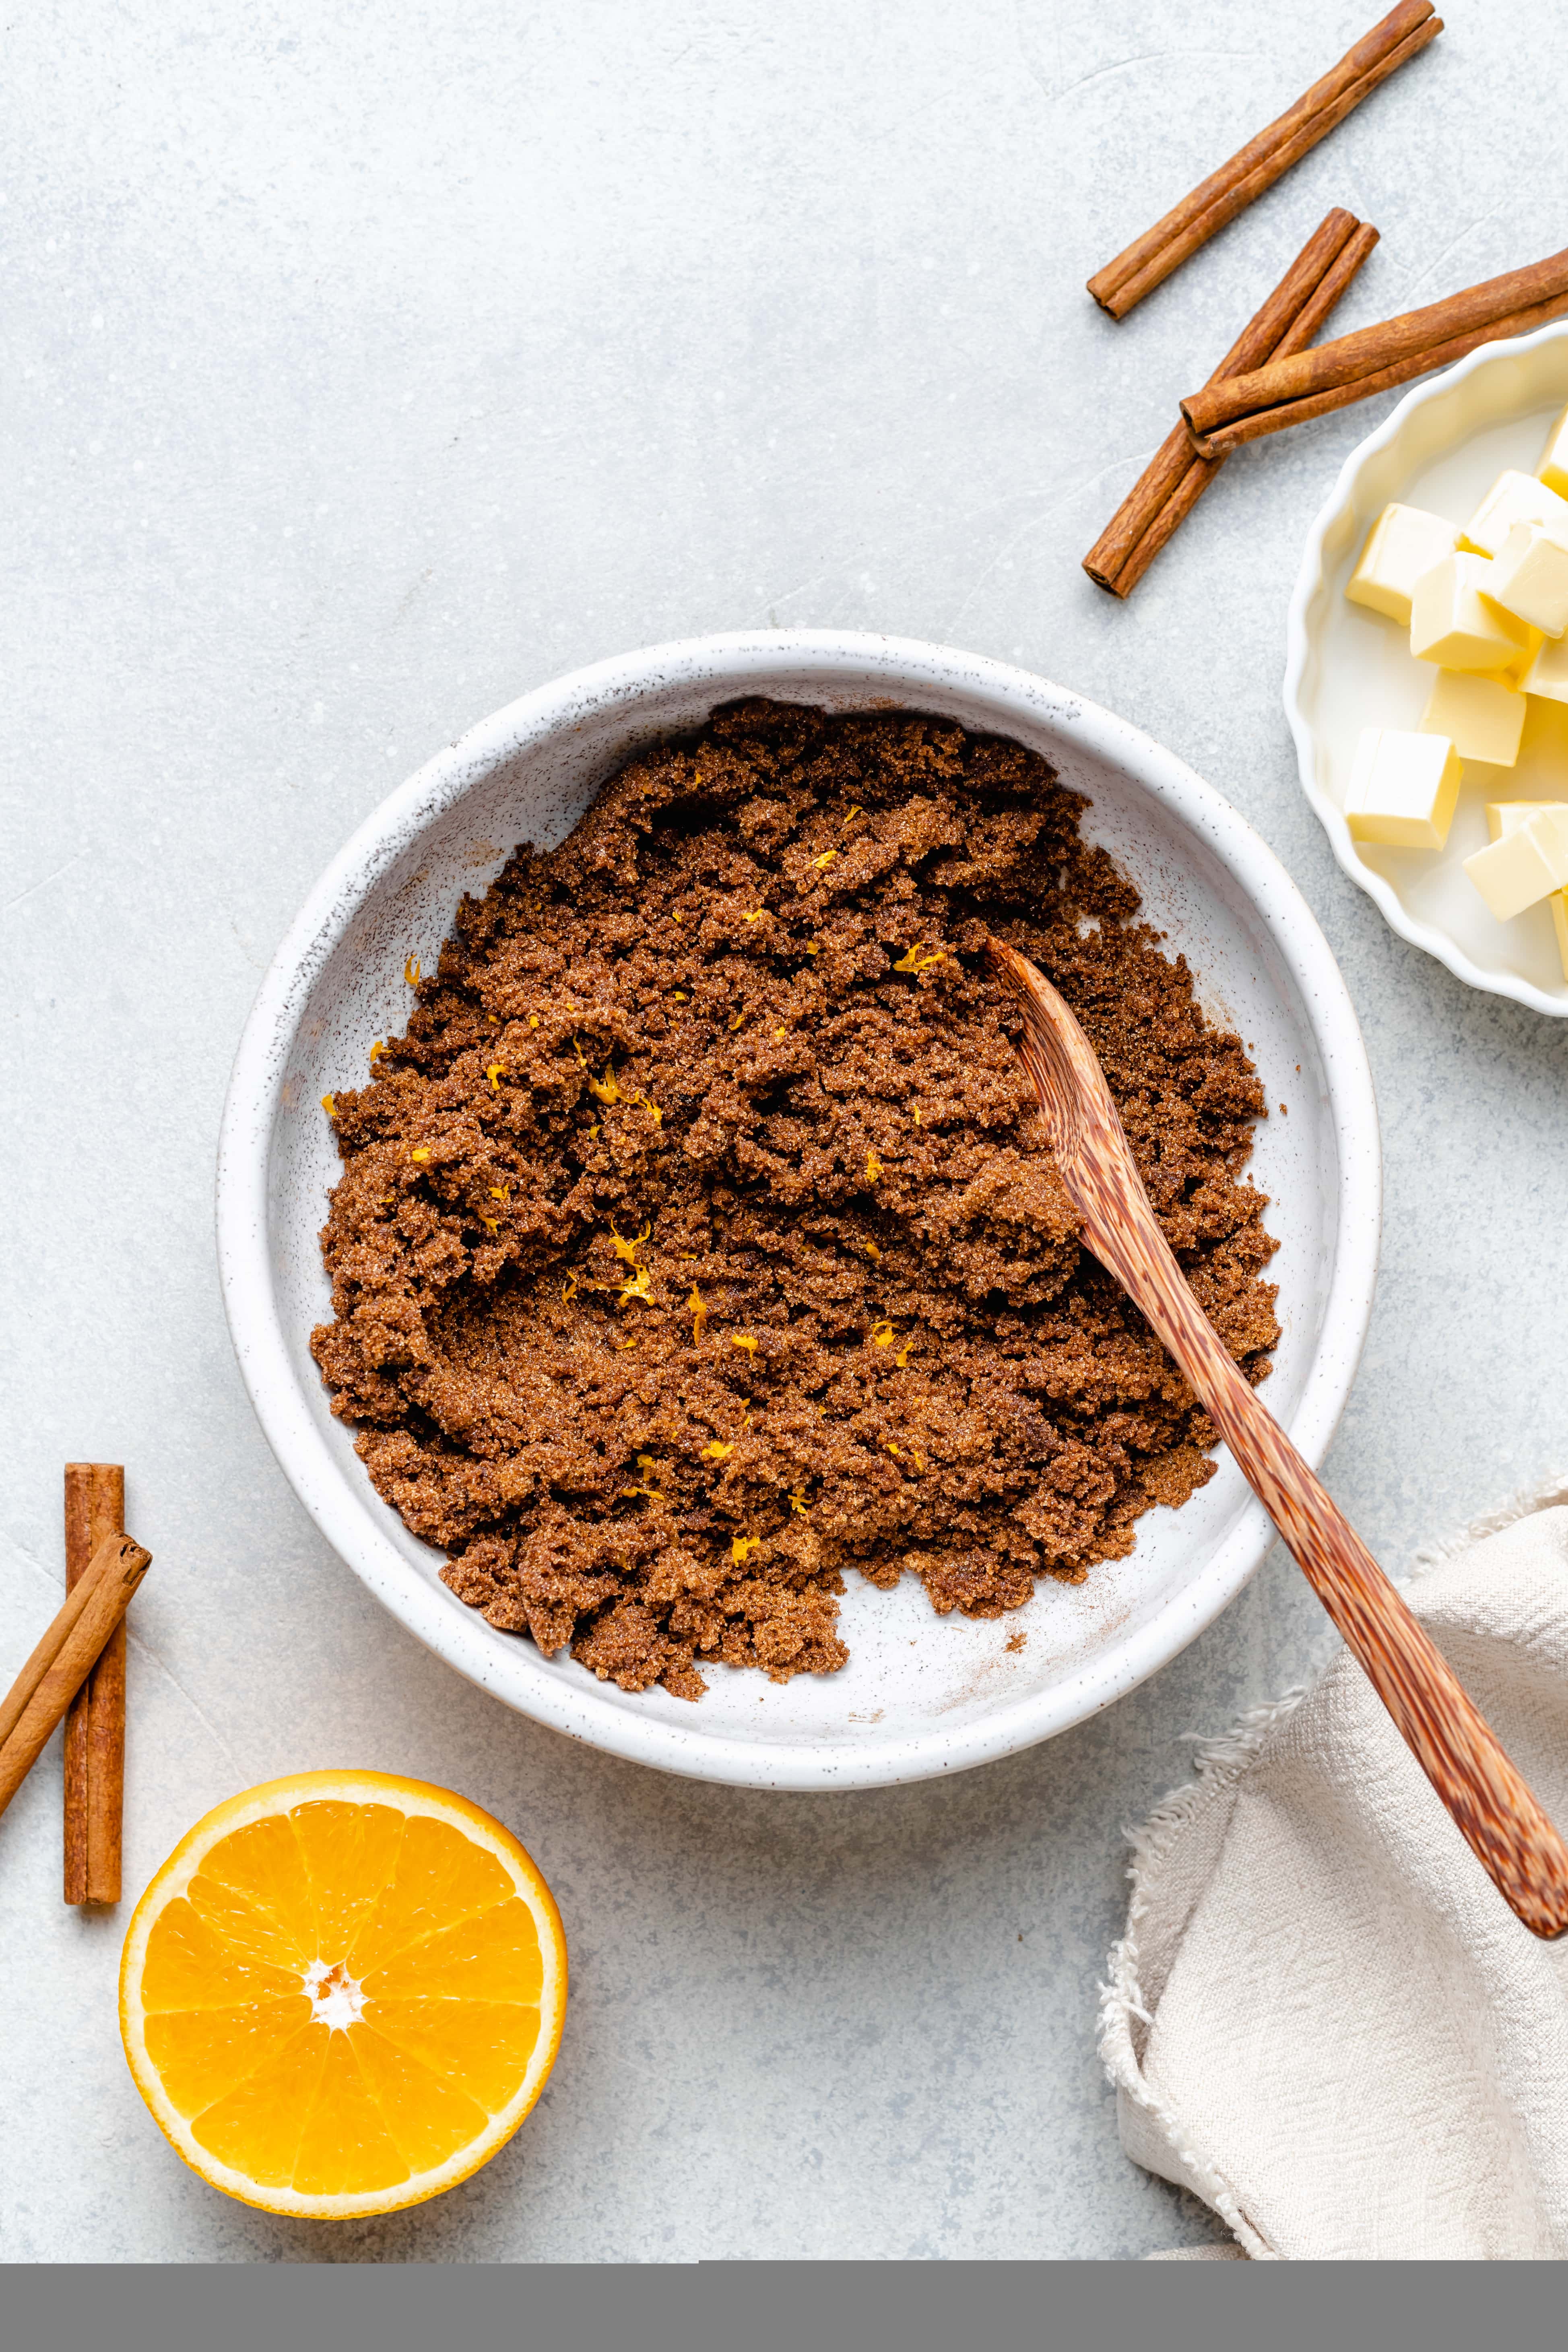
Dark Brown Sugar: we’ll use plenty of rich dark brown sugar in the cinnamon roll filling.
Cinnamon: I mean obviously, am I right?
Vanilla Extract: this is also added to the filling as well as the delicious cream cheese icing, which we’ll talk more about later.
Orange Zest: the combination of fresh orange zest and cinnamon is a match made in heaven, in my personal opinion. This recipe uses a little orange zest in both the filling and icing to and gives the cinnamon rolls the PERFECT flavor. You could skip it but, don’t. Just trust me here.
Helpful Kitchen Tools
- Candy thermometer – to help you make sure that the milk is just the right temperature.
- Large mixing bowl – you’ll need a bowl with a lot of room to mix the dough.
- Wooden spoon – I prefer using a wooden spoon to stir the dough because it has a nice firm handle.
- Tea towel – to cover your dough while it rises.
- rolling pin – you’ll need this to roll out the dough. I prefer to use French rolling pin without handles to get the dough an even thickness.
- serrated knife – this makes cutting the cinnamon roll dough a breeze! I’ve heard that you can use unflavored dental floss to cut the rolls as well.
- parchment paper – to line the baking dish and prevent any mess.
- 9×13 baking dish – this recipe makes 12 cinnamon rolls so you’ll need a 9×13 pan to hold all the rolls.
How to Make Cinnamon Rolls

Step One: Warm the buttermilk to 110-115 degrees Farenheit and then transfer the milk to a large mixing bowl. You can warm the milk by heating it a microwave safe bowl for 30 15-20 seconds at a time or you can heat it on the stovetop over low heat in a small sauce pot. Sprinkle the yeast and then the sugar over the warm milk. The yeast should begin to foam after a few minutes. Then, add the melted butter, egg and egg yolk, and whisk together.
Step Two: Next, add the flour and salt to the wet ingredients and use a wooden spoon to stir until well combined and a thick sticky dough forms. Be sure to incorporate all of the flour from the sides of the mixing bowl.
Step Three: Turn the dough out onto a lightly floured surface and then use your hands to knead the dough for 8-10 minutes until it becomes elastic and can easily form into a smooth ball. The dough should feel slightly tacky but it should not stick to your hands or the kneading surface. If the dough is still too sticky after kneading, add 1 tablespoon of flour at a time and continue to knead the dough until it becomes a smooth, elastic ball.
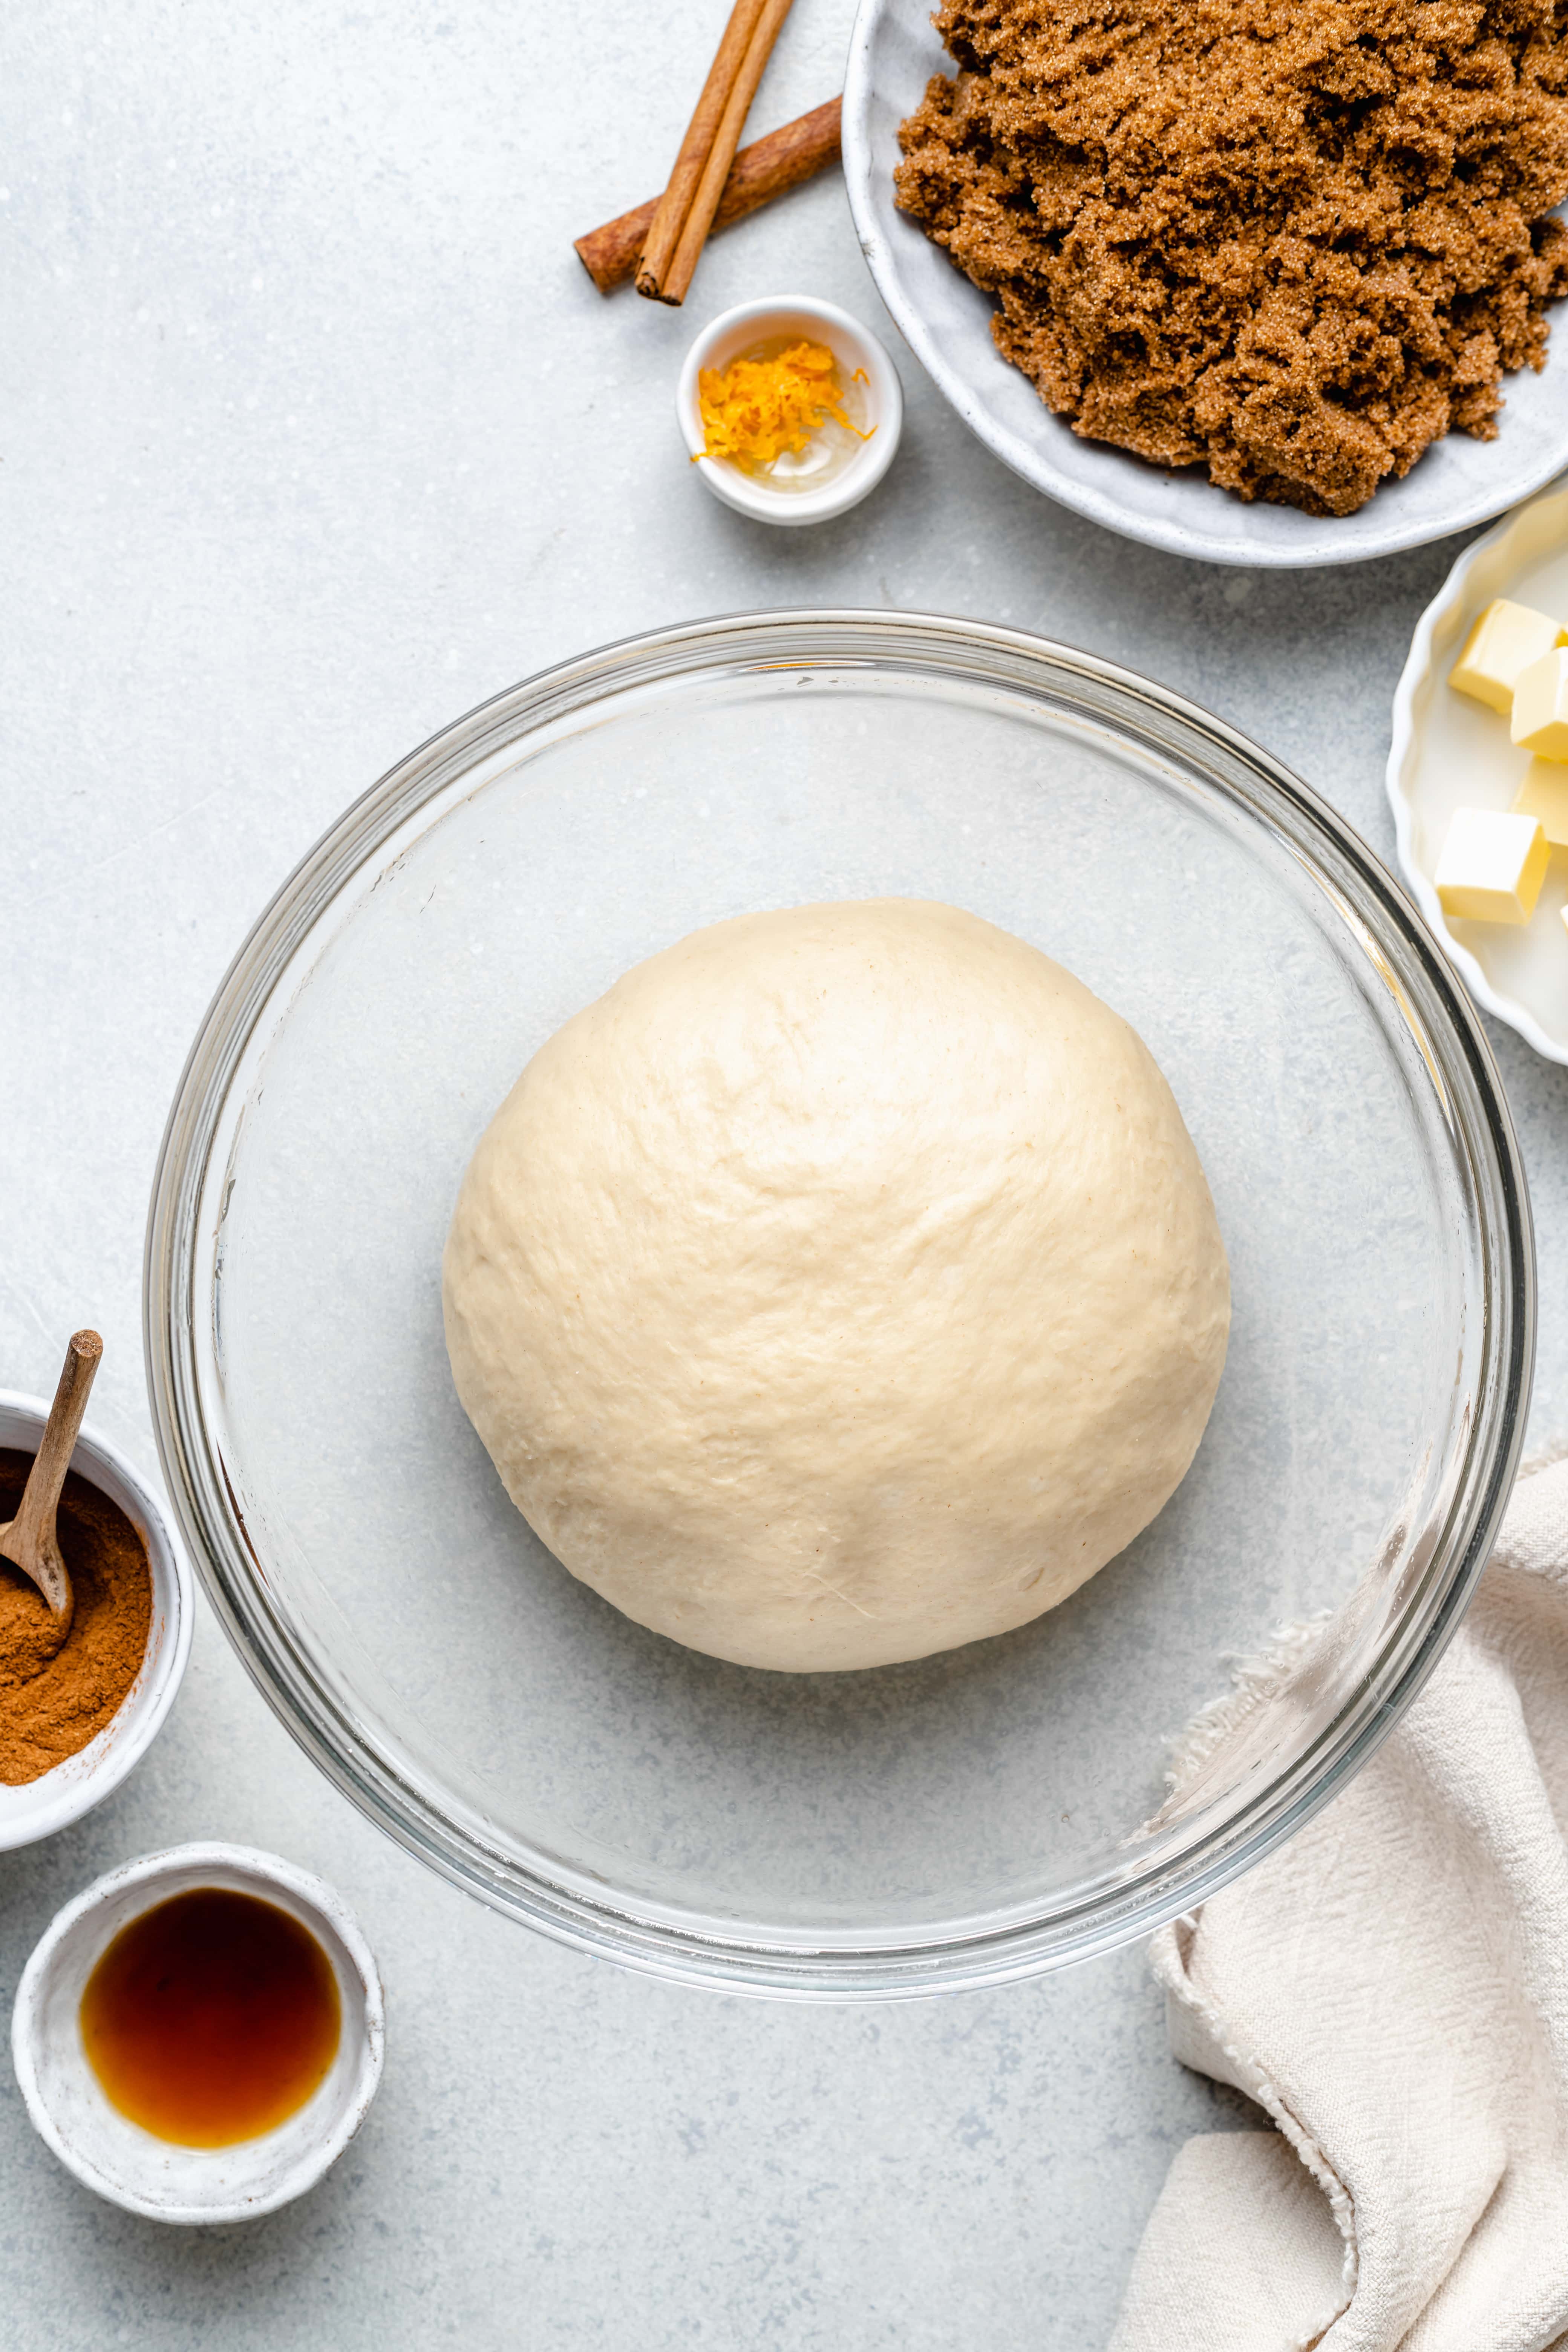
Step Four: Grease a clean, large bowl with one teaspoon of avocado oil and then transfer your ball of dough to the greased bowl. Cover the bowl with a tea towel and let the dough rise in a warm area (like the top of your oven/stovetop) for 60-75 minutes or until the dough has doubled in size.
Step Five: While the dough is rising, make the cinnamon roll filling by combining dark brown sugar, ground cinnamon, vanilla extract, and orange zest in a small bowl.
Step Six: Once the dough has risen, punch it down to release the extra air and then transfer it to a lightly floured surface. Use your hands to shape the dough into a rough rectangle and then use a rolling pin to roll the dough out into a 20×16 rectangle that is roughly 1/4 inch thick.
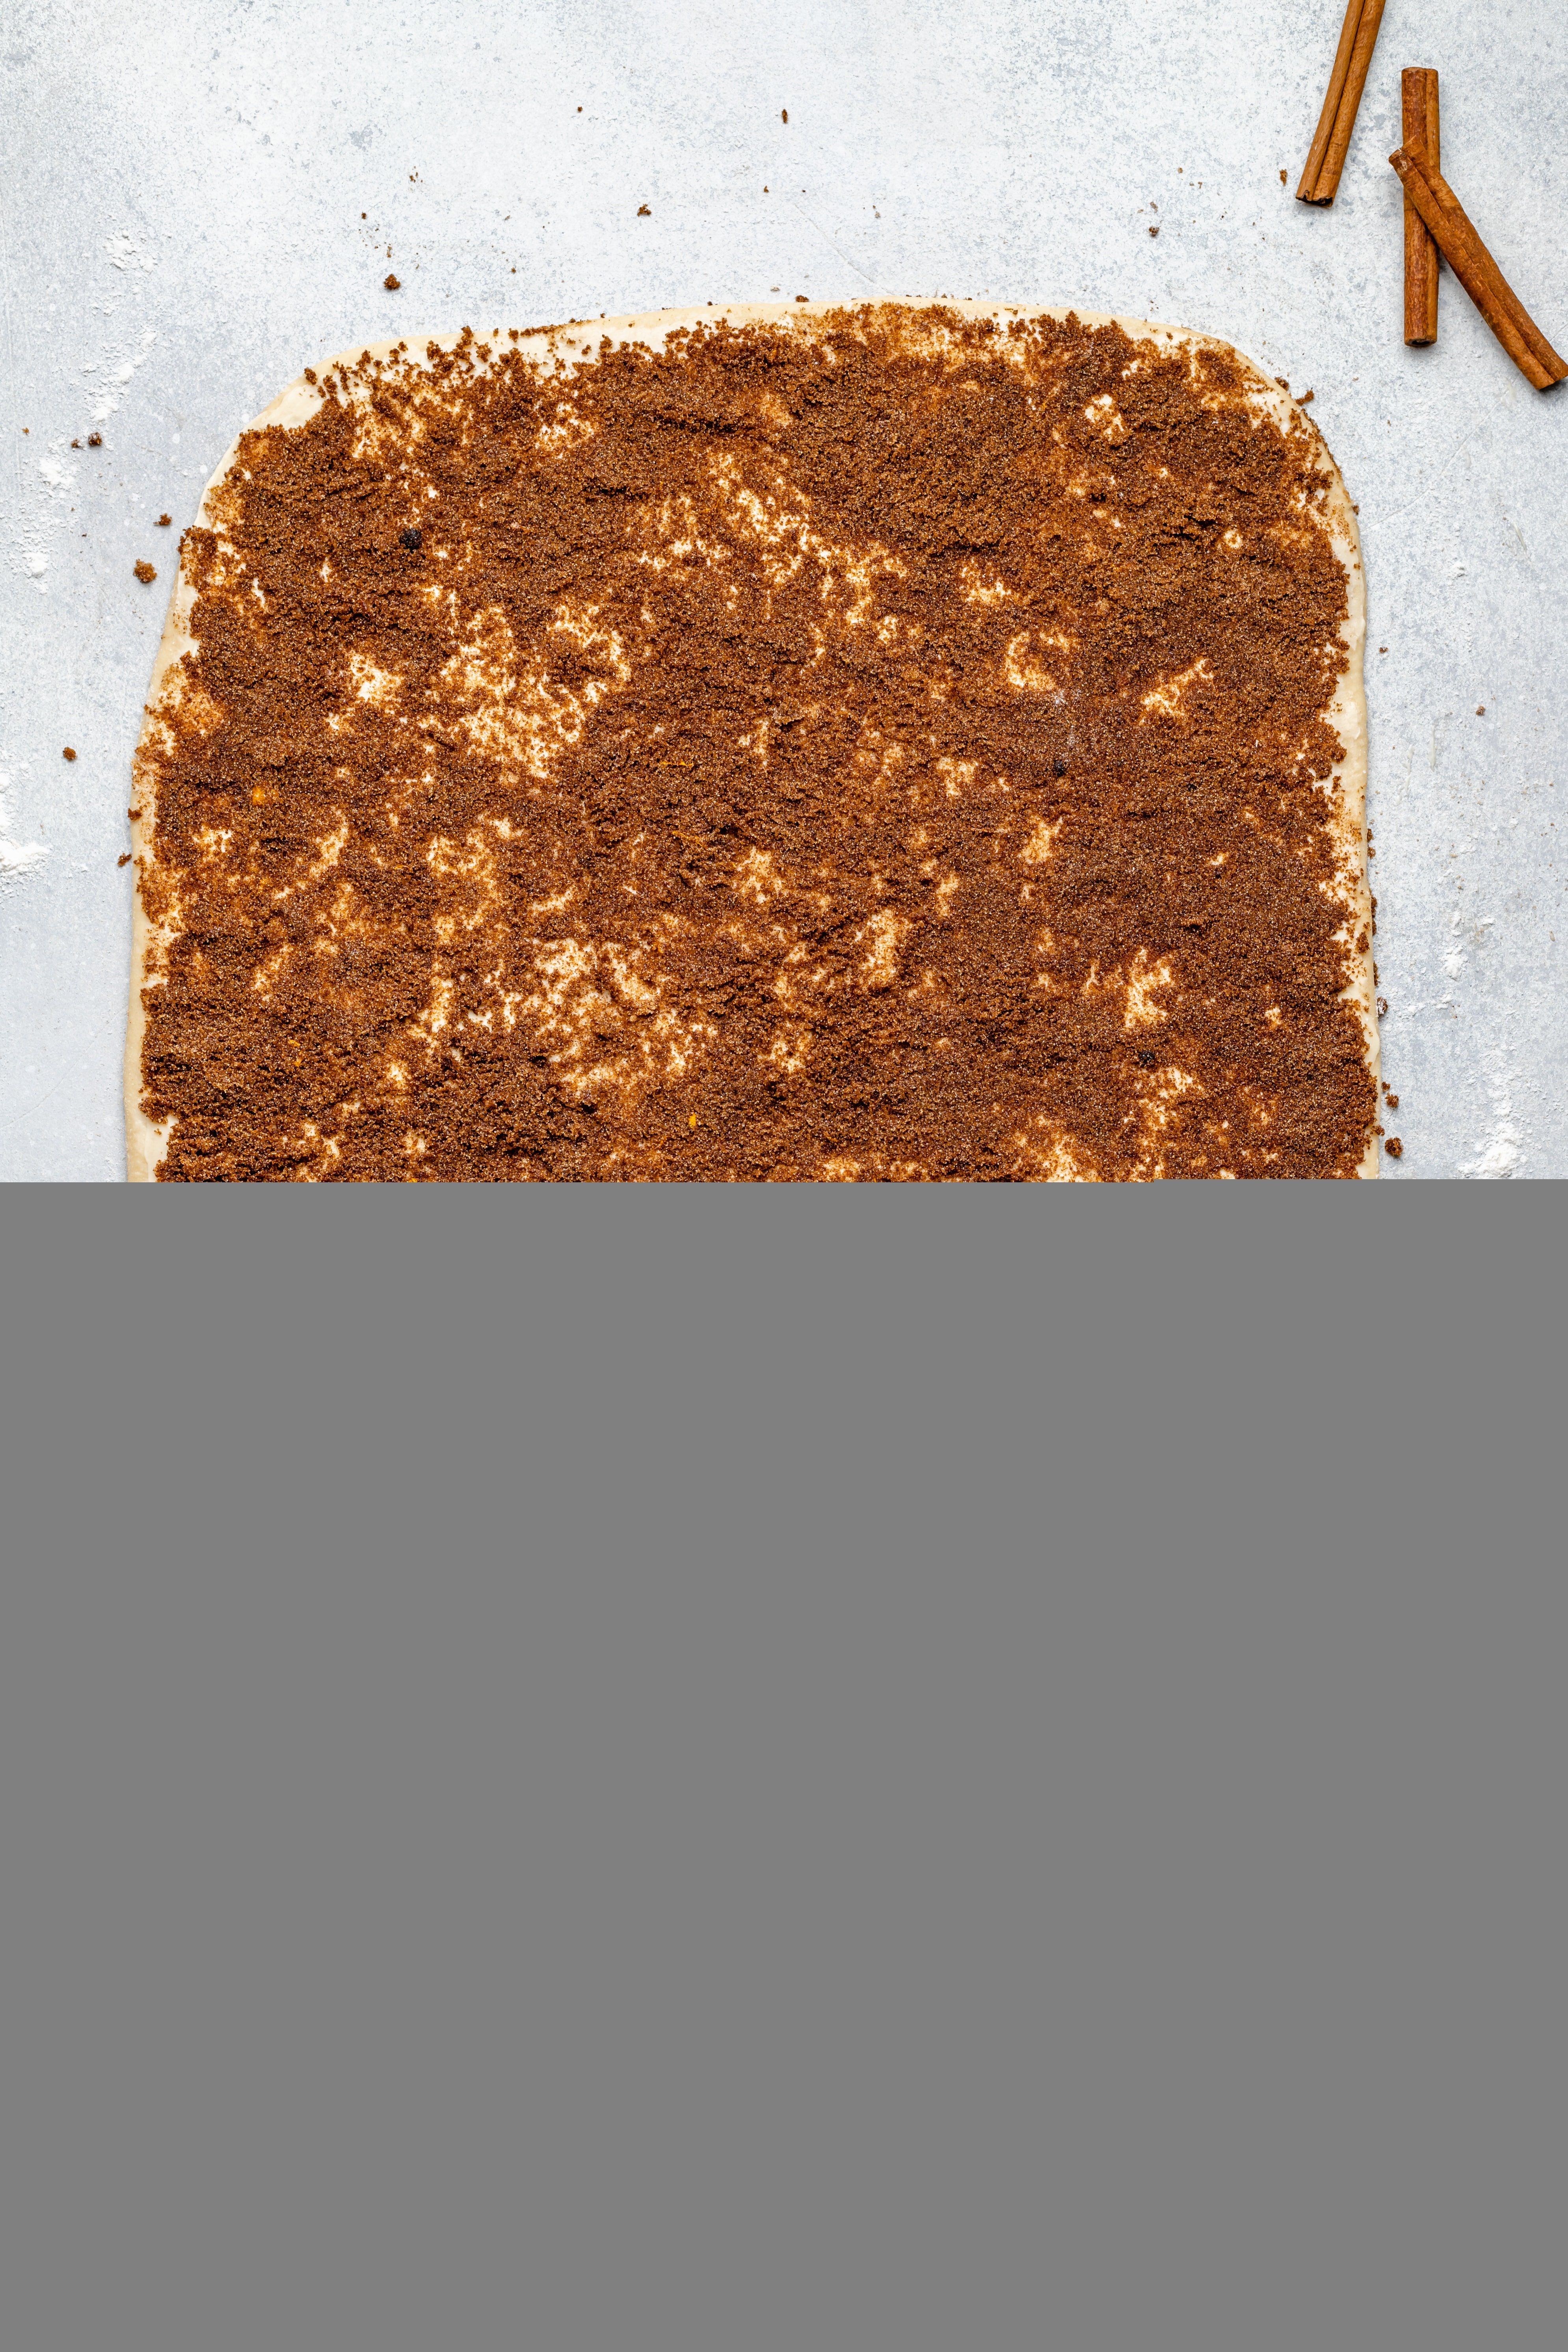
Step Seven: Use a spatula or knife to spread the softened butter evenly over the dough and then sprinkle the cinnamon sugar filling mixture over the butter. Be sure to cover all the edges of the dough! You can use your fingers to gently press the cinnamon sugar mixture into the butter to ensure it sticks.
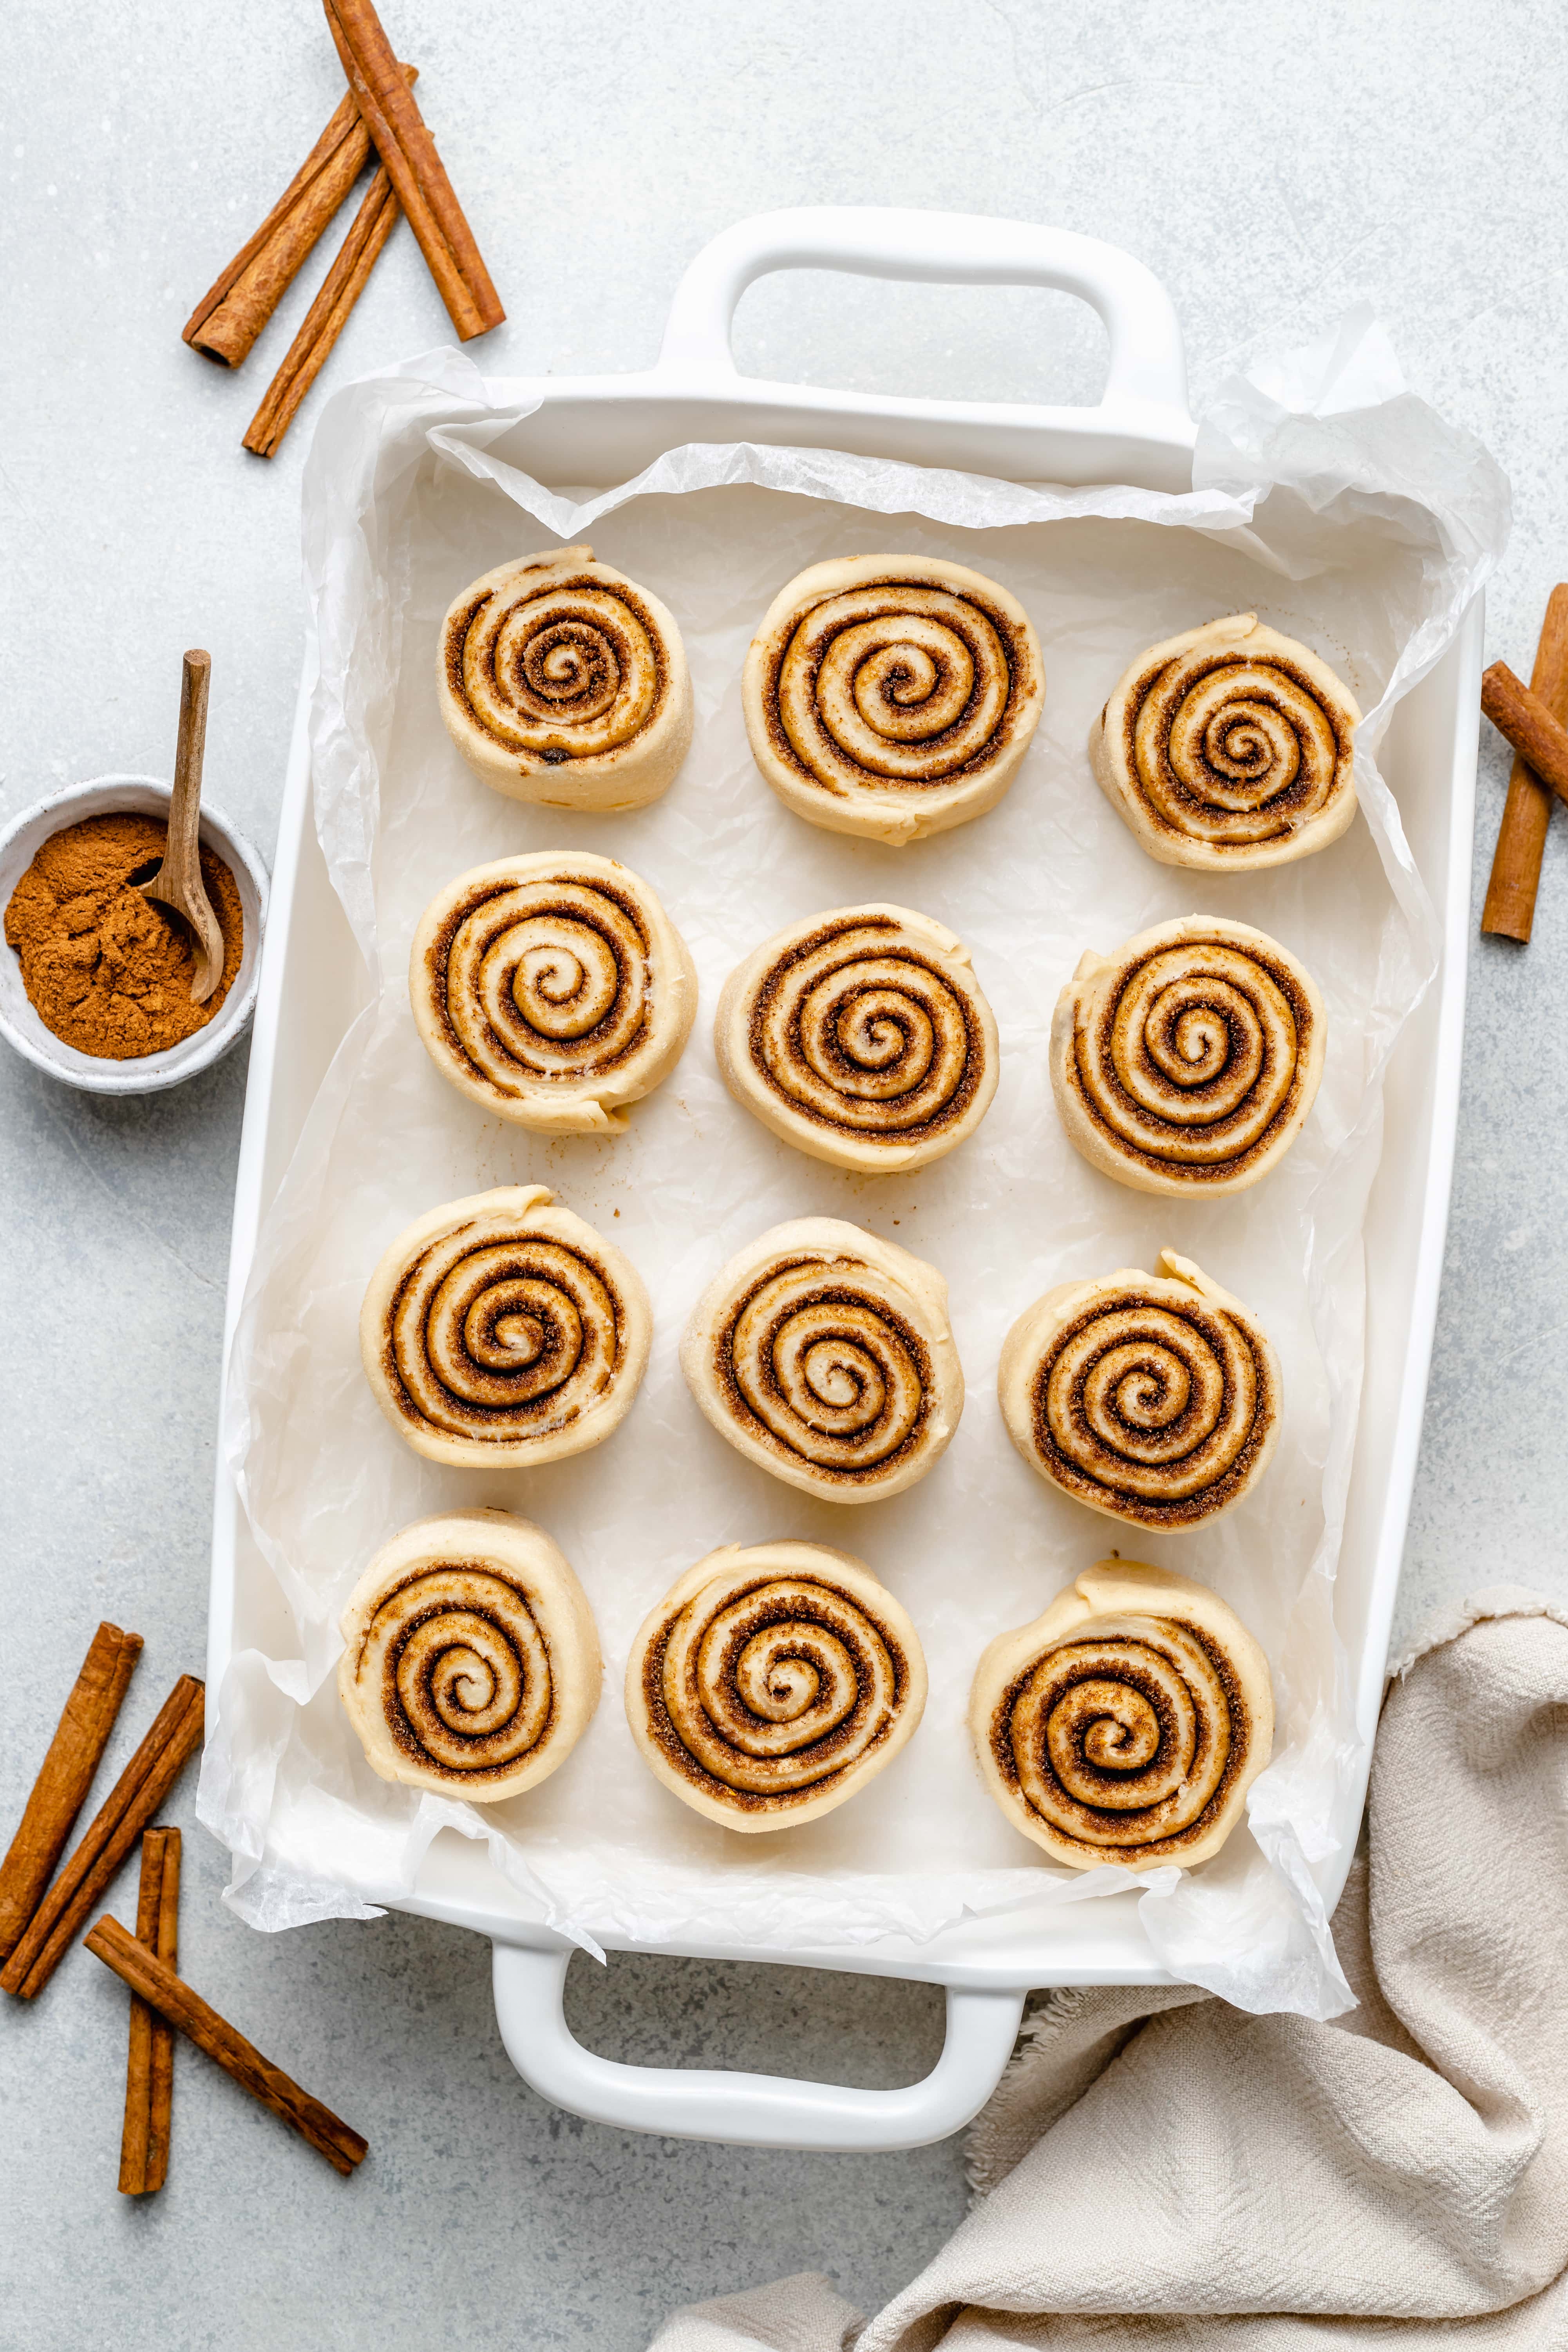
Step Eight: Tightly roll up the dough, on the long side, and then place seam side down. You can pinch the seam a bit so the rolls don’t unravel. Use a sharp serrated knife to cut a small amount of dough off the ends of log. Then, cut the log into 12 equally sized pieces. Place the cinnamon rolls in a 9×13 casserole dish, lined with parchment paper, evenly spaced a part. You should have 3 rows with 4 rolls per row.
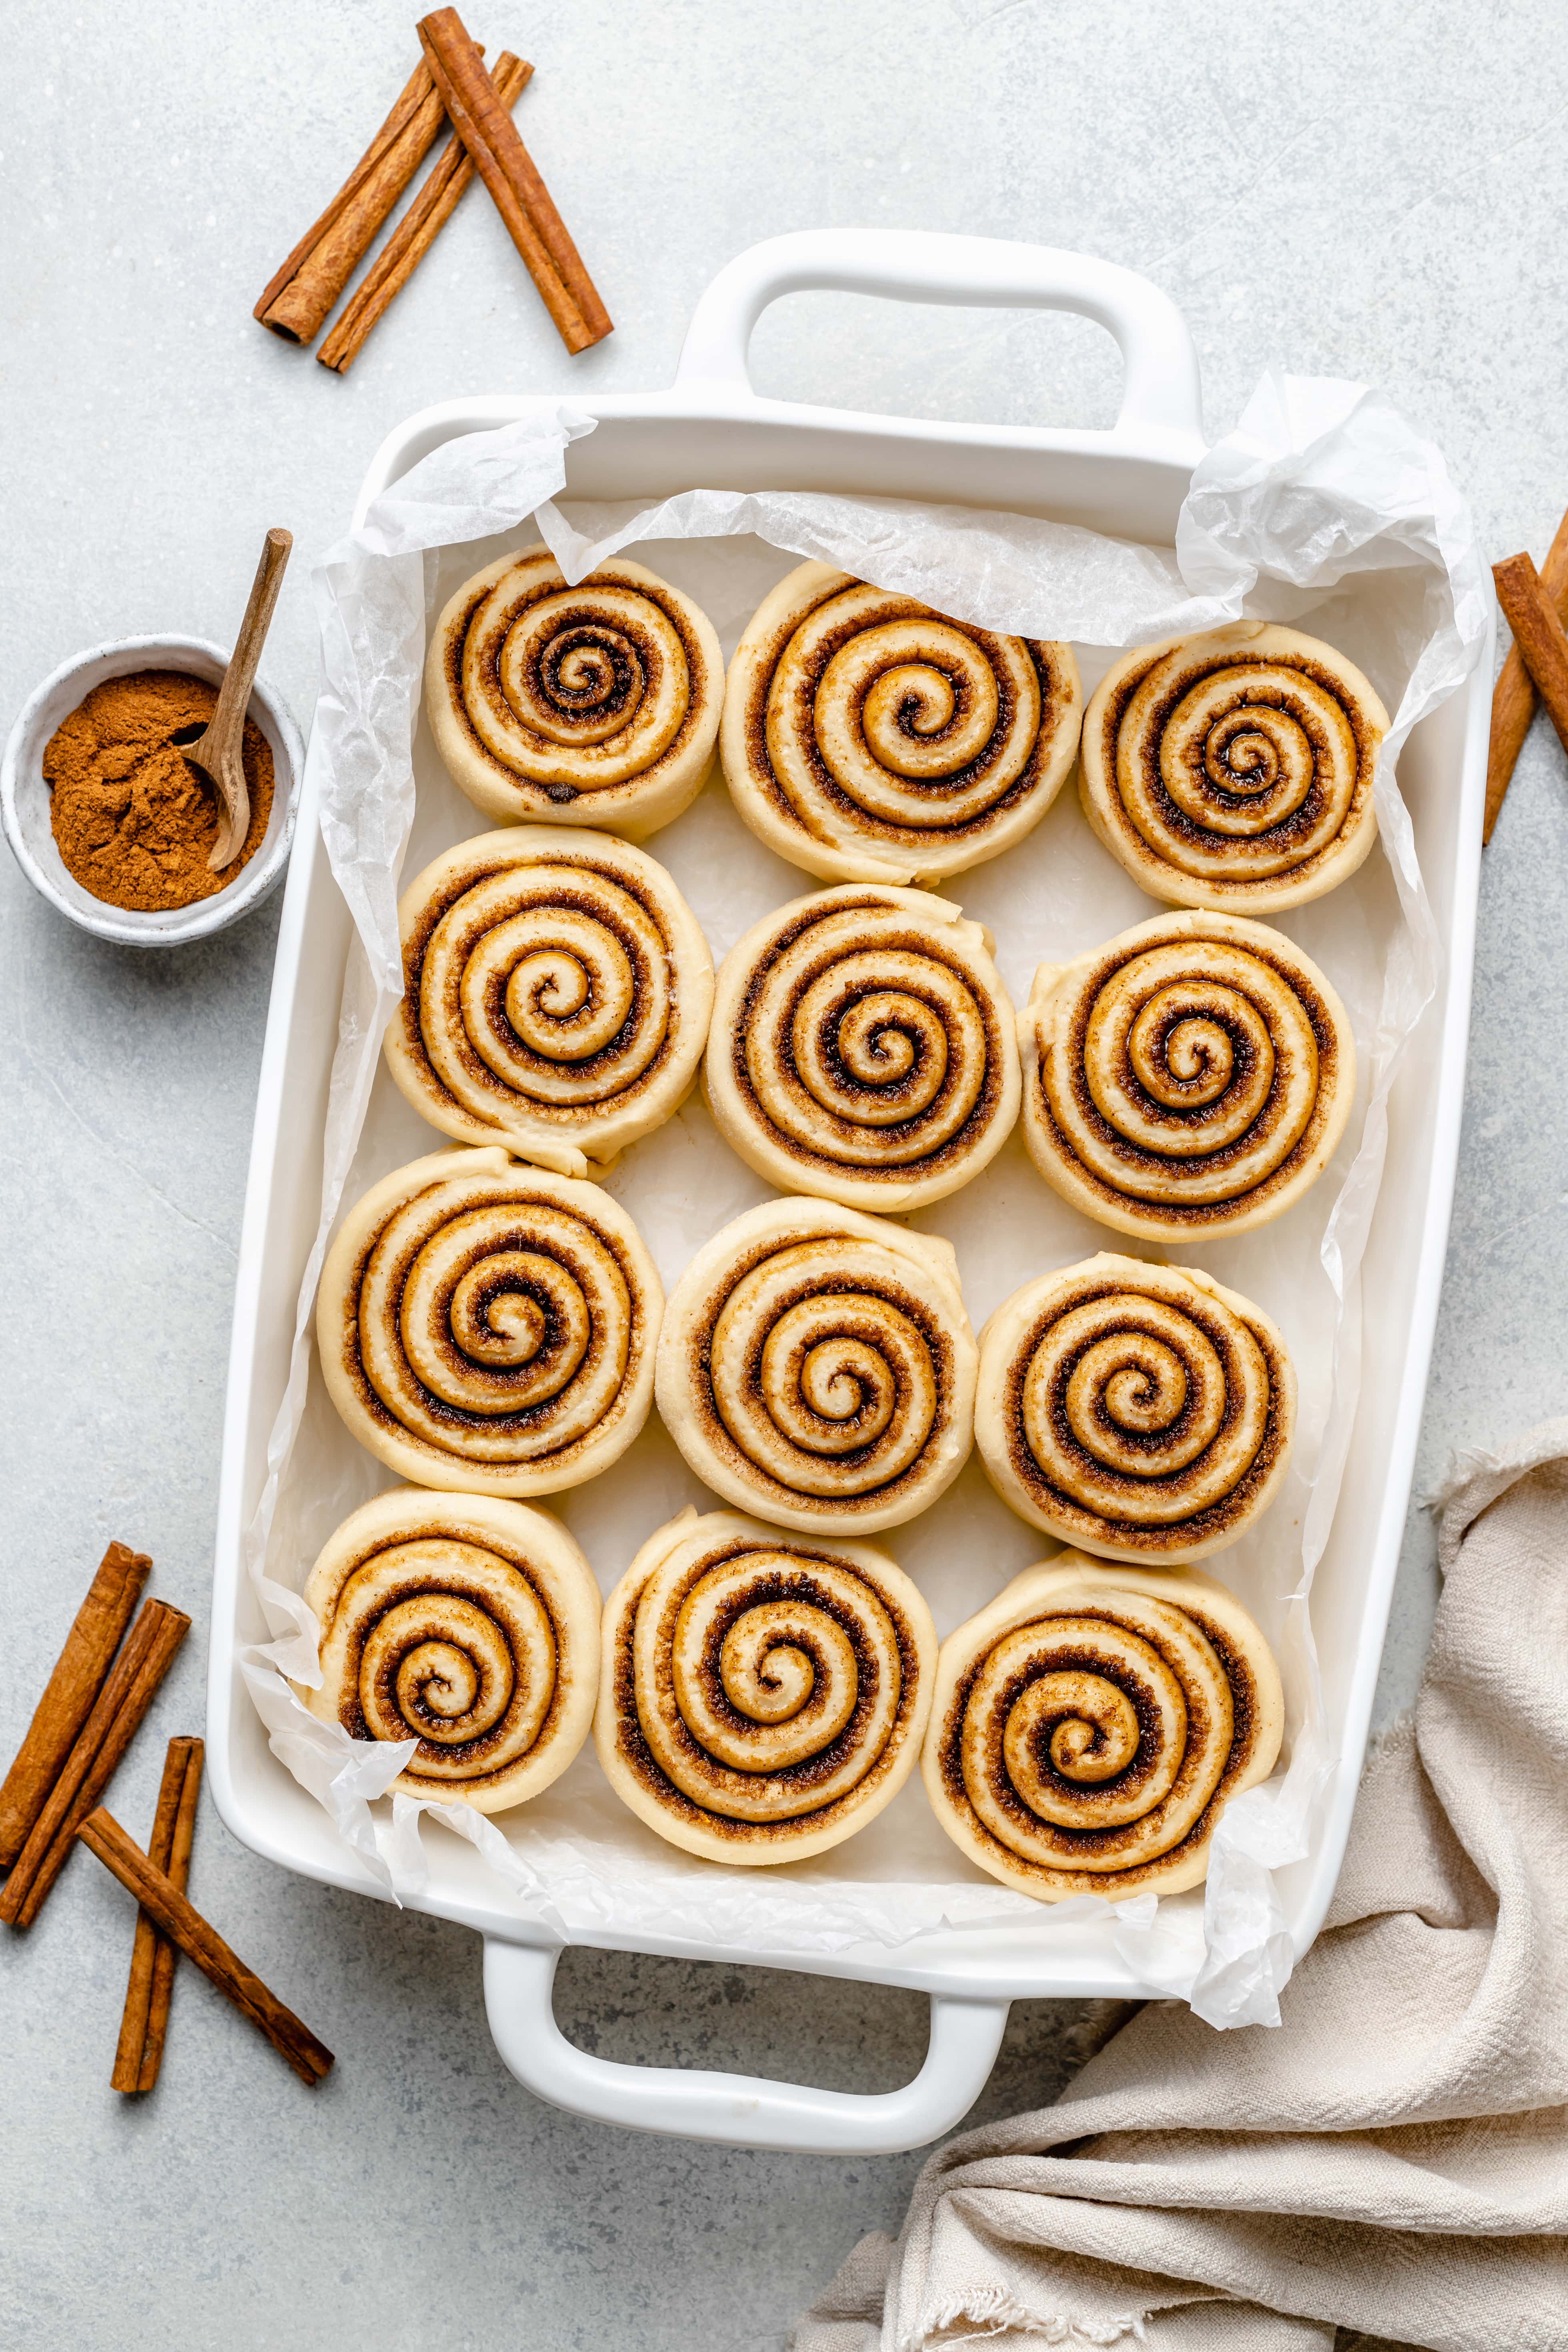
Step Nine: Cover the casserole dish with a tea towel and let the cinnamon rolls rise again for another 30-45 minutes until they have almost doubled in size.
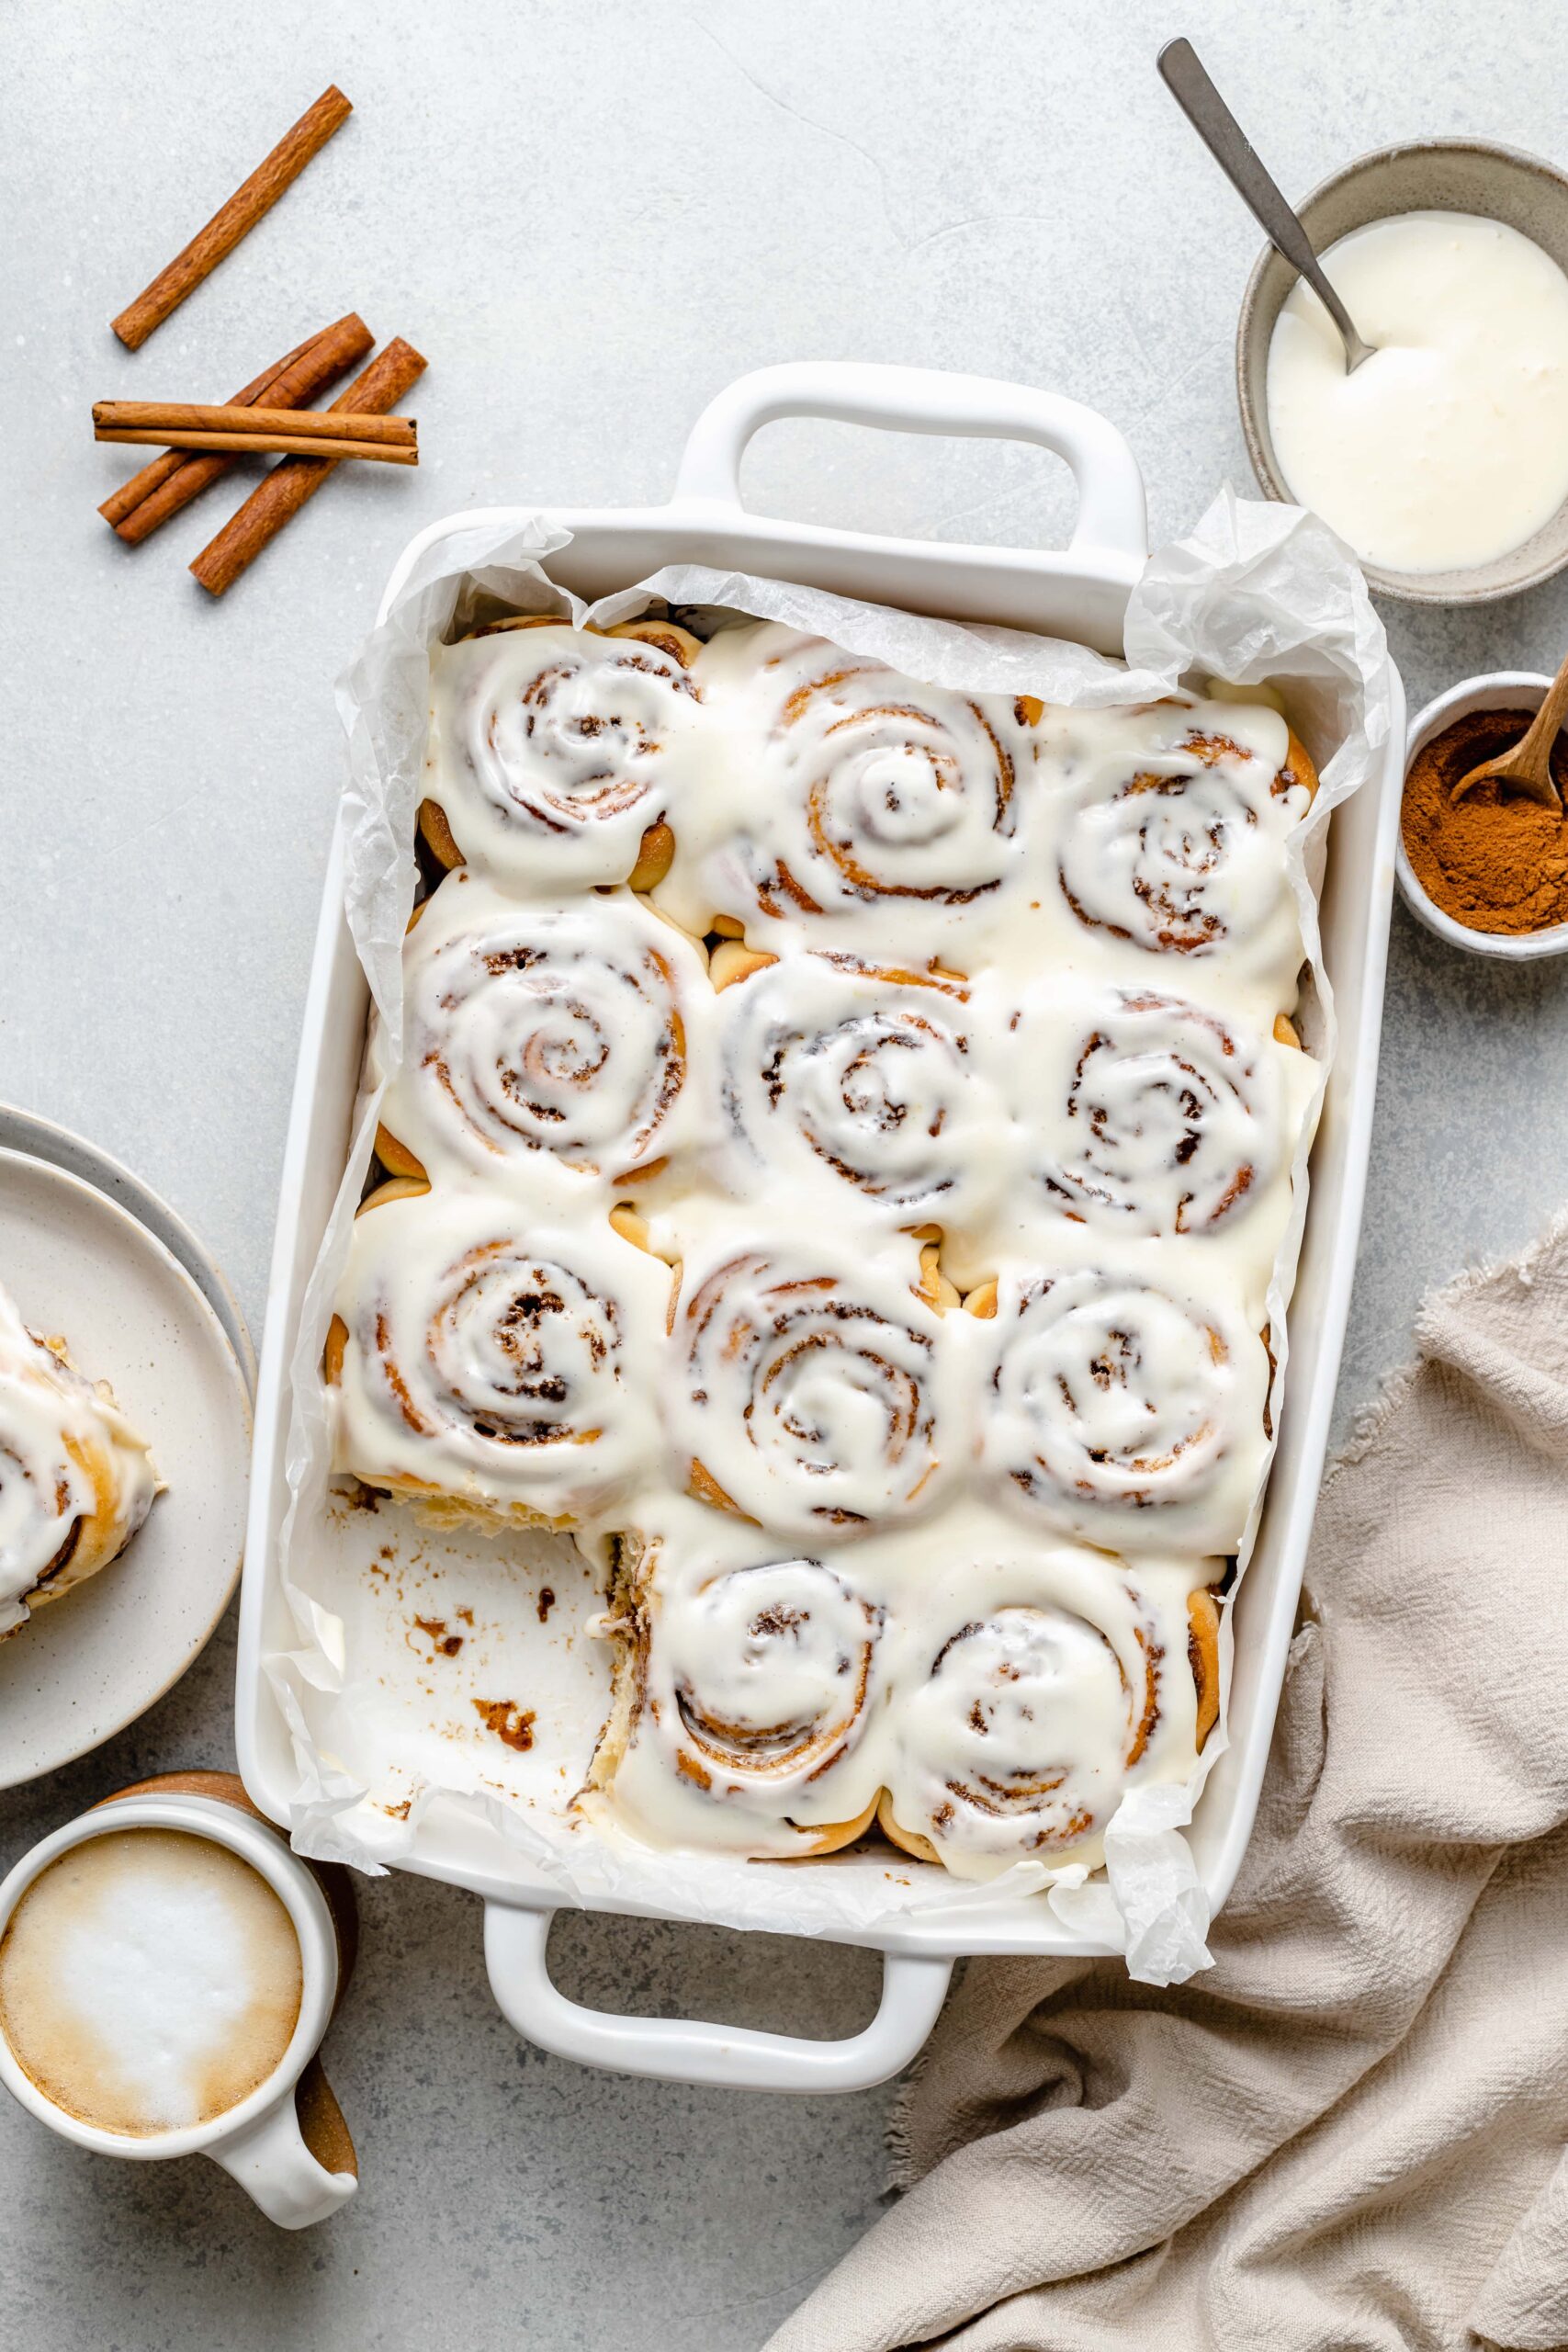
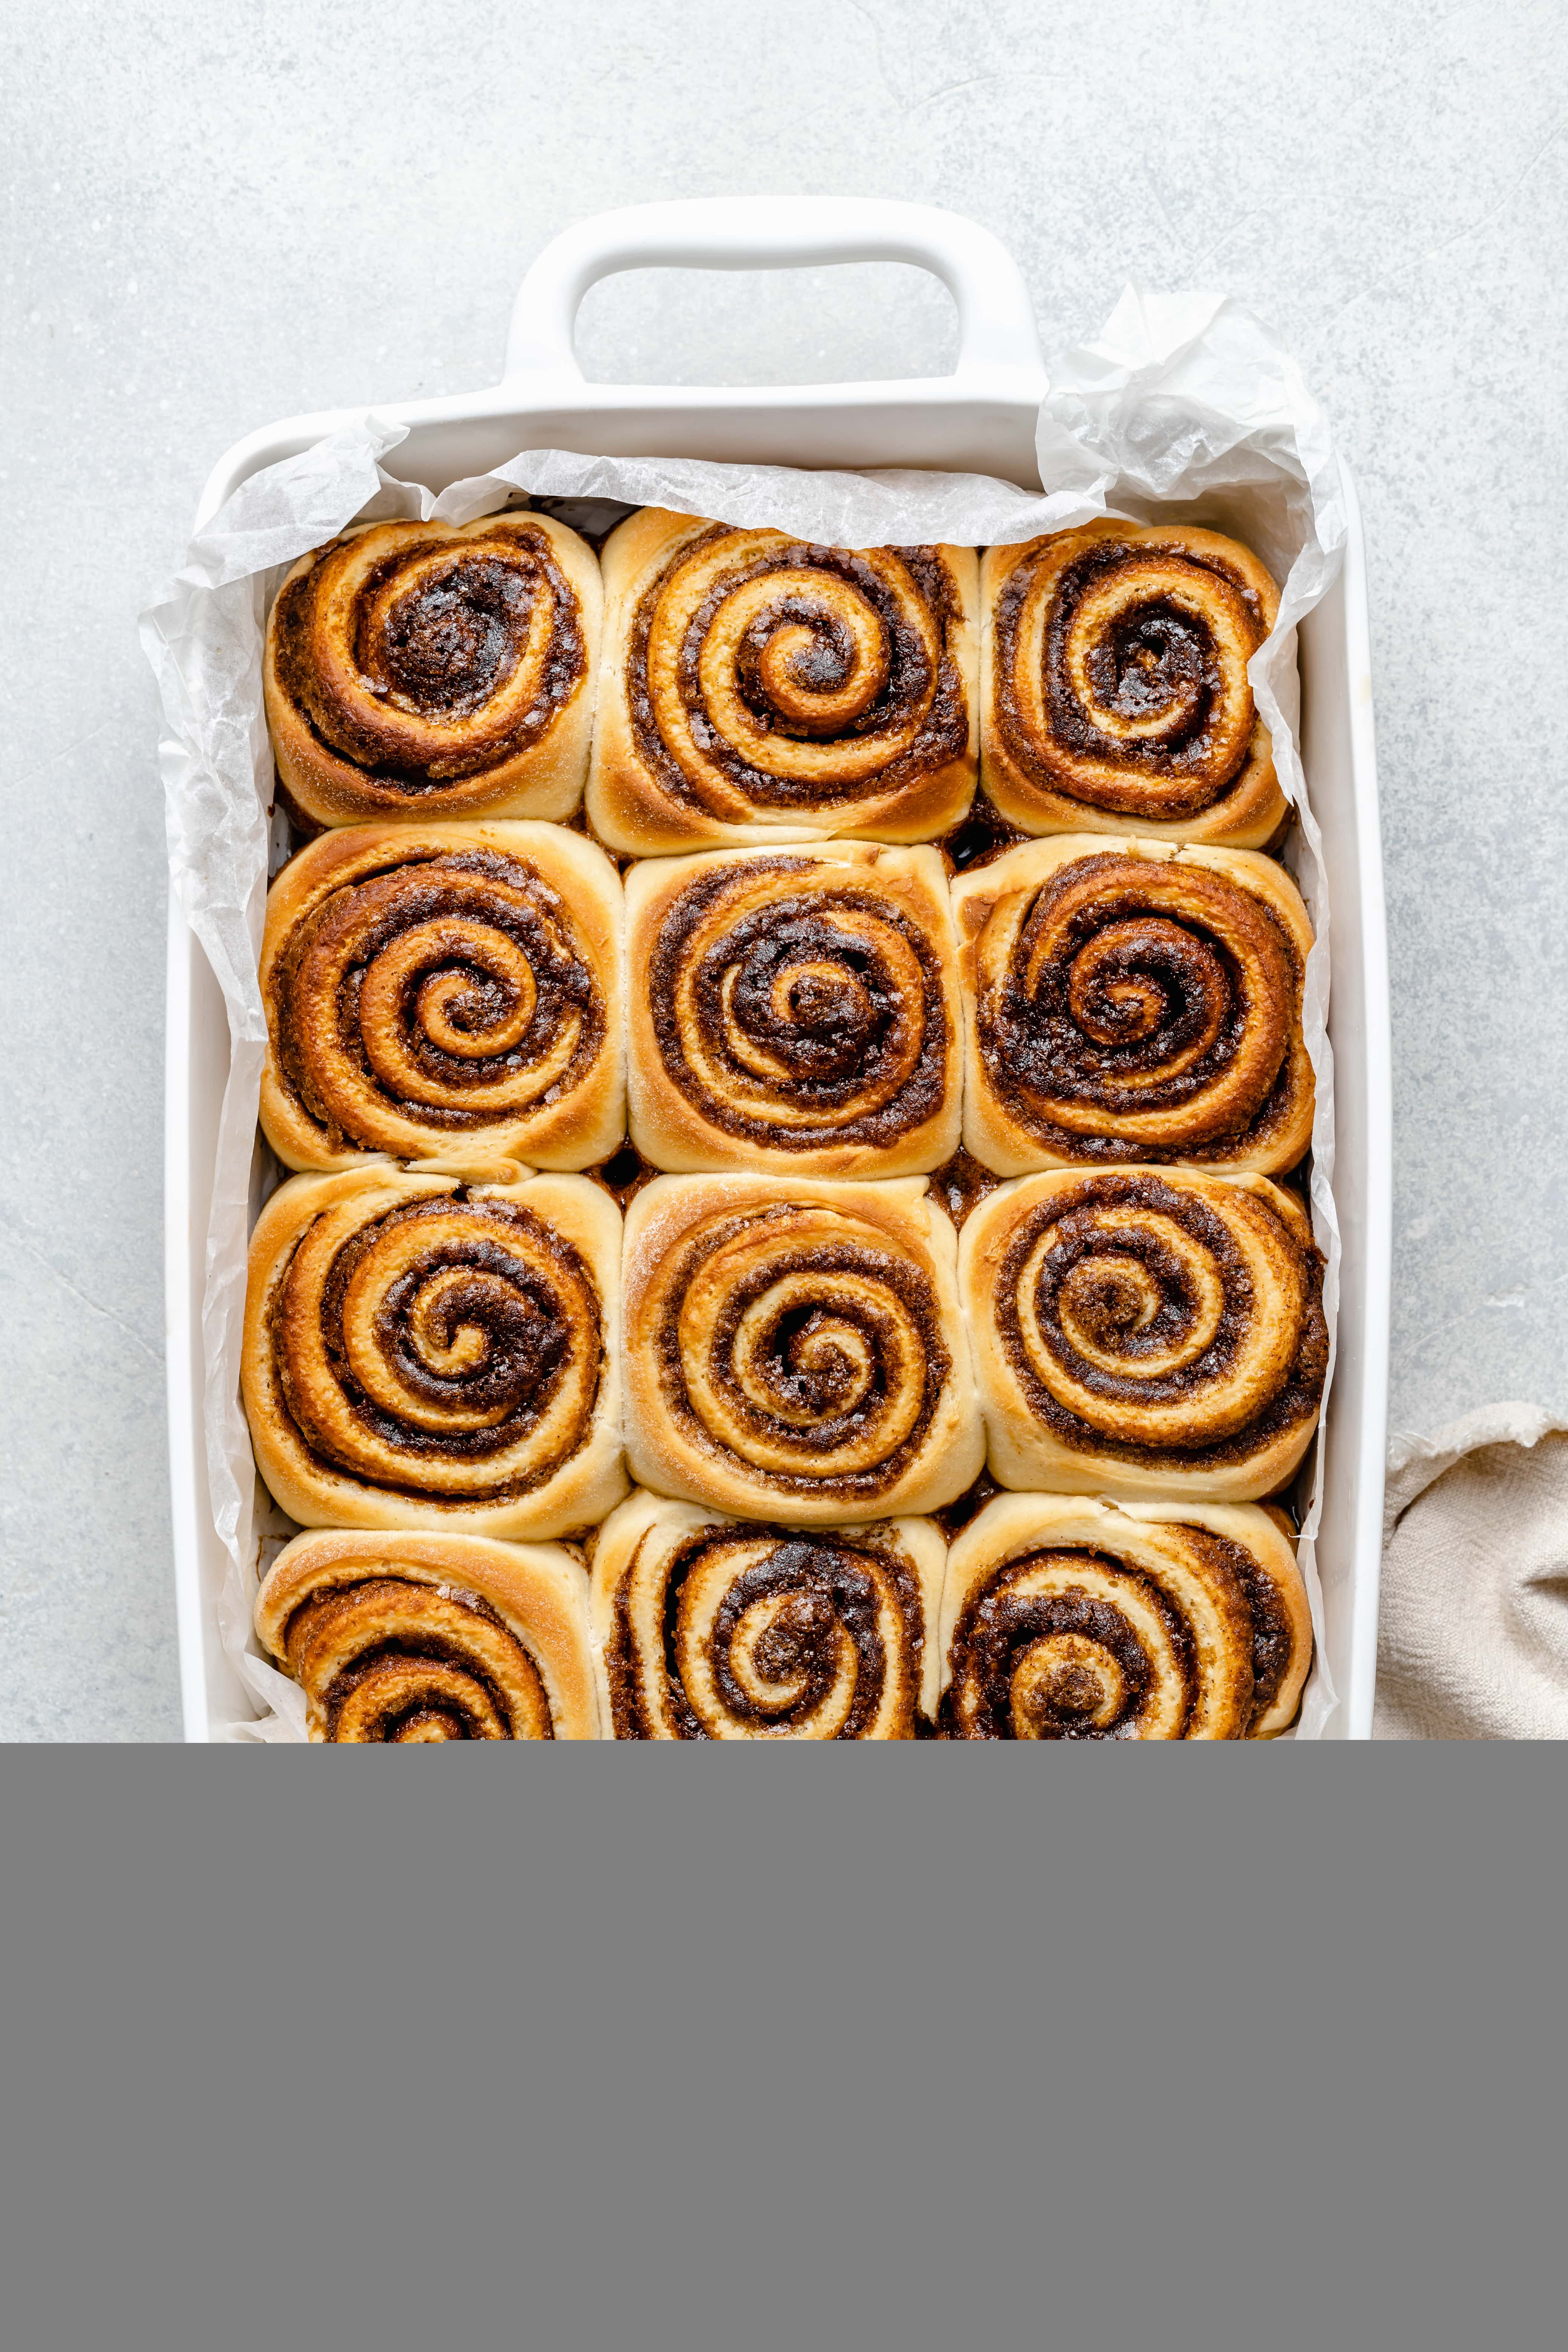
Step Ten: Bake the cinnamon rolls on the center rack at 350 degrees for 20-25 minutes or until the rolls are a light golden brown. Remove the cinnamon rolls from the oven and let cool for 10 minutes before icing.
How to Make Overnight Cinnamon Rolls
I often make these cinnamon rolls the night before and bake them the next morning. You do all of the work the night before and then everyone wakes up to a fresh, warm, cozy, batch of perfect cinnamon rolls. It’s amazing.
To make overnight: Roll, cut, and place the cinnamon rolls in a parchment lined baking dish after they have finished their 1st rise. Then, cover the rolls tightly with plastic wrap and place in the fridge overnight. The next morning, remove the baking dish from the fridge and let the rolls finish their second rise in a warm area for about 45 minutes to 1 hour before baking.
Tips and Tricks for the Best Cinnamon Rolls
- Make sure your yeast is not expired – check the label on your packets of yeast to make sure that it hasn’t expired so that you get a good rise on your cinnamon rolls.
- Don’t overheat or underheat your milk – in order for your yeast to activate properly you want to be sure that your milk is heated to 110-115 digress Fahrenheit. I like to heat my milk in a small pot on the stovetop but you can also heat it in the microwave in increments of 15-20 seconds until warm. Use a candy thermometer to ensure the milk isn’t too hot or not hot enough.
- Make sure your eggs are room temperature – this helps to keep the milk the right temperature and not negatively impact your yeast.
- Measure the flour correctly – be sure to measure your flour by spooning it into the measuring cup and then using a knife to level it out. Measuring it correctly will ensure that you don’t add too much flour to the dough.
- Swap AP flour for bread flour – I’ve made these rolls with both all purpose flour and bread flour and both ways come out great. But, if you want extra fluffy chewy cinnamon rolls then bread flour is the way to go!
- Use room temperature butter in the filling – I’ve tested these with both melted butter and room temperature butter and room temp butter wins every single time. I found that the filling leaked out of the rolls while baking when I used melted butter.
- Use measuring tape – I use to really struggle with getting evenly sized cinnamon rolls until I started to pull out my measuring tape. Now, I keep one in the kitchen and it helps me to cut evenly sized cinnamon rolls every time.
- Line your pan with parchment paper – if you want to make clean up a breeze and keep your rolls from sticking, don’t forget to line your baking dish with parchment paper before adding the cinnamon rolls.
- Don’t over bake – the cinnamon rolls should be a nice golden brown on the top and not too dark. If you tap the top of a roll and it sounds hollow then you know they are done.
- Practice makes perfect – here’s the thing with cinnamon rolls, you get better at making them the more you make them. I’ve made dozens of batches at this point and I still feel like I learn a new little trick or find something I want to tweak every time I make them. Just know your rolls will be delicious and you’ll feel even more confident making them with more practice.
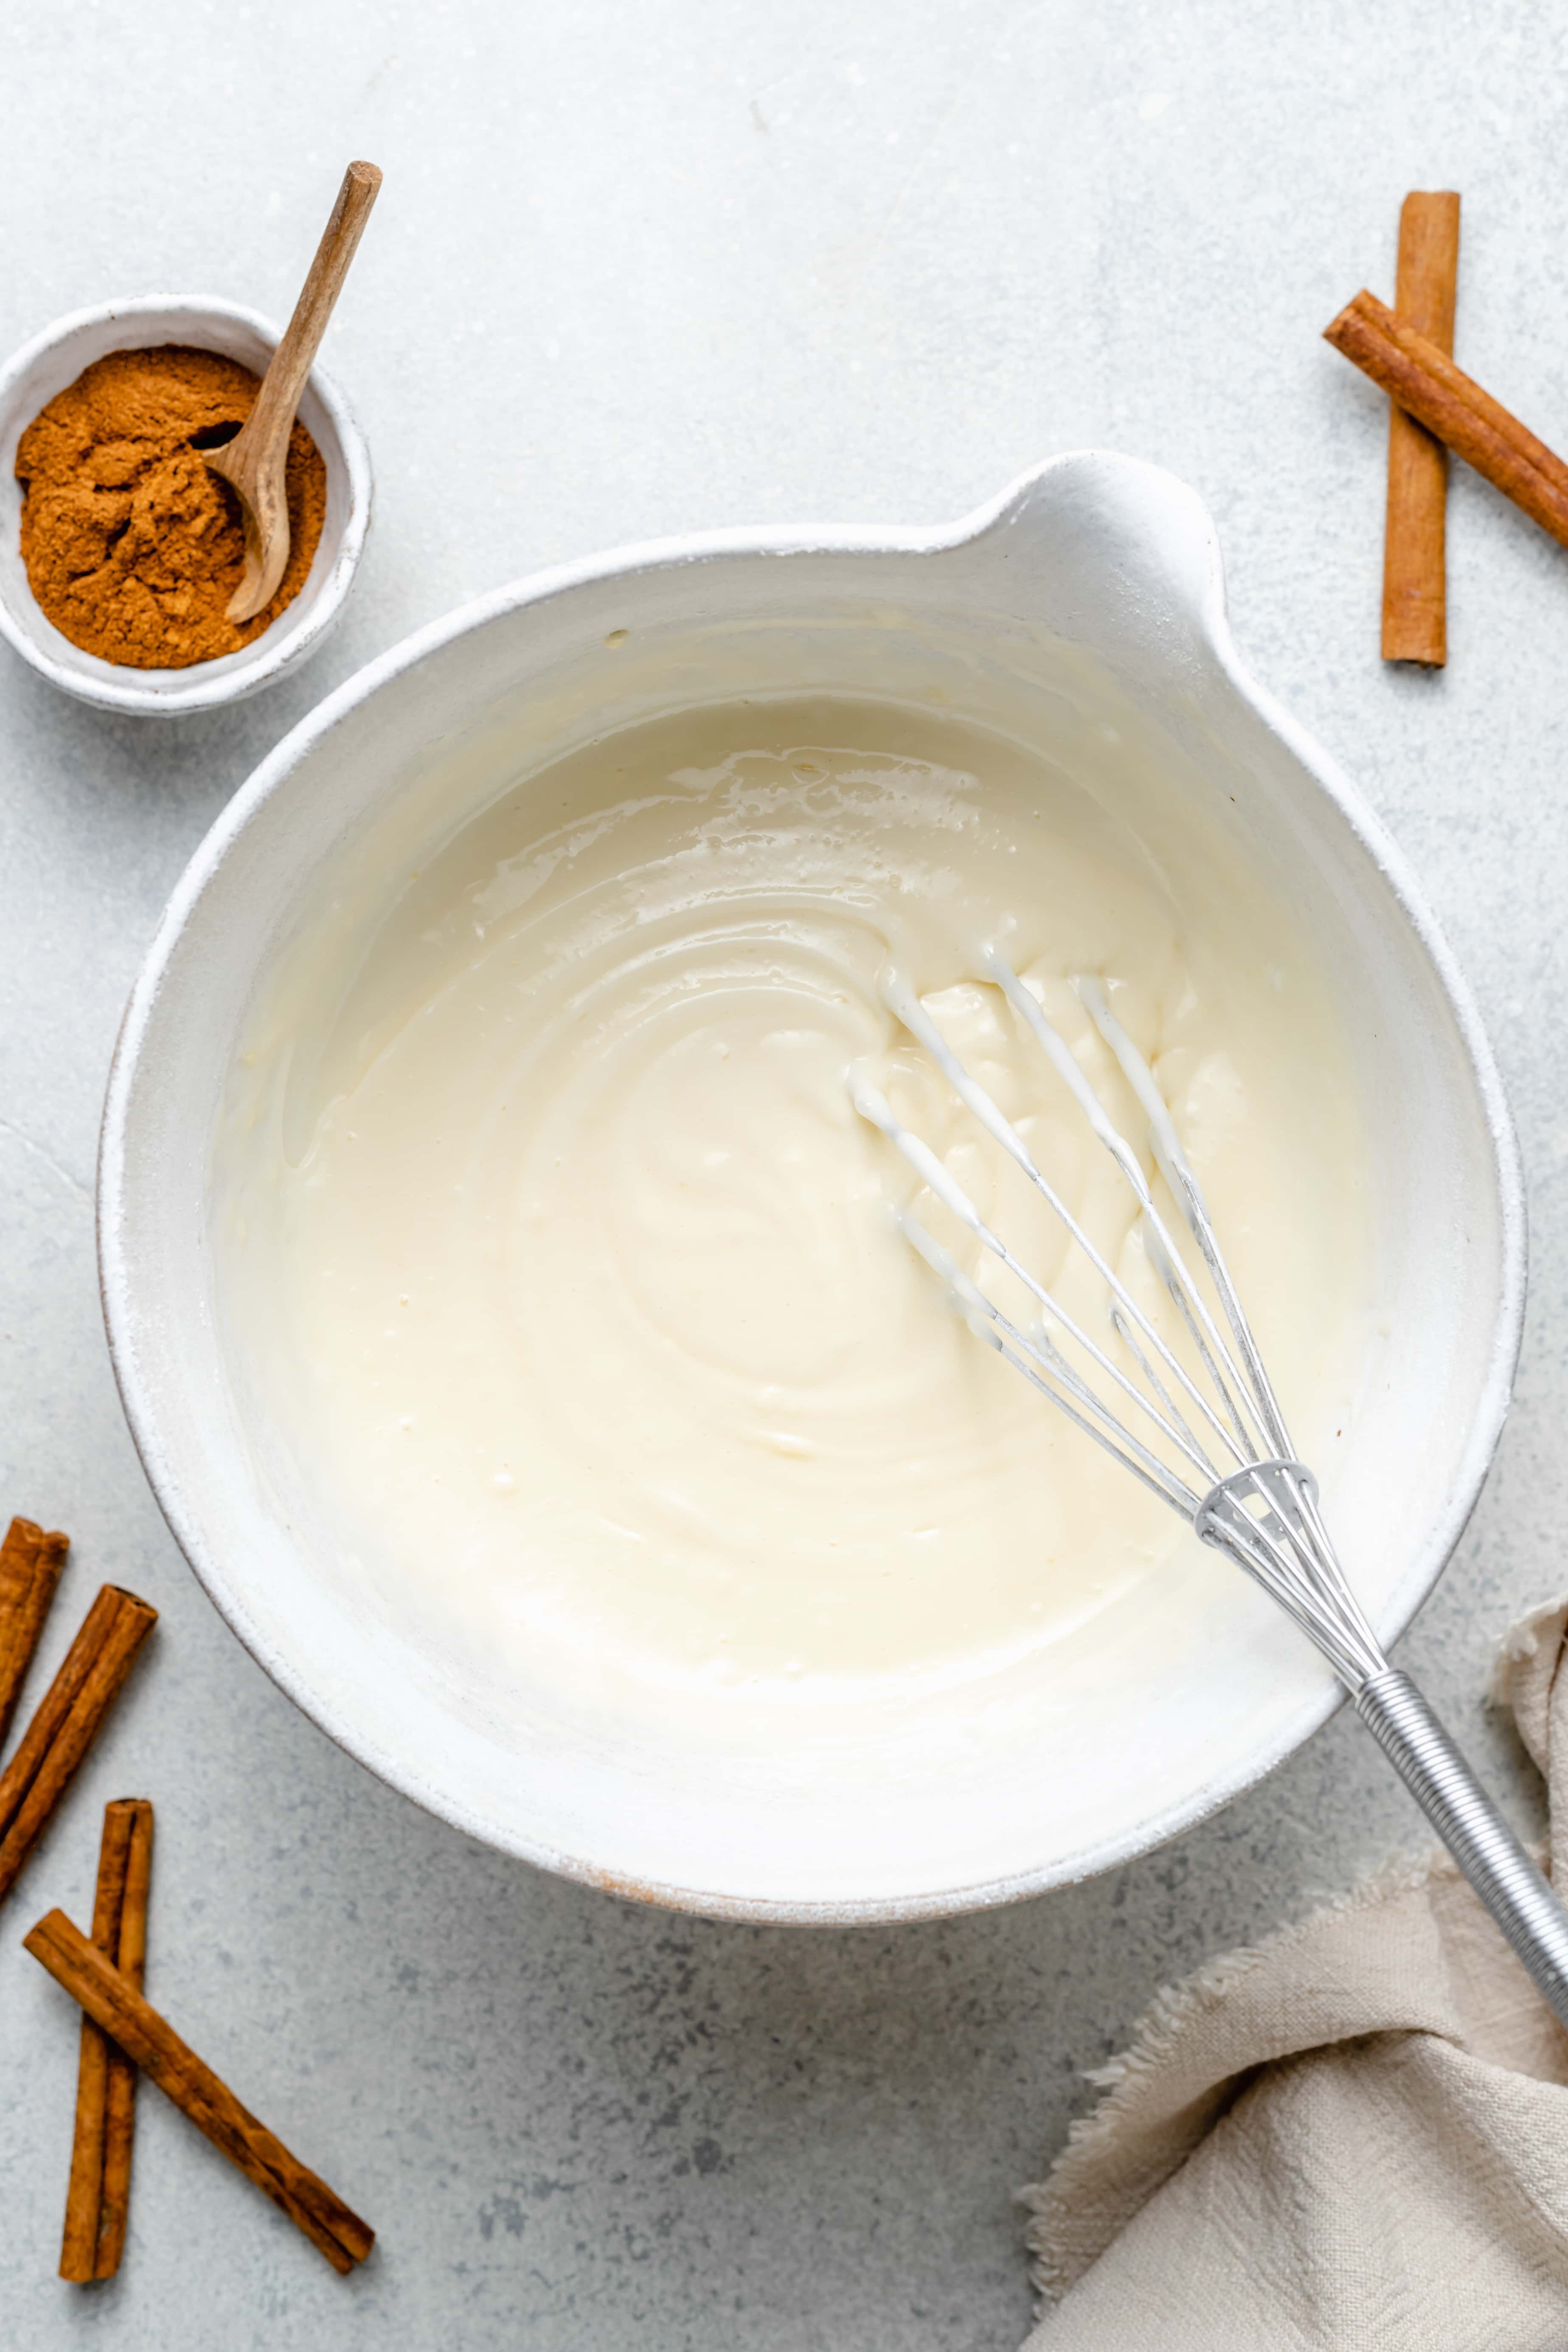
The Best Cream Cheese Icing
Cinnamon rolls are great on their own but they would be nothing without a creamy, sweet cream cheese icing slathered on top.
This cream cheese icing is my favorite because it’s not overly sweet, has the perfect consistency, and has hints of orange. It really helps to pull everything together and keeps you coming back for more. Here’s what you’ll need:
- cream cheese – go for the block of cream cheese here, not a spread.
- butter – I like to go all out and use the fancy grass fed butter for this recipe.
- powdered sugar – we’ll use just the right amount so the rolls aren’t too sweet.
- orange juice – a splash of OJ helps to brighten things up.
- vanilla extract – I provide a measurement but I mean, feel free to measure with your heart here.
Frequently Asked Questions
Do I have to use buttermilk?
No. I really do think it makes a difference in the overall flavor of the dough but you could easily swap the buttermilk for whole milk instead!
What’s the best way to heat the milk?
I prefer heating my buttermilk on the stove top in a small pot. However, you can also heat the milk in the microwave by heating it in 15-20 second increments. Just be sure to use a candy thermometer to ensure it’s the right temperature.
Can I leave out the orange zest?
Yes! of course you could, but don’t knock it until you try it. I really think the orange zest just takes these cinnamon rolls to another level.
Can I make these dairy free?
Most likely, yes! I haven’t tested these rolls with dairy free ingredients but you could likely use almond or coconut milk instead of buttermilk. You could likely use vegan butter and vegan cream cheese as well.
Can I make these gluten free?
I’ve tested these MANY times with gluten free cup for cup flour instead of all purpose and the results were alway lackluster. The dough was hard to work with and the rolls came out a bit dry instead of soft and fluffy. I’m still testing gluten free rolls, because I truly believe it’s possible, but subbing gluten free flour in this recipe is not my preference.
Can I use a stand mixer?
Yes! Instead of kneading by hand, if you have a stand mixer you can knead the dough using a dough hook. Just know that if you don’t have a stand mixer, don’t worry! Personally, I never use a stand mixer.
Can I add in extra mix-ins?
Sure! If you like you can add in chopped nuts, seeds, or dried fruit to the filling of your cinnamon rolls.
More Reader Favorite Cinnamon Roll Recipes
- The Best Pumpkin Cinnamon Rolls
- Raspberry Lemon Sweet Rolls
- Banana Bread Cinnamon Rolls
- Apple Cinnamon Rolls with Brown Butter Cream Cheese Icing
I hope you love these Homemade Cinnamon Rolls as much as we do!
If you do give this recipe a try, I want to know! Leave a comment with a star rating below. You can also snap a photo & tag @allthehealthythings on INSTAGRAM. Your reviews help support All the Healthy Things and make it possible for me to continue to create the recipes you know and love.
Print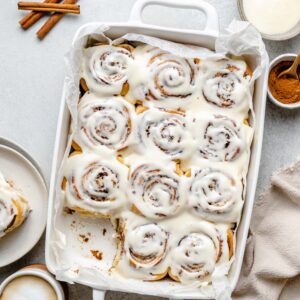
The Best Homemade Cinnamon Rolls
- Prep Time: 2 hours 45 minutes
- Cook Time: 25 minutes
- Total Time: 3 hours 10 minutes
- Yield: 12 1x
- Category: Dessert
- Method: Baking
- Cuisine: American
- Prep Time: 2 hours 45 minutes
- Cook Time: 25 minutes
- Total Time: 3 hours 10 minutes
- Yield: 12 1x
- Category: Dessert
- Method: Baking
- Cuisine: American
Ingredients
Dough
- 1 cup buttermilk, warmed to 110-115 degrees Fahrenheit
- 2 – 1/4 oz packets active-dry yeast
- 1/3 cup granulated sugar
- 1/4 cup butter, melted
- 1 egg + 1 egg yolk, room temperature
- 1/2 teaspoon salt
- 4 cups all purpose flour or bread flour, spooned and leveled
- avocado oil or avocado oil non-stick spray
Filling
- 6 tablespoons unsalted butter, softened to room temperature
- 1 cup packed dark brown sugar
- 1 1/2 tablespoons ground cinnamon
- 1 tablespoon vanilla extract
- 1/2 teaspoon orange zest
Cream Cheese Frosting
- 8 oz cream cheese, softened to room temperature
- 2 tablespoons unsalted butter, softened to room temperature
- 3/4 cup confectioner’s sugar, plus more to taste
- 2 tablespoons orange juice
- 1/2 tablespoon vanilla extract
Method
- Warm the buttermilk to 110-115 degrees Farenheit and then transfer to a large mixing bowl. Sprinkle the yeast on top of the warm milk and then sprinkle the granulated sugar over the yeast. The yeast should begin to foam and become frothy. If after 5 minutes the yeast does still not start to foam or become frothy, throw out the milk mixture and start again with new yeast. Next, add the melted butter, egg, and egg yolk to the mixture and whisk together until well combined.
- Add the all purpose flour and salt to the wet ingredients and use a wooden spoon to stir in the flour until it is well combined a dough forms, being sure to incorporate all of the flour from the sides of the bowl. You’ll know it’s time to move on to the next step once it becomes hard to stir. The dough will be thick, shaggy dough that’s still quite a bit sticky and that’s ok!
- Turn the dough out onto a lightly floured surface and then use your hands to knead the dough for 8-10 minutes until it becomes elastic and can easily form into a smooth ball. The dough should feel slightly tacky but it should not stick to your hands or the kneading surface. If the dough is still too sticky, add 1 tablespoon of flour at a time and continue to knead the dough until it becomes a smooth, elastic ball.
- Grease a clean, large bowl with one teaspoon of avocado oil and then transfer the ball of dough to the greased bowl. Cover the bowl with a tea towel and let the dough rise in a warm area (like the top of your oven/stovetop) for 1 – 1 1/2 hours or until the dough has doubled in size.
- While the dough is rising, make the filling by combining the dark brown sugar, cinnamon, vanilla extract, and orange zest in a small bowl.
- Once the dough has risen, punch it down to release the extra air and then transfer to a lightly floured surface. Shape the dough into the shape of a rough rectangle and then use a rolling pin to roll the dough out into a 20×16 rectangle that is roughly 1/4 inch thick.
- Use a spatula or knife to spread the softened butter evenly over the dough and then sprinkle the filling mixture over the butter being sure to cover all of the edges of the dough. Use your fingers to press the cinnamon sugar mixture into the butter a bit.
- Tightly roll up the dough, on the long side, and place seam side down. Pinch the seal a bit so the rolls don’t unravel. Use a sharp serrated knife or unflavored dental floss to cut the roll into 12 equally sized pieces. Place the cinnamon rolls in a 9×13 casserole dish, lined with parchment paper, evenly spaced a part. You should have 3 rows with 4 rolls per row.
- Cover the casserole dish with a tea towel and let the cinnamon rolls rise for another 30-45 minutes until they have almost doubled in size.
- Bake the cinnamon rolls on the center rack at 350 degrees for 20-25 minutes or until the rolls are a light golden brown. Be sure to check the middle rolls to ensure they’re fully baked. You can lightly tent the rolls with foil if they begin to become too brown. Remove the cinnamon rolls from the oven and let cool for 10 minutes before icing.
- Make the Cream Cheese Icing: Add the cream cheese, butter, and confectioner’s sugar to a mixing bowl. Use a hand mixer to mix the frosting until it is fluffy and the confectioners sugar is well incorporated without any lumps. Next, add in the orange juice and vanilla extract and mix on high again until well combined. Set aside.
Notes
To make overnight: Roll, cut, and place the cinnamon rolls in a parchment lined baking dish after they have finished their 1st rise. Then, cover the rolls tightly with plastic wrap and place in the fridge overnight. The next morning, remove the baking dish from the fridge and let the rolls finish their second rise in a warm area for about 45 minutes to 1 hour before baking.
Recipe by: Ashlea Carver / All the Healthy Things | Photography by: Eat Love Eats


